
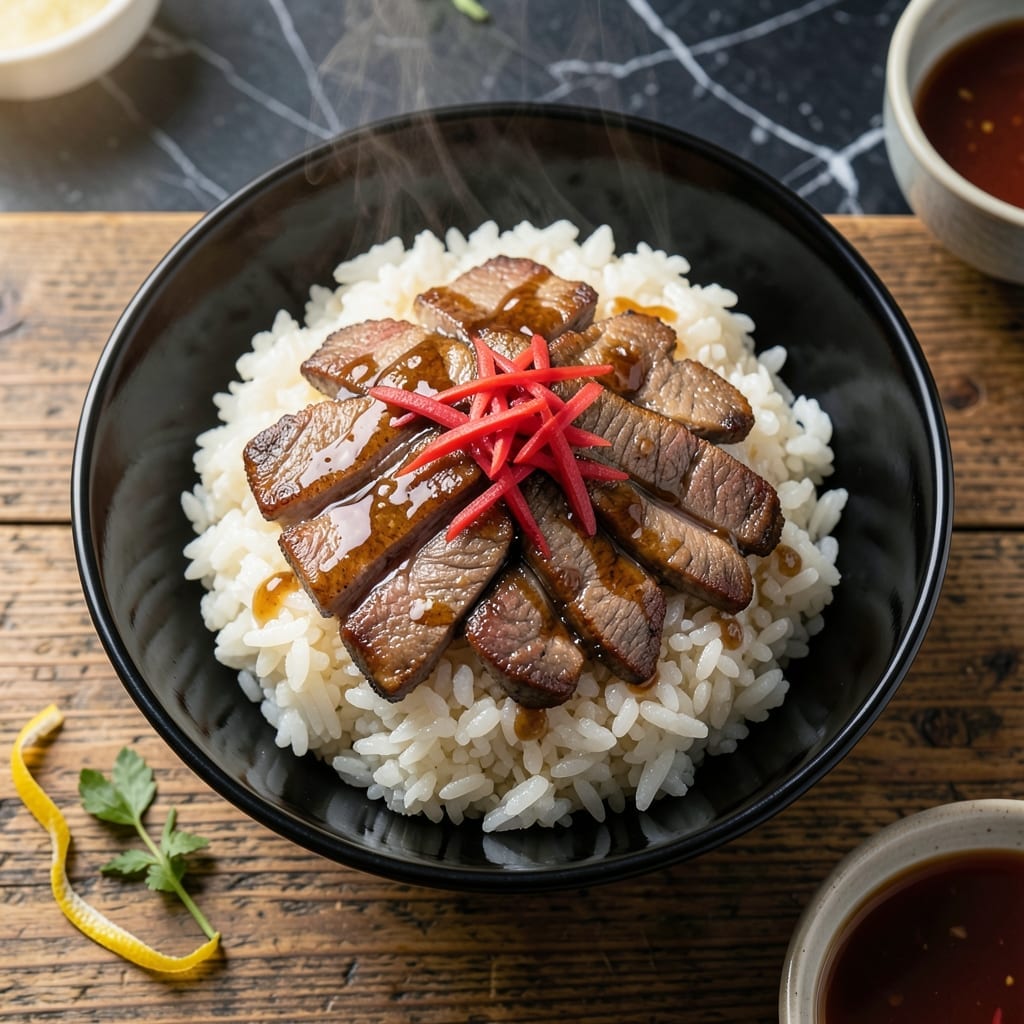
There’s something deeply satisfying about a well-made Japanese beef rice bowl, where tender meat meets fluffy steamed rice in perfect harmony. I’ve refined this recipe to capture the authentic flavors of a traditional gyudon without complicated techniques.
The secret lies in thinly sliced beef marinated briefly in a sweet-savory sauce, then quickly cooked to preserve its tenderness. This method ensures every bite delivers maximum flavor with minimal effort, making it ideal for weeknight dinners.
What you’ll achieve is melt-in-your-mouth beef with a glossy sauce soaking into each grain of rice, creating a comforting and balanced meal. The dish comes together in under 30 minutes, proving that authentic Japanese cuisine can be accessible.
Serve with pickled vegetables or a soft-boiled egg for a complete, restaurant-worthy experience at home.
Ingredients for Japanese Beef Rice Bowl
Classic pantry staples plus a few Japanese essentials create this comforting bowl.
| Ingredient | Amount | Notes |
|---|---|---|
| Thinly Sliced Beef 🥩 | 1 ½ lb | Ribeye or sirloin recommended |
| Short-Grain White Rice 🍚 | 2 cups | Rinsed until water runs clear |
| Soy Sauce 🫒 | ½ cup | Low-sodium preferred for balance |
| Mirin 🍶 | ¼ cup | Sweet rice wine essential |
| Brown Sugar 🧈 | 2 tbsp | Light or dark works fine |
| Sake 🍶 | 2 tbsp | Dry Japanese rice wine |
| Fresh Ginger 🌿 | 1 tbsp | Grated, no fibers |
| Garlic Cloves 🧄 | 3 cloves | Minced finely for even flavor |
| Green Onions 🧅 | 4 whole | Thinly sliced for garnish |
| Dashi Stock 💧 | ½ cup | Or substitute water in pinch |
| Sesame Oil 🫒 | 1 tsp | Toasted for aroma |
| Neutral Oil 🫒 | 1 tbsp | For cooking beef |
| Sesame Seeds 🌾 | 1 tsp | Toasted for garnish |
The beef is everything here. Ribeye or sirloin cut paper-thin (freeze 30 minutes first for easier slicing) gives that melt-in-your-mouth texture. Asian markets often sell pre-sliced beef for sukiyaki—perfect shortcut. For the rice, Koshihikari or Nishiki brands at Whole Foods or H-Mart are worth the splurge. Mirin and sake can be found in the international aisle of most supermarkets.
No mirin? Mix 2 tbsp sugar + 2 tbsp water + 1 tbsp rice vinegar as substitute. Sake can be swapped with dry white wine (or skip it—just add extra dashi). Brown sugar can be honey or maple syrup in a pinch, but it’ll change the flavor slightly. For gluten-free, use tamari instead of soy sauce. The green onions can be swapped with chives if that’s what you’ve got.
Cooked rice stays fresh for 3-4 days in the fridge, but the beef is best eaten same-day. The sauce components (soy, mirin, sake) keep for months unopened, 1 month opened. Freeze sliced beef in portions for up to 3 months—thaw in fridge overnight.
Why You’ll Love This Recipe
- One Pan Wonder: I throw the beef, soy, mirin, and sugar in a pan while the rice cooks—no extra pots, no fuss.
- Sweet-Savory Magic: The brown sugar caramelizes with the soy and mirin, making the beef so tender it melts.
- Weeknight Hero: It’s my go-to for busy evenings—ready before the kids finish their homework.
- Leftovers Win: Honestly, it tastes even better the next day. I pack it for lunch and my coworkers always ask for the recipe.
Step-by-Step Instructions for Japanese Beef Rice Bowl
This method delivers tender beef and perfectly seasoned rice with minimal effort.
Step 1: Prepare and Cook the Short-Grain White Rice
Rinse the 2 cups Short-Grain White Rice under cold water until the water runs clear. This removes excess starch and prevents a gummy texture. I use a fine-mesh strainer for this step.
Combine the rinsed rice with 0.5 cup Dashi Stock and enough water to reach the 2:1 liquid-to-rice ratio in your rice cooker or pot. Cook according to your appliance’s instructions until the liquid is absorbed and the grains are tender. Let it steam covered for 10 minutes off heat after cooking.
Step 2: Marinate the Thinly Sliced Beef
In a bowl, whisk together the 0.5 cup Soy Sauce, 0.25 cup Mirin, 2 tbsp Brown Sugar, 2 tbsp Sake, 1 tbsp Fresh Ginger, and 3 cloves minced Garlic Cloves until the sugar dissolves. This creates a balanced sweet-savory marinade.
Add the 1.5 lb Thinly Sliced Beef to the marinade, ensuring each slice is coated. Let it sit for 15-20 minutes while the rice cooks. Don’t marinate longer, as the soy sauce can start to break down the meat’s texture.
Step 3: Cook the Beef and Reduce the Sauce
Heat 1 tbsp Neutral Oil in a large skillet over medium-high heat. Remove the beef from the marinade (reserve the marinade) and sear in batches for 1-2 minutes per side until browned but still slightly pink inside. Avoid overcrowding the pan to ensure even cooking.
Pour the reserved marinade into the skillet and bring to a simmer. Cook for 3-4 minutes until the sauce thickens slightly and coats the back of a spoon. Stir in the 1 tsp Sesame Oil for added depth.
Step 4: Assemble the Beef Rice Bowls
Divide the cooked Short-Grain White Rice among four bowls. Arrange the seared Thinly Sliced Beef over the rice, then spoon the reduced sauce generously over the top.
Garnish with thinly sliced 4 whole Green Onions and sprinkle with 1 tsp Sesame Seeds. The green onions add a fresh crunch, while the sesame seeds provide a nutty finish.
Pro Tips For Making Japanese Beef Rice Bowl
- Sear Beef Quickly: Thinly sliced beef cooks in under 2 minutes—crank the heat to high and resist the urge to stir constantly, or it’ll stew instead of sear.
- Rinse the Rice: Short-grain rice needs a thorough rinse until the water runs clear, otherwise your bowl ends up gummy instead of sticky and separate.
- Skip the Overcrowding: I learned this the hard way—cook the beef in batches so it browns properly; dumping it all in at once just boils it in its own juices.
- Simmer the Sauce: After combining soy sauce, mirin, and brown sugar, let it bubble for 3-4 minutes until slightly thickened—this keeps it from turning your rice bowl into soup.
Dietary Considerations for This Recipe
Gluten-Free Adaptation
For a gluten-free version, swap the regular soy sauce for tamari—it delivers the same umami depth without wheat. I use San-J brand for consistent quality. Double-check that your mirin is gluten-free too, as some brands contain added wheat. 💪
Lower Sodium Option
To reduce sodium, use low-sodium soy sauce and cut the amount by 25%. Boost flavor with extra fresh ginger and garlic to compensate. I also add 1 tsp rice vinegar to brighten the dish without extra salt.
Dairy-Free by Nature
This recipe is naturally dairy-free, making it perfect for lactose-intolerant diners. The only potential concern is cross-contamination if you’re highly sensitive, so verify your mirin and sake are processed in dairy-free facilities.
Vegetarian Swap
Replace the beef with thinly sliced mushrooms like shiitake or cremini. Sauté them in the same marinade for 4-5 minutes until tender. The mushrooms absorb the sauce beautifully, creating a hearty plant-based version.
Low-Carb Adjustment
For a lower-carb take, serve the beef and sauce over cauliflower rice instead of white rice. Steam 4 cups riced cauliflower for 5 minutes until tender. You’ll save about 40g carbs per serving while keeping all the flavor. 🌱
Nut Allergy Note
This dish is nut-free, but be cautious with garnishes. Skip sesame seeds if allergic, and ensure your sesame oil is pure. Some brands blend with nut oils, so always read labels carefully.
Nutrition Facts
Frequently Asked Questions
Can I use a different type of beef?
Ribeye or sirloin work best for tenderness. For budget options, try flank steak, but slice it thinly against the grain and marinate for 20 minutes to prevent toughness.
Why is short-grain rice recommended?
Its sticky texture holds the sauce better and creates the authentic Japanese bowl experience. Long-grain rice stays separate and won’t absorb the flavors as well.
How do I prevent the beef from becoming tough?
Avoid overcooking. Sear over medium-high heat for just 1-2 minutes per side and slice thinly against the grain. The marinade also helps tenderize the meat.
Can I make this ahead of time?
Cook the rice and beef separately, then store in airtight containers in the fridge for up to 2 days. Reheat gently and assemble just before serving to maintain texture.

- Mujadara Rice and Lentils Recipe: Earthy Spiced Lentils With Caramelized Onions - November 1, 2026
- Naija Fried Rice Recipe: Street-Style Spice With Veggie Crunch - November 1, 2026
- Mushy Rice Recipe: Fluffy Grains Transformed in Minutes - November 1, 2026