
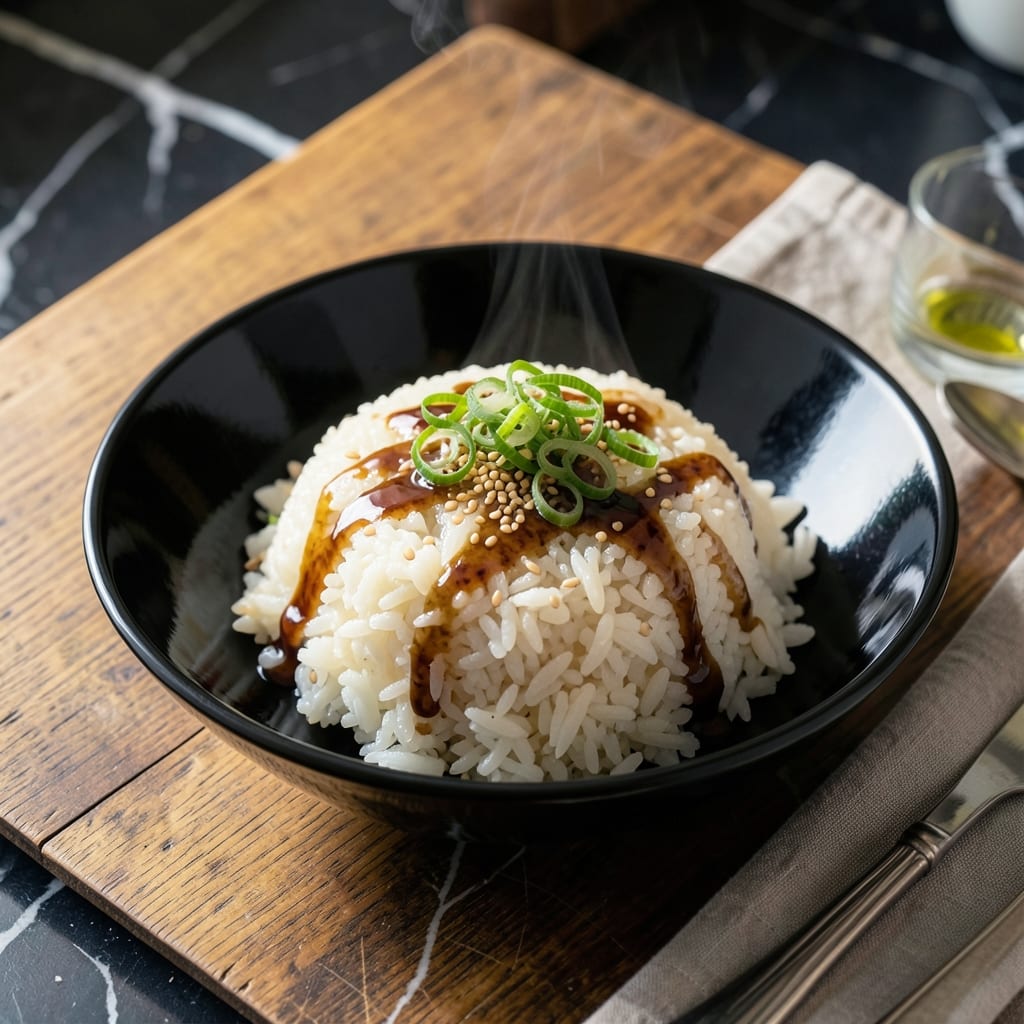
Achieving perfectly seasoned Japanese rice at home is simpler than you think. This method delivers sticky, glossy grains with deep umami flavor every time.
I rely on a precise ratio of rice to water and a few traditional ingredients to create that signature taste. The technique ensures each grain stays separate yet clings together beautifully.
The secret lies in the seasoning blend and cooking method. A short rest after cooking allows the rice to absorb all the flavors fully.
You’ll end up with umami-packed rice that pairs perfectly with any Japanese dish. This is the foundation of an authentic meal.
Ingredients for Japanese Flavoured Rice
Traditional ingredients deliver authentic sticky rice with deep umami character and glossy finish.
| Ingredient | Amount | Notes |
|---|---|---|
| Japanese Short-Grain Rice 🍚 | 2 cups | Rinsed until water runs clear |
| Water 💧 | 2 ½ cups | Filtered preferred for best texture |
| Rice Vinegar 🍶 | 2 tbsp | Seasoned variety preferred |
| Granulated Sugar 🍚 | 1 tbsp | Dissolves evenly in vinegar blend |
| Kosher Salt 🧂 | 1 tsp | Diamond Crystal preferred for consistency |
| Soy Sauce 🫒 | 1 tbsp | Low-sodium for controlled seasoning |
| Mirin 🍶 | 1 tbsp | Sweet rice wine essential for umami |
| Dashi Powder 🐟 | 1 tsp | Instant bonito-based for depth |
| Sesame Oil 🫒 | 1 tsp | Toasted variety for aroma |
| Nori Sheets 🌿 | 1 sheet | Cut into strips for garnish |
| Green Onions 🧅 | 2 whole | Thinly sliced for fresh finish |
| Sesame Seeds 🌾 | 1 tbsp | Toasted for nutty flavor |
The rice quality is paramount. Koshihikari or Nishiki short-grain varieties from Asian markets yield the best texture—avoid long-grain as it lacks stickiness. Dashi powder can be found in the Japanese section of Whole Foods or H Mart. For mirin, avoid aji-mirin (contains salt) and opt for hon-mirin if available (the premium choice, but pricier). Rinse the rice thoroughly—this removes excess starch for that perfect separate-yet-sticky texture.
No rice vinegar? Apple cider vinegar at half the amount works in a pinch but lacks the subtle sweetness. For dashi powder, vegetarian dashi (kombu-based) maintains umami without fish. Low-sodium soy sauce can be replaced with tamari for gluten-free needs. If nori sheets are unavailable, furikake seasoning adds similar oceanic notes. The sesame oil should be toasted—light sesame oil won’t deliver the same depth of flavor.
Store uncooked rice in an airtight container in a cool, dark place for up to 1 year. Once cooked, rice keeps 3-4 days refrigerated or 1 month frozen. Dashi powder and mirin last 6-12 months unopened. Toast sesame seeds just before use for maximum aroma and crunch.
Why You’ll Love This Recipe
- One Pot Wonder: I just dump everything in the rice cooker and walk away—no stirring, no stress.
- Sweet-Tangy Bite: The rice vinegar and sugar give it that signature sushi-rice flavor I crave.
- Pairs With Everything: Honestly, it’s my base for bentos, sushi rolls, or even a quick fried rice the next day.
- Budget Stretch: A pound of short-grain rice and pantry staples feed my family for days.
Step-by-Step Instructions for Japanese Flavoured Rice
Master the technique for consistently perfect sticky rice with layered umami depth and satisfying texture.
Step 1: Rinse and Soak the Japanese Short-Grain Rice
Place the 2 cups Japanese Short-Grain Rice in a fine-mesh strainer and rinse under cold water until the water runs completely clear. This removes excess starch, which prevents gummy rice and ensures individual grains that stick together just right.
Once rinsed, transfer the rice to your rice cooker pot or heavy-bottomed saucepan. Add the 2.5 cups Water and let it soak for 20-30 minutes. Soaking hydrates the grains evenly, which guarantees uniform cooking and that characteristic sticky texture.
Step 2: Cook the Rice to Perfect Tenderness
Cook the soaked rice using your preferred method. In a rice cooker, select the standard white rice setting. On the stovetop, bring to a boil over high heat, then immediately reduce to low, cover, and simmer for 15 minutes.
After cooking, let it rest covered for 10 minutes—this final steam period is crucial. You’ll know it’s done when the grains are plump, tender, and slightly translucent at the edges. The surface should be dotted with steam holes, not wet or undercooked at the bottom.
Step 3: Prepare the Seasoning Blend
While the rice cooks, combine the 2 tbsp Rice Vinegar, 1 tbsp Granulated Sugar, and 1 tsp Kosher Salt in a small saucepan. Warm over low heat for 2-3 minutes, stirring until the sugar and salt dissolve completely—the mixture should be clear, not grainy.
Remove from heat and stir in the 1 tbsp Soy Sauce, 1 tbsp Mirin, 1 tsp Dashi Powder, and 1 tsp Sesame Oil. This blend creates a balanced sweet-savory profile with deep umami from the dashi and mirin. Let it cool slightly before using.
Step 4: Fold Seasoning into Rice and Finish
Transfer the cooked rice to a large, shallow bowl. Drizzle the seasoning mixture evenly over the hot rice. Using a rice paddle or silicone spatula, gently fold the seasoning into the rice with a cutting motion—this distributes the flavor without mashing the grains.
Continue folding for 1-2 minutes until every grain glistens with seasoning and the rice has cooled slightly. The rice should be sticky but not mushy, with visible sheen from the vinegar blend. Taste and adjust seasoning if needed, though the initial blend should be perfectly balanced.
Finally, sprinkle the 1 tbsp Sesame Seeds over the top and fold once more to incorporate. The seeds add a subtle nutty crunch that contrasts beautifully with the soft rice.
Step 5: Garnish and Serve
Cut the 1 sheet Nori Sheets into thin strips using kitchen shears. Thinly slice the 2 whole Green Onions on a diagonal for elegant presentation. These garnishes add freshness and visual appeal that elevates the dish.
Sprinkle the nori strips and green onions over the rice just before serving. The nori softens slightly from the residual heat, while the green onions retain their crisp bite. Serve warm in bowls, where the rice holds its shape briefly before melting together on the tongue.
Pro Tips For Making Japanese Flavoured Rice
- Rinse the Rice: Wash the short-grain rice under cold water until the water runs clear—this removes excess starch and guarantees fluffy, separate grains instead of a gummy mess.
- Heat the Vinegar: Warm the rice vinegar slightly before mixing it with sugar and salt so the sugar dissolves completely and evenly coats the rice.
- Rest Before Serving: Let the rice sit covered for 10 minutes after cooking to steam and absorb the seasoning—this step makes the flavors meld properly.
- Use the Right Ratio: Stick to a 1:1.1 rice-to-water ratio (e.g., 1 cup rice to 1.1 cups water) for perfect texture; Japanese short-grain rice needs less water than you might expect.
Storing and Reheating This Recipe
Refrigerator Storage
Let your rice cool completely before transferring to an airtight container. It will keep in the fridge at 40°F or below for up to 4 days. The flavors actually deepen as it rests. ❄️
Freezer Storage
For longer storage, portion into freezer-safe bags or containers. Squeeze out excess air to prevent freezer burn. Your rice will maintain quality for up to 1 month at 0°F or below.
Stovetop Reheating
Add 1-2 tbsp water to a nonstick pan over low heat. Add rice and cover for 5-7 minutes, stirring occasionally. This restores moisture and stickiness perfectly. 🔥
Microwave Method
Place rice in a microwave-safe dish with 1 tbsp water and a damp paper towel. Heat on 50% power for 1-2 minutes, fluffing halfway through.
Garnish After Reheating
Always add fresh nori strips and green onions after reheating. This preserves their texture and vibrant color. The sesame seeds may need a quick toast if stored separately.
Nutrition Facts
Frequently Asked Questions
What rice works best?
Use short-grain varieties like Koshihikari or Nishiki. Their high starch content creates the perfect sticky texture that holds together beautifully.
Can I make this without a rice cooker?
Use a heavy pot with a tight lid. Bring to a boil, then reduce to low heat for 15 minutes, followed by a 10-minute rest off heat.
Why rinse the rice?
Rinsing removes excess starch that would make the rice gummy. Stop when the water runs clear—this ensures separate grains that cling together just right.
How do I fix bland seasoning?
Add an extra 1 tsp soy sauce or 1/2 tsp dashi powder to the blend. Taste as you fold it in to avoid over-seasoning.

- Mujadara Rice and Lentils Recipe: Earthy Spiced Lentils With Caramelized Onions - November 1, 2026
- Naija Fried Rice Recipe: Street-Style Spice With Veggie Crunch - November 1, 2026
- Mushy Rice Recipe: Fluffy Grains Transformed in Minutes - November 1, 2026