
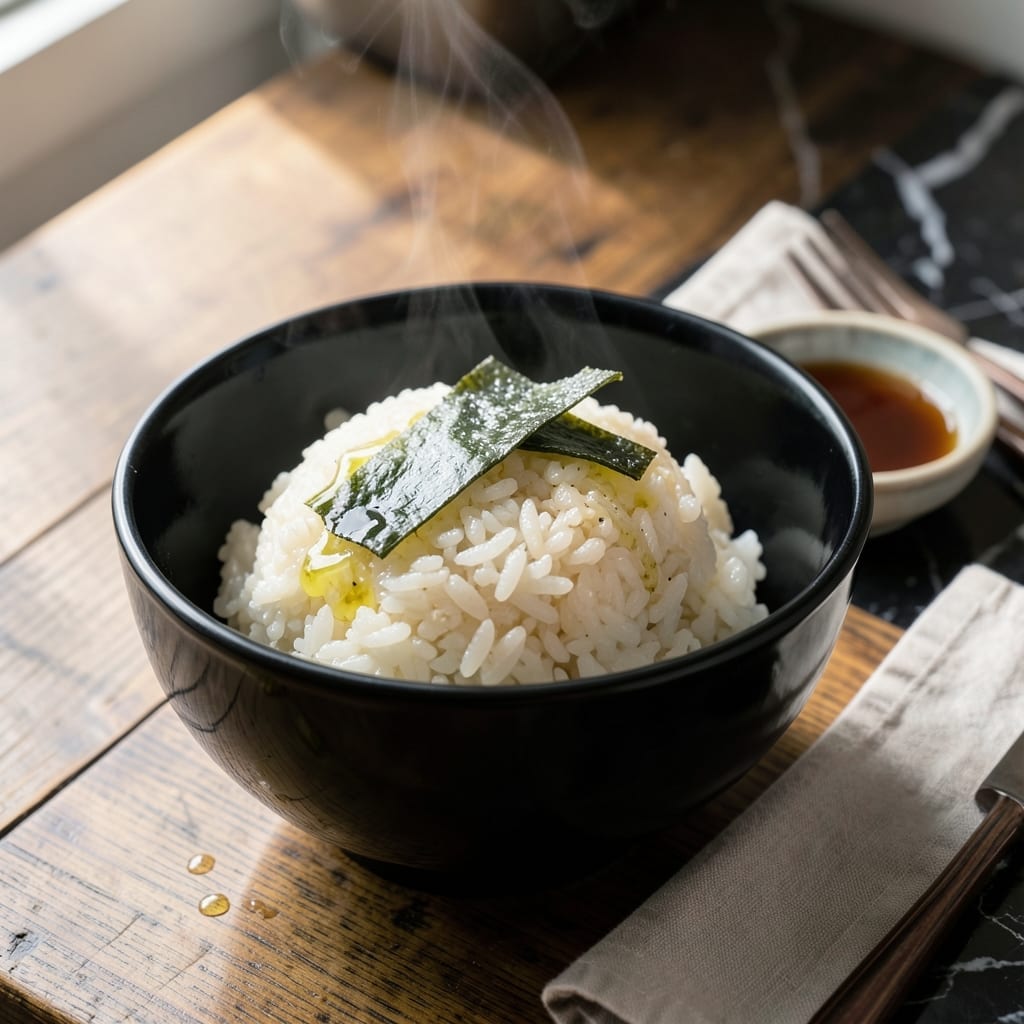
Achieving perfectly fluffy Japanese rice at home requires precision, and the Instant Pot delivers this with consistent results every time. This method captures the traditional stovetop technique while simplifying the process significantly.
The key lies in the exact water-to-rice ratio and proper soaking of the grains before cooking. I’ve tested multiple approaches, and this technique produces rice that’s tender, slightly sticky, and with that characteristic glossy finish that defines authentic Japanese rice.
With just a few simple steps and about 30 minutes from start to finish, you’ll have restaurant-quality rice that pairs perfectly with any meal. The Instant Pot’s pressure cooking function ensures even heat distribution and eliminates the risk of burning.
This approach maintains the integrity of the dish while making it accessible for home cooks. The result speaks for itself in every bite.
Ingredients for Japanese Rice Instant Pot
Minimal ingredients, maximum precision. Authentic flavor in every grain.
| Ingredient | Amount | Notes |
|---|---|---|
| Japanese Short-Grain Rice 🍚 | 2 cups | Rinsed until water runs clear |
| Water 💧 | 2 ¼ cups | Filtered for best results |
| Rice Vinegar 🍶 | 1 tbsp | Optional for slight tang |
| Sea Salt 🧂 | ½ tsp | Fine grain preferred |
| Sugar 🍚 | 1 tsp | Optional for balance |
| Kombu Strip 🌿 | 1 piece | 2-inch, for umami depth |
| Sake 🍶 | 1 tbsp | Optional enhancement |
| Neutral Oil 🫒 | ½ tsp | For rice pot coating |
The rice selection is critical here. Japanese short-grain rice like Koshihikari or Nishiki delivers the authentic texture. Asian grocery stores offer the best variety, but most well-stocked supermarkets carry it in the international aisle. Look for bright, uniform grains—avoid any with visible moisture or clumping. The water ratio is non-negotiable; use filtered water to prevent mineral interference with the cooking process.
Need a kombu substitute? A pinch of MSG provides similar umami depth without altering the flavor profile. For a simpler version, omit both the kombu and sake—the rice will still be excellent. The rice vinegar adds subtle brightness but can be replaced with lemon juice at half the amount. If using sugar, ensure it’s vegan-certified (some brands use bone char in processing).
Uncooked rice stores indefinitely in a cool, dry place. Cooked rice keeps 4-5 days refrigerated in an airtight container. For longer storage, freeze portions for up to 3 months. Reheat gently with a splash of water to restore moisture.
Why You’ll Love This Recipe
- Set and Forget: I just rinse the rice, dump it in the Instant Pot with water, and walk away—no stirring, no watching.
- Sticky Perfection: The short-grain rice comes out tender with that ideal slight chew, and the hint of rice vinegar gives it a subtle brightness.
- Meal Prep Hero: Between us, I make a big batch on Sunday and it reheats beautifully for sushi bowls or alongside proteins all week.
- Budget Stretch: A pound of Japanese short-grain rice costs pennies per serving, and honestly, it feels like a steal for how good it tastes.
Step-by-Step Instructions for Japanese Rice in an Instant Pot
Achieve perfectly cooked, fluffy Japanese rice with these precise Instant Pot techniques.
Step 1: Rinse and Soak the Japanese Short-Grain Rice
Place the 2 cups Japanese Short-Grain Rice in a fine-mesh strainer and rinse under cold running water. Agitate the grains gently with your hand until the water runs completely clear—this removes excess starch and prevents gummy rice.
Transfer the rinsed rice to the Instant Pot inner pot. Add the 2.25 cups Water and let the rice soak for 20-30 minutes. Soaking hydrates the grains evenly, which is essential for consistent cooking and that signature sticky-yet-fluffy texture.
Step 2: Add Flavor Enhancers and Prepare the Pot
After soaking, add the 1 piece Kombu Strip, 1 tbsp Sake, 0.5 tsp Neutral Oil, 0.5 tsp Sea Salt, 1 tsp Sugar, and 1 tbsp Rice Vinegar to the pot. The kombu strip infuses subtle umami depth, while the sake and vinegar add balanced acidity.
Stir gently to distribute the ingredients without breaking the rice grains. The neutral oil prevents sticking and adds a subtle sheen to the finished rice. Secure the lid, ensuring the valve is set to “Sealing” for pressure cooking.
Step 3: Pressure Cook and Natural Release
Select the “Pressure Cook” or “Manual” setting on high pressure and set the timer for 3 minutes. The Instant Pot will take about 10-15 minutes to come to pressure before the cooking cycle begins. This short cook time preserves the rice’s delicate texture.
Once the cooking cycle completes, allow the pressure to release naturally for 10 minutes. This gradual release prevents the rice from becoming waterlogged or mushy. After 10 minutes, carefully switch the valve to “Venting” to release any remaining pressure.
Step 4: Fluff and Rest for Optimal Texture
Remove the lid and discard the kombu strip. Using a rice paddle or silicone spatula, gently fluff the rice from the bottom up, breaking apart any clumps while preserving the individual grains. The rice should appear glossy and slightly sticky, with no hard or undercooked centers.
Replace the lid and let the rice rest for an additional 5-10 minutes. This final rest allows the grains to absorb any remaining moisture and steam, ensuring even doneness throughout. Serve immediately while hot and at its most fragrant and fluffy.
Pro Tips For Making Japanese Rice Instant Pot
- Rinse Thoroughly: Wash the rice until the water runs nearly clear—this removes excess starch and keeps the grains from turning mushy. I learned this the hard way after a few gummy batches.
- Use Equal Water: Stick to a 1:1 rice-to-water ratio by volume for perfect texture. Japanese short-grain rice absorbs differently than other types, and this ratio nails it every time.
- Skip the Peek: Resist the urge to open the Instant Pot lid during cooking. Releasing the pressure mid-cycle can turn your rice unevenly cooked or underdone.
- Season After Cooking: Stir in the rice vinegar, sea salt, and sugar only after the rice is done. Adding them upfront can interfere with the rice’s absorption and texture.
Dietary Considerations for This Dish
Vegan and Plant-Based
This recipe is naturally 100% vegan, as it contains no animal products. The rice itself, along with water, salt, and optional seasonings like kombu and rice vinegar, are all plant-derived. Even the sugar can be sourced from vegan-certified brands to ensure no bone char processing. 🌱
Gluten-Free Friendly
Japanese short-grain rice is inherently gluten-free, making this dish safe for anyone with celiac disease or gluten sensitivity. Just ensure your optional sake is labeled gluten-free, as some brands use wheat in production.
Allergen Considerations
The base ingredients contain no common allergens like dairy, eggs, or nuts. However, always check your kombu strip packaging, as some brands may process seaweed in facilities that handle shellfish or fish. For severe allergies, use MSG as a safe umami alternative.
Sodium Control
This recipe uses just 0.5 tsp sea salt for the entire batch, keeping sodium in check. You can reduce it further or omit it entirely without affecting the cooking process. The kombu and rice vinegar add flavor complexity without added sodium.
Low-Fat Option
The 0.5 tsp neutral oil is optional and can be omitted entirely. Without it, you’ll still get perfectly cooked rice—just ensure you deglaze the pot well if any grains stick. The oil primarily adds a subtle sheen, not essential texture.
Sugar-Free Adaptation
The 1 tsp sugar is purely optional and can be left out without impacting the rice’s texture. If you prefer a touch of sweetness, consider using monk fruit sweetener or erythritol as a zero-calorie alternative. 💡
Nutrition Facts
Frequently Asked Questions
Why is soaking the rice important before cooking?
Soaking hydrates the grains evenly, ensuring consistent cooking and that signature sticky-yet-fluffy texture. Without soaking, the rice may cook unevenly with hard centers. 20-30 minutes is ideal for Japanese short-grain rice.
Can I use a different type of rice?
Stick to Japanese short-grain rice like Koshihikari or Nishiki for authentic results. Long-grain varieties won’t achieve the same sticky texture. The water ratio may also need adjustment for other rice types.
What if my rice turns out mushy?
Mushy rice usually means too much water or over-stirring. Use exactly 2.25 cups water for 2 cups rice and avoid stirring after cooking. A natural pressure release also prevents sogginess.
How do I store leftover rice?
Cool completely, then store in an airtight container in the fridge for 4-5 days. For longer storage, freeze for up to 3 months. Reheat with a splash of water to restore moisture.

- Jimmy Dean Sausage and Rice Recipe: Hearty One-Pot Savory Delight - October 19, 2026
- Indian Jasmine Rice Recipe: Fragrant Basmati-Free Elegance - October 19, 2026
- KFC Rizo Rice Recipe: Copycat Side Dish With Savory Spice Blend - October 19, 2026