
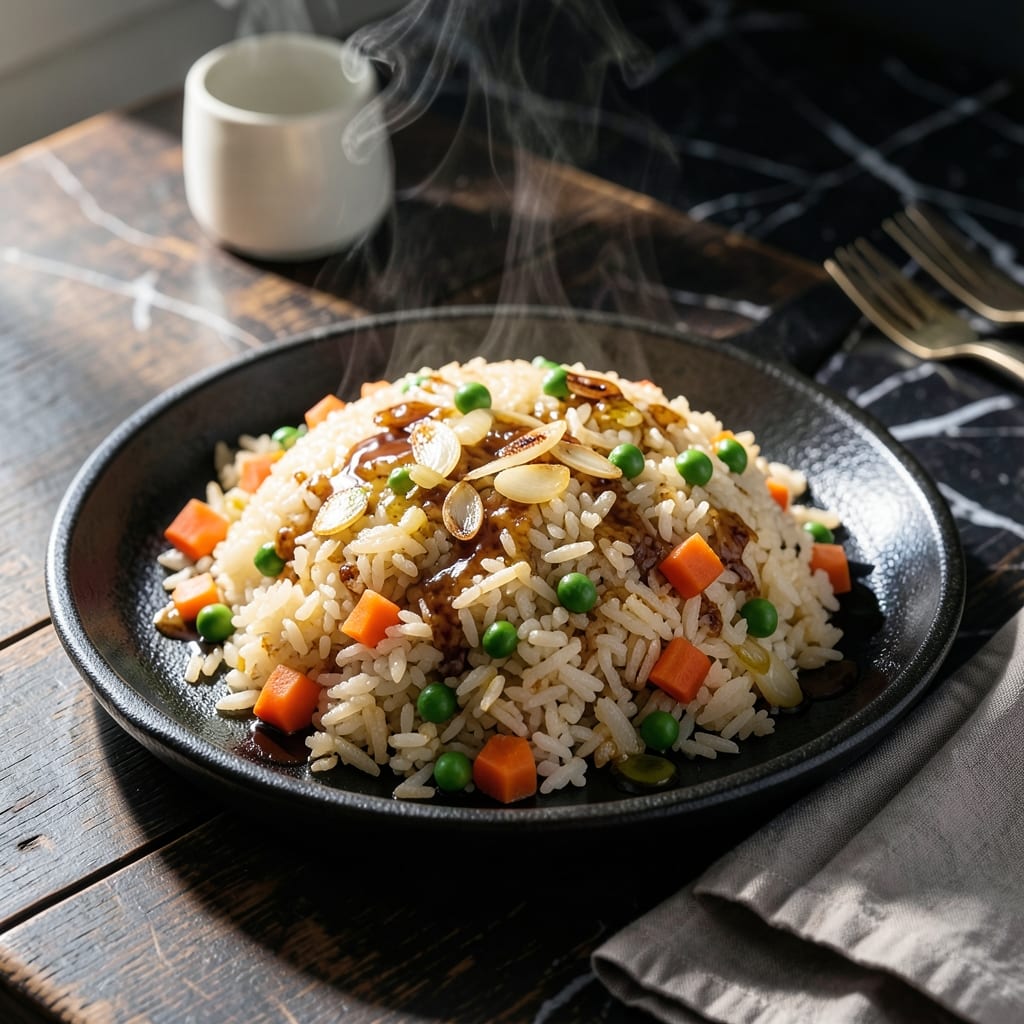
This hibachi-style fried rice captures the essence of Japanese teppanyaki cooking with its savory flavors and perfectly charred bits.
I’ve refined this method to use simple ingredients and a high-heat technique that mimics the teppan grill experience at home. The key is cooking the rice in small batches to achieve that signature smoky depth.
You’ll love how the soy sauce, butter, and garlic blend with tender rice and vegetables for a dish that’s both hearty and balanced. Every bite delivers that authentic hibachi taste.
Ready in 20 minutes, this recipe brings the restaurant experience to your kitchen with minimal effort and maximum flavor.
Ingredients for Japanese Teppanyaki Fried Rice
Cold rice, fresh vegetables, and bold seasonings create the perfect hibachi-style foundation.
| Ingredient | Amount | Notes |
|---|---|---|
| Day-Old Cooked White Rice 🍚 | 4 cups | Cold, preferably overnight |
| Unsalted Butter 🧈 | 3 tbsp | Divided for cooking |
| Soy Sauce 🫙 | 3 tbsp | Low-sodium preferred |
| Garlic Cloves 🧄 | 3 cloves | Minced finely |
| Small Onion 🧅 | 1 whole | Finely diced |
| Carrots 🥕 | 2 whole | Medium, diced small |
| Green Onions 🧅 | 3 whole | Thinly sliced, white and green parts separated |
| Frozen Peas 🌱 | ½ cup | Thawed under running water |
| Large Eggs 🥚 | 2 whole | Lightly beaten |
| Sesame Oil 🫒 | 1 tsp | Toasted variety for depth |
| Salt 🧂 | ½ tsp | Or to taste |
| Black Pepper 🌶️ | ¼ tsp | Freshly ground |
| Cooking Oil 🫒 | 2 tbsp | Neutral high-smoke point |
The rice is critical here—day-old, cold rice from the fridge prevents mushiness and achieves that signature teppanyaki texture. Jasmine or short-grain white rice works best for authenticity. For the soy sauce, Kikkoman low-sodium is a reliable choice, but any Japanese brand will deliver depth. The butter should be European-style (higher fat content) for richer flavor, available at Whole Foods or most supermarkets.
No green onions? Shallots or chives can substitute in a pinch. Fresh out of peas? Diced bell peppers or corn add color and sweetness. For a gluten-free version, tamari instead of soy sauce works perfectly. The sesame oil is non-negotiable for that nutty aroma—Kadoya brand is a professional favorite. Skip the pre-diced mirepoix; fresh cuts char better under high heat.
Cooked rice keeps in the fridge for 3-4 days—make extra for this dish. Store fresh ginger and garlic in the freezer for up to 3 months. The cooked fried rice reheats beautifully in a skillet with a splash of water to revive the texture. Always use within 4 days for best quality.
Why You’ll Love This Recipe
- One Pan Wonder: I love that everything cooks in a single pan—rice, garlic, onion, and that buttery soy sauce magic.
- Umami Bomb: The combo of soy sauce, garlic, and that crispy rice edge is ridiculously good.
- Weeknight Hero: Between us, this is my go-to when I need dinner fast and flavors bold.
- Leftover Savior: Day-old rice works best, so it’s my secret way to use up what’s in the fridge.
Step-by-Step Instructions for Japanese Teppanyaki Fried Rice
Master the technique for authentic hibachi-style fried rice with these precise, professional steps.
Step 1: Prepare and Sauté the Aromatics
Heat 2 tbsp cooking oil in a large wok or skillet over medium-high heat until shimmering. Add the finely diced small onion, diced small carrots, and thawed frozen peas, then stir-fry for 3-4 minutes until the vegetables soften and the onion becomes translucent.
Add the minced garlic cloves and cook for an additional 30 seconds until fragrant. Be careful not to let the garlic burn—it should turn light golden but not dark brown. This base layer of aromatics forms the flavor foundation for your dish.
Step 2: Scramble the Eggs and Incorporate the Rice
Push the vegetables to one side of the pan and add 1 tbsp unsalted butter. When it melts, pour in the lightly beaten large eggs and scramble quickly with a spatula until just set but still slightly runny. This ensures soft, custardy egg bits throughout the rice.
Immediately add all 4 cups day-old cooked white rice, breaking up any clumps with your spatula. The cold rice is critical—it fries up fluffy and separate rather than mushy. Stir-fry for 2-3 minutes until the rice is heated through and begins to crisp slightly in spots.
Step 3: Season and Finish with Signature Flavors
Drizzle the 3 tbsp soy sauce evenly over the rice mixture, then add the 1 tsp sesame oil, 0.5 tsp salt, and 0.25 tsp black pepper. Toss everything together vigorously for 1-2 minutes until the rice is uniformly coated and the color deepens to a rich caramel hue.
Remove from heat and stir in the remaining 2 tbsp unsalted butter for a luxurious finish. This final enrichment adds a velvety sheen and rounds out the flavors beautifully.
Step 4: Garnish and Serve Immediately
Transfer the fried rice to a serving platter and top with the thinly sliced green onions, using both white and green parts for color contrast. The residual heat will slightly wilt the green onions, mellowing their bite while keeping their vibrant appearance.
Serve at once while steaming hot. The ideal texture features distinct grains of rice, tender-crisp vegetables, and ribbons of egg throughout, with a glossy sheen from the soy-butter emulsion. This dish doesn’t hold well, so plan to enjoy it fresh from the pan.
Pro Tips For Making Japanese Teppanyaki Fried Rice
- Chill the Rice: Use truly cold, day-old rice straight from the fridge—fresh rice turns mushy. I learned this the hard way after my first batch came out like porridge.
- Hot Pan First: Crank the heat to high before adding butter and rice. After burning three batches, I finally figured out that teppanyaki needs that sizzle to get the right texture.
- Dice the Onion Fine: Small, even pieces of onion cook faster and distribute better in the rice. Sounds obvious, but I used to rush this and end up with crunchy bits in every bite.
- Salt the Butter: Since you’re using unsalted butter, add a pinch of salt to it as it melts—more control than trying to season the rice after. My grandmother swore by this, and she was right.
Regional Styles of japanese teppanyaki fried rice
Tokyo Teppanyaki Style
In Tokyo, teppanyaki chefs use short-grain rice for its sticky texture that holds up to high heat. They often add beni shoga (red pickled ginger) for a tangy contrast. The rice gets pressed into small mounds to create crispy edges, then flipped with a metal spatula for that signature char. 🗼
Osaka Variation
Osaka’s version leans sweeter, with 1 tbsp mirin added to the soy sauce blend. They include diced lotus root for crunch and sometimes shrimp for a seafood twist. The technique involves continuous stirring to prevent sticking, using sesame oil as the primary cooking fat.
Hokkaido Approach
Northern Japan’s colder climate influences this style with hearty root vegetables like diced potatoes and parsnips. They use miso paste mixed into the soy sauce for deeper umami. The rice is often cooked with dashi stock for added complexity.
Kyoto Tradition
Kyoto’s refined cuisine shows in their teppanyaki rice, using matcha powder for color and earthy notes. They prefer koshihikari rice and add edible gold leaf for special occasions. The cooking surface is seasoned with camellia oil for a delicate aroma.
Yakitori-Inspired
Some regions combine techniques with yakitori, adding chicken thigh pieces marinated in tare sauce. The rice absorbs the smoky grill flavors, and they finish with yuzu zest for brightness. This fusion style is popular at izakayas.
Nutrition Facts
Frequently Asked Questions
Why use day-old rice for this dish?
Day-old rice is drier and firmer, which prevents mushiness when stir-fried. Freshly cooked rice retains too much moisture, making your fried rice soggy instead of fluffy.
Can I add protein to this recipe?
Try diced chicken, shrimp, or beef. Cook the protein first in 1 tbsp oil over medium-high heat until browned, then set aside and add back at the end.
What if my rice turns out mushy?
This usually happens with fresh rice or overcrowding the pan. Use cold rice in batches, and keep the heat at medium-high to maintain texture. Spread rice in a single layer for best results.

- Indian Jasmine Rice Recipe: Fragrant Basmati-Free Elegance - October 19, 2026
- KFC Rizo Rice Recipe: Copycat Side Dish With Savory Spice Blend - October 19, 2026
- Jeerakasala Rice Recipe: Fragrant Cumin-Infused Kerala Delight - October 19, 2026