
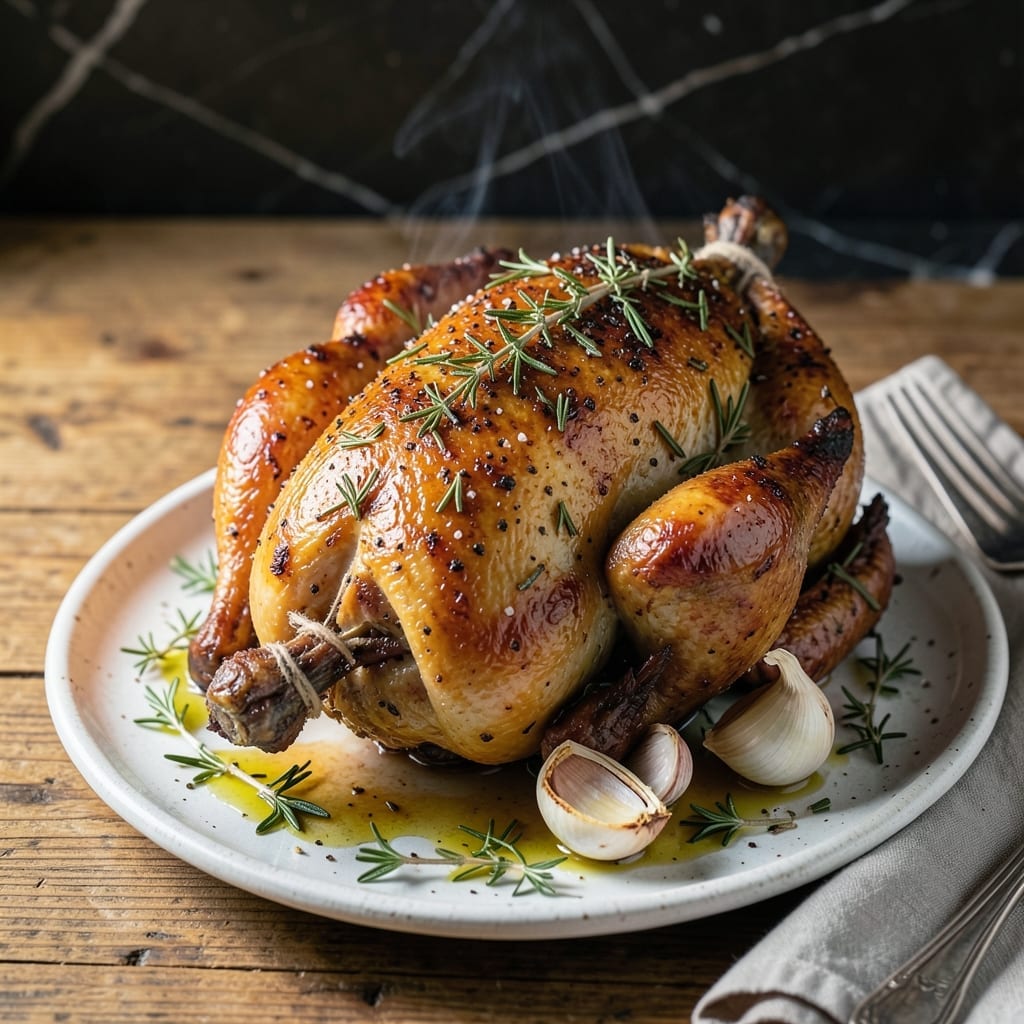
This roasted chicken recipe delivers a classic Jewish kitchen staple with golden crisp skin and tender, flavorful meat. The secret lies in a simple yet effective technique that’s been passed down through generations.
I’ve perfected this method to ensure every bite is infused with the rich aroma of garlic and fresh herbs. The chicken roasts evenly, creating a juicy interior while the skin achieves that coveted crunch.
The process is straightforward, requiring just a few pantry staples and minimal prep. Yet, the result is a dish that feels special enough for Shabbat or any family gathering.
Serve it with roasted potatoes or a simple salad for a meal that’s both comforting and deeply satisfying. Here’s how to make it.
Ingredients for Jewish Roasted Chicken
Classic Jewish kitchen staple with golden crisp skin and tender, flavorful meat.
| Ingredient | Amount | Notes |
|---|---|---|
| Whole Chicken 🍗 | 1 whole | 3-4 lb, patted dry inside and out |
| Kosher Salt 🧂 | 1 ½ tbsp | Diamond Crystal preferred for even seasoning |
| Black Pepper 🌶️ | 1 tsp | Freshly ground for best flavor |
| Garlic Cloves 🧄 | 8 cloves | Minced or smashed for robust flavor |
| Fresh Rosemary 🌿 | 2 tbsp | Chopped, stems removed |
| Fresh Thyme 🍃 | 2 tbsp | Chopped, leaves only |
| Extra-Virgin Olive Oil 🫒 | ¼ cup | High quality for crisp skin |
| Lemon 🍋 | 1 whole | Halved, for cavity and basting |
| Yellow Onion 🧅 | 1 whole | Quartered, for cavity aromatics |
| Carrots 🥕 | 3 whole | Peeled, cut into chunks for roasting |
| Celery Stalks 🌿 | 3 pieces | Cut into chunks for roasting |
| Chicken Broth 🍲 | ½ cup | Low-sodium preferred for basting |
The chicken is the star here. Kosher or organic free-range yields the best texture and flavor. Most butchers can provide a whole bird—3-4 lb is ideal for even cooking. Look for plump, pale pink flesh without bruising. I source mine from Whole Foods or local kosher markets for consistent quality. Pat it completely dry before seasoning (this ensures that coveted crunch).
No fresh herbs? Dried at one-third the amount works in a pinch, though fresh is ideal for aroma. Short on garlic? Garlic powder at half the quantity can substitute. For the broth, homemade or low-sodium store-bought prevents over-salting. If you’re missing carrots or celery, potatoes or parsnips roast just as well alongside the bird.
Leftovers keep beautifully. Store in an airtight container for up to 4 days in the fridge, or freeze for 3 months. The meat makes excellent sandwiches or can be shredded for soups. Always bring to room temperature before reheating to maintain juiciness.
Why You’ll Love This Recipe
- One Pan Wonder: I just rub the chicken with kosher salt, pepper, crushed garlic, and rosemary, then let the oven do the work.
- Sunday Dinner Magic: The garlic cloves roast into sweet, spreadable bites while the rosemary perfumes every bite.
- Feeds My Crew: One whole chicken serves my family of four with leftovers for sandwiches the next day.
- Budget Hero: A whole chicken costs less than pre-cut pieces, and the leftovers stretch into soups or tacos.
Step-by-Step Instructions for Jewish Roasted Chicken
Here’s the method I rely on for perfectly crisp skin and juicy meat every time.
Step 1: Season and Prepare the Chicken
Pat the whole chicken completely dry inside and out with paper towels. This is non-negotiable—moisture prevents crispy skin. Season the cavity and exterior generously with the 1.5 tbsp Kosher Salt and 1 tsp Black Pepper.
Rub the seasoning into every crevice, including under the wings and thighs. Stuff the cavity with the 1 whole Yellow Onion, 1 whole Lemon (halved), 8 cloves Garlic Cloves, 2 tbsp Fresh Rosemary, and 2 tbsp Fresh Thyme. This infuses the meat with aromatic flavor as it roasts.
Step 2: Truss and Prep the Roasting Pan
Tie the legs together with kitchen twine and tuck the wing tips under the body. This compact shape ensures even cooking and prevents the breast from drying out. Place the chicken breast-side up on a roasting rack set over a rimmed baking sheet.
Arrange the 3 whole Carrots and 3 pieces Celery Stalks around the chicken—they’ll soak up the drippings and add sweetness to the pan juices. Drizzle 0.25 cup Extra-Virgin Olive Oil over the chicken and vegetables, ensuring the skin is thoroughly coated.
Step 3: Roast at High Heat
Preheat your oven to 425°F. Roast the chicken for 1 hour to 1 hour 15 minutes, depending on size. The skin should turn a deep golden brown, and the juices should run clear when you pierce the thickest part of the thigh.
Baste the chicken with the 0.5 cup Chicken Broth every 20-25 minutes to keep the skin moist and promote even browning. If the skin darkens too quickly, tent loosely with foil.
Step 4: Rest and Carve
Transfer the chicken to a cutting board and let it rest for 15-20 minutes before carving. This allows the juices to redistribute, ensuring every bite is moist and flavorful. Tent it loosely with foil to keep it warm.
Carve the chicken into pieces, discarding the twine. Serve with the roasted carrots, celery, and pan juices spooned over the top. The skin should be shatteringly crisp, while the meat remains tender and juicy.
Pro Tips For Making Jewish Roasted Chicken
- Dry the Chicken: Pat the whole chicken thoroughly dry with paper towels before seasoning—this ensures the skin crisps up properly in the oven.
- Season Generously: Use more kosher salt than you think you need, especially under the skin and inside the cavity, to guarantee flavor penetrates every bite.
- Don’t Overcrowd: Give the chicken space in the roasting pan so hot air circulates, or the skin will steam instead of brown.
- Rest Before Carving: Let the chicken rest for at least 15 minutes after roasting to keep the juices inside where they belong, not all over your cutting board.
Essential Equipment for Perfect Results
Roasting Rack Essentials
A sturdy roasting rack elevates the chicken, allowing hot air to circulate underneath for even browning. I use a stainless steel V-rack that fits perfectly in my half-sheet pan. This setup prevents the bottom from steaming in its own juices. 🔥
Rimmed Baking Sheet
A rimmed baking sheet catches all the delicious drippings, which you can use for basting or gravy. Look for heavy-gauge aluminum like Nordic Ware—it distributes heat evenly and won’t warp at 425°F.
Kitchen Twine
100% cotton kitchen twine is crucial for trussing the legs. It holds its shape in the oven and won’t melt. I keep a 50-foot roll from OXO in my drawer—it’s inexpensive and lasts for dozens of roasts.
Instant-Read Thermometer
An instant-read thermometer ensures perfect doneness. I swear by my ThermoWorks Thermapen for its 2-3 second response time. Check the thickest part of the thigh—it should read 165°F.
Basting Tools
A long-handled silicone pastry brush makes basting safe and easy. For pan juices, a heatproof basting spoon from RSVP works beautifully. Both tools withstand high heat and clean up easily.
Resting Setup
Let your chicken rest on a wooden cutting board with a groove to catch juices. I use a 12×18-inch board from John Boos—it’s large enough to hold the bird and vegetables while carving. 💛
Nutrition Facts
Frequently Asked Questions
What temperature should I roast the chicken at?
Roast at 425°F for crispy skin and juicy meat. This high heat ensures even browning while cooking the bird through in 1 to 1 hour 15 minutes.
How do I keep the breast from drying out?
Truss the legs and tuck the wings to promote even cooking. Baste every 20-25 minutes with pan juices, and tent with foil if browning too quickly.
Can I use dried herbs instead of fresh?
Yes, use dried herbs at one-third the amount. Fresh is preferred for aroma, but dried work in a pinch. Avoid old spices, as they lose potency.
How long should the chicken rest before carving?
Let it rest 15-20 minutes tented with foil. This allows juices to redistribute, keeping the meat moist and flavorful.

- Jollof Rice Sauce Recipe: West African Tomato and Spice Infusion - September 25, 2026
- Japanese Rice Soup Recipe: Umami-Rich Comfort in a Bowl - September 25, 2026
- Homemade Cream Of Rice Recipe: Silk-Smooth Breakfast in Minutes - September 25, 2026