
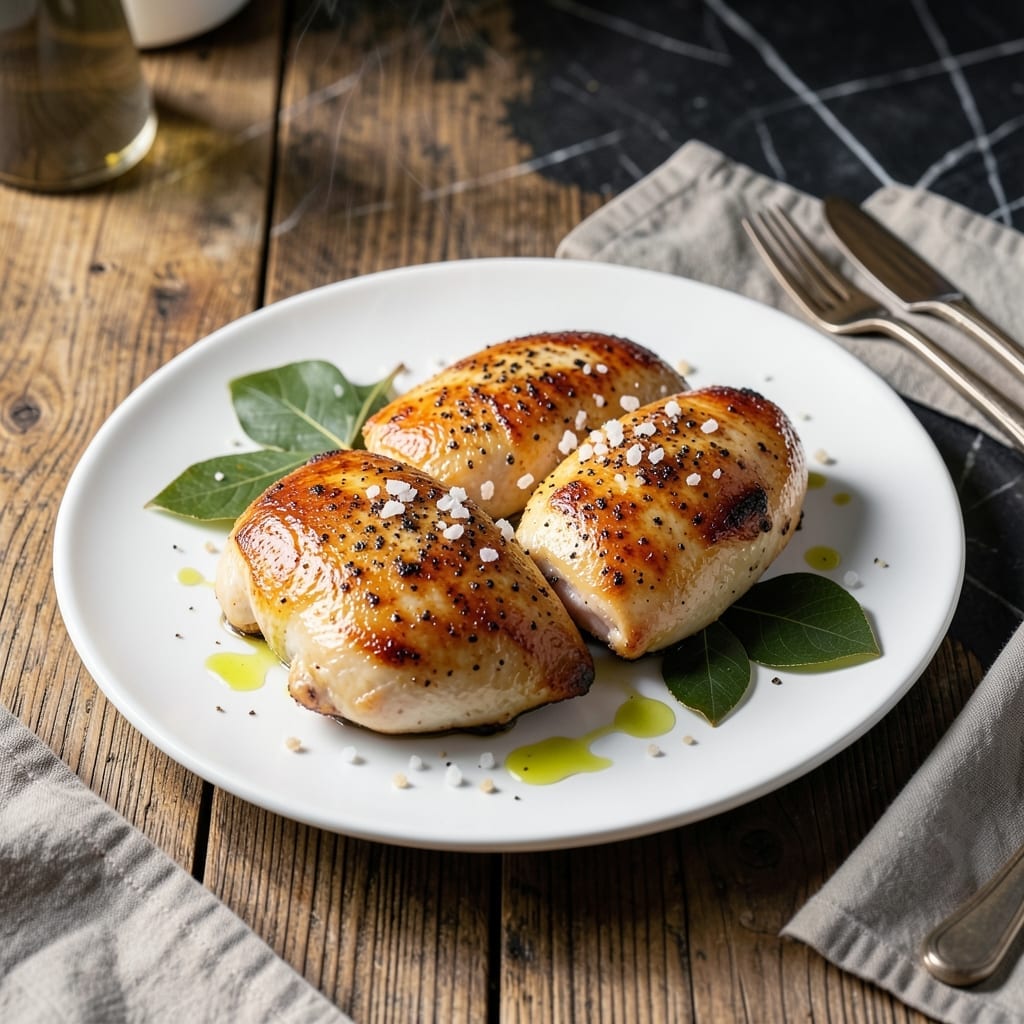
Achieving perfectly juicy chicken every time comes down to one essential step: brining. This proven technique locks in moisture before cooking, ensuring tender, flavorful meat that never dries out.
I developed this method after years of testing different approaches, and it works consistently across all cuts. The brine infuses the chicken with seasoning while altering its protein structure to retain natural moisture during cooking.
Whether you’re grilling, roasting, or pan-searing, brined chicken delivers superior results. The process adds minimal time but transforms ordinary poultry into something extraordinary.
Follow these precise steps for chicken that stays succulent from the first bite to the last. Your family will notice the difference immediately.
Ingredients for Juicy Chicken
Simple brine ingredients transform ordinary chicken into something extraordinary every time.
| Ingredient | Amount | Notes |
|---|---|---|
| Chicken Breasts 🍗 | 2 lb | Boneless, skinless preferred |
| Water 💧 | 4 cups | Cold, for brine base |
| Kosher Salt 🧂 | ½ cup | Diamond Crystal preferred |
| Granulated Sugar 🍚 | ¼ cup | Balances salt in brine |
| Bay Leaves 🍃 | 4 pieces | Dried, for aroma |
| Black Peppercorns 🌶️ | 1 tbsp | Lightly crushed |
| Garlic Cloves 🧄 | 6 cloves | Smashed, peeled |
| Fresh Rosemary Sprigs 🌿 | 3 pieces | Or 1 tbsp dried |
| Fresh Thyme Sprigs 🌿 | 3 pieces | Or 1 tbsp dried |
| Olive Oil 🫒 | 2 tbsp | For post-brine searing |
| Unsalted Butter 🧈 | 1 tbsp | Optional for basting |
| Lemon Zest 🍋 | 1 tsp | From 1 lemon |
The salt is non-negotiable—Diamond Crystal kosher salt dissolves cleanly and gives consistent results. I grab mine in bulk at Costco (the big red box). For the sugar, plain granulated works, but brown sugar adds a subtle depth if you’re feeling fancy. Fresh herbs are ideal, but dried in a pinch won’t ruin things. Just don’t skip the bay leaves—they’re the quiet heroes of the brine.
No fresh rosemary or thyme? Dried at one-third the amount works fine. Out of bay leaves? A pinch of dried oregano gets you close. The sugar can be swapped for honey or maple syrup (same amount). If you’re brining a whole chicken, double everything. For bone-in pieces, add 30 minutes to the brining time.
Brine keeps in the fridge for 1 week in a sealed jar. Chicken can be brined 24 hours max—any longer and it gets mushy. Cook brined chicken within 2 days of removing from the brine. Leftovers? They’ll still be juicy after 4 days in the fridge.
Why You’ll Love This Recipe
- 5-Minute Prep: I just mix water, salt, sugar, and bay leaves in a bowl, drop in the chicken, and walk away. Honestly, that’s it.
- Locks in Juices: The sugar-salt brine works magic—every bite stays tender, never dry.
- Meal Prep Hero: I cook a batch Sunday and it’s ready for salads, sandwiches, or stir-fry all week.
- Budget Stretcher: One pack of chicken breasts turns into four meals, and the brine costs pennies.
Step-by-Step Instructions for Juicy Chicken
Here’s how to brine and cook chicken that stays incredibly moist and flavorful every time.
Step 1: Create the Brine Solution
In a large saucepan, combine the 4 cups Water with 0.5 cup Kosher Salt and 0.25 cup Granulated Sugar. Heat over medium-high heat just until the salt and sugar dissolve completely—you don’t want it to boil.
Remove from heat and stir in the 4 pieces Bay Leaves, 1 tbsp Black Peppercorns, 6 cloves Garlic Cloves, 3 pieces Fresh Rosemary Sprigs, and 3 pieces Fresh Thyme Sprigs. Let this aromatic mixture cool completely to room temperature before using.
Step 2: Brine the Chicken Breasts
Submerge the 2 lb Chicken Breasts in the cooled brine, ensuring they’re fully covered. I use a large zip-top bag for this—it fits perfectly in the fridge and uses less space than a bowl. Squeeze out excess air before sealing.
Refrigerate for 4-6 hours, or up to 12 hours for maximum moisture retention. The longer brine time allows the seasonings to deeply penetrate the meat. You’ll notice the chicken plumps slightly as it absorbs the liquid.
Step 3: Sear the Brined Chicken
Remove the chicken from the brine and pat it extremely dry with paper towels. This is crucial for achieving a good sear. Heat 2 tbsp Olive Oil in a large skillet over medium-high heat until shimmering.
Add the chicken and cook undisturbed for 5-6 minutes per side, until golden brown and the internal temperature reaches 160°F. For extra richness, add 1 tbsp Unsalted Butter and 1 tsp Lemon Zest during the last 2 minutes, basting the chicken with the foaming butter.
Step 4: Rest and Serve
Transfer the chicken to a cutting board and let it rest for 5-10 minutes. This allows the juices to redistribute throughout the meat. You’ll see the internal temperature rise to 165°F during this time.
Slice against the grain and serve immediately. The brine ensures each bite is juicy and flavorful, with the herbs and citrus adding a subtle brightness. The exterior should have a beautiful golden crust from the sear.
Pro Tips For Making Juicy Chicken
- Brine Longer: Soak the chicken breasts in the salt-sugar-water mix with bay leaves for at least 4 hours— overnight if you can. I learned this the hard way: shorter brines just don’t penetrate enough to keep the meat juicy through cooking.
- Pound Evenly: Use a rolling pin or heavy pan to pound the chicken breasts to an even ¾-inch thickness. Sounds tedious, but it ensures even cooking so the thin edges don’t dry out while the thick parts finish.
- Skip the Boil: Resist the urge to boil the brine—it’s not necessary and can make the chicken tough. A simple cold brine with kosher salt, sugar, and bay leaves does the job without overcooking the meat.
- Rest Before Slicing: Let the chicken rest for 5-10 minutes after cooking, tented with foil. This lets the juices redistribute—my grandmother swore by it, and she never served dry chicken.
Dietary Considerations for This Recipe
Gluten-Free Friendly
This recipe is naturally 100% gluten-free, as all ingredients—from the kosher salt to the olive oil—contain no gluten. The brining process itself doesn’t introduce any wheat or grain derivatives, making it safe for those with celiac disease or gluten sensitivity. 💪
Low-Carb Keto Option
For a keto-friendly version, you can reduce the granulated sugar in the brine to 1 tbsp without affecting moisture retention. The small amount of sugar is primarily for balancing the salt, and this adjustment keeps net carbs under 2g per serving.
Dairy Considerations
The only dairy in this recipe is the optional 1 tbsp unsalted butter for basting. Simply skip it or substitute with olive oil to make the dish dairy-free. The chicken will still be just as juicy and flavorful.
Sodium Awareness
While brining does add sodium, you can reduce the kosher salt to ¼ cup for a lower-sodium version. The chicken will still retain moisture, though the flavor may be slightly less pronounced. I recommend tasting the brine before using—it should taste pleasantly salty, not overwhelming.
Allergen Notes
This dish is free from the top 8 allergens, assuming no cross-contamination. It contains no nuts, eggs, soy, or dairy (if omitting butter). Always verify your olive oil and spices for potential processing cross-contact if allergies are severe.
For those with garlic allergies, simply omit the 6 cloves—the other herbs will still infuse plenty of flavor. 🌿
Nutrition Facts
Frequently Asked Questions
How long should I brine the chicken?
For best results, brine for 4-6 hours, or up to 12 hours for maximum moisture. Never exceed 24 hours as the texture can become mushy.
Can I use this method for bone-in pieces?
Yes! Add 30 minutes to the brining time for bone-in cuts. The brine works just as well, though thicker pieces may need slight cooking time adjustments.
Why is patting the chicken dry important?
Drying ensures a golden crust by allowing proper browning. Skipping this step may cause steaming instead of searing, reducing that delicious crisp exterior.
What if my chicken turns out dry?
Overcooking is the main culprit. Pull it at 160°F and let it rest to 165°F. Brined chicken is forgiving, but a meat thermometer is essential.

- Jollof Rice Sauce Recipe: West African Tomato and Spice Infusion - September 25, 2026
- Japanese Rice Soup Recipe: Umami-Rich Comfort in a Bowl - September 25, 2026
- Homemade Cream Of Rice Recipe: Silk-Smooth Breakfast in Minutes - September 25, 2026