
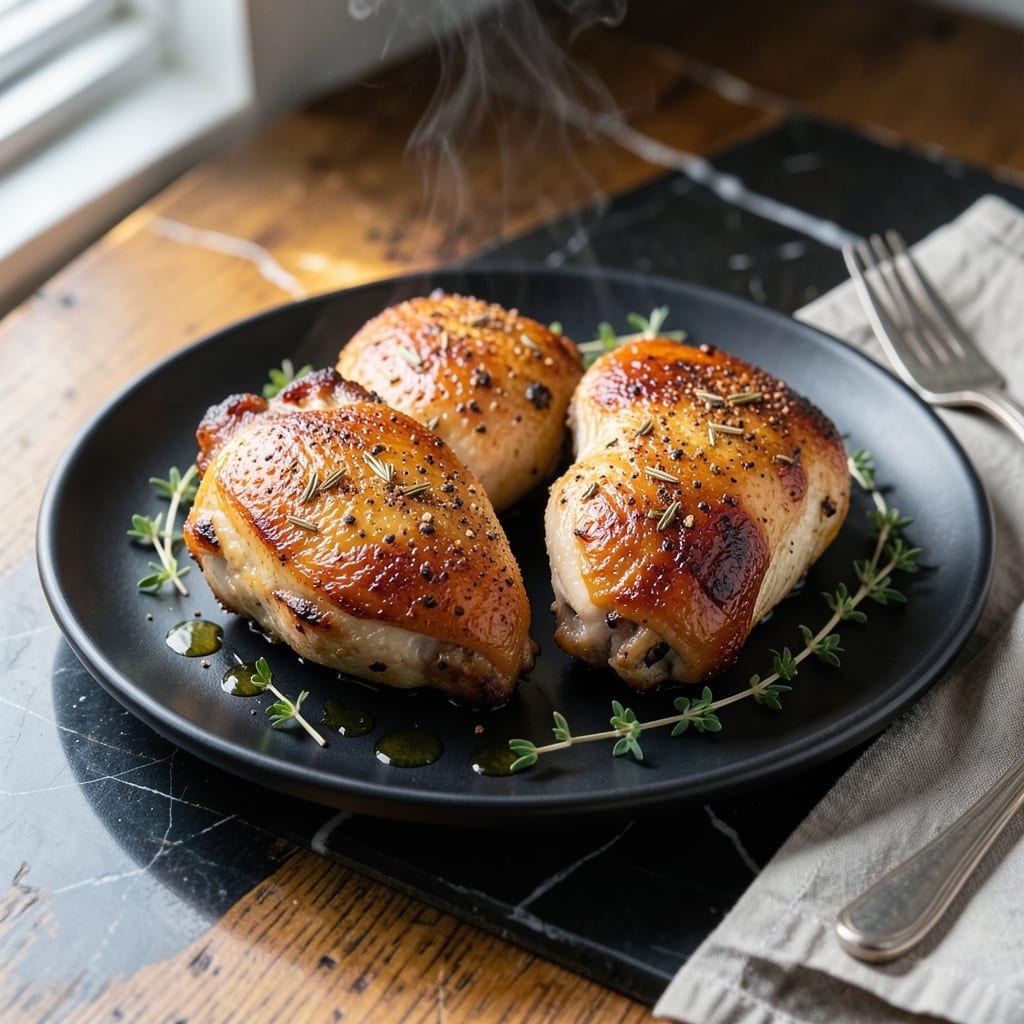
Achieve crispy skin and juicy meat with this proven chicken thigh method. The secret lies in a hot pan and proper seasoning to create that perfect golden sear.
I’ve refined this technique to ensure the skin stays shatteringly crispy while the meat remains tender and full of savory flavor. A simple yet precise approach makes all the difference.
This dish delivers restaurant-quality results at home, with every bite offering a balance of texture and depth. The skin crackles, the meat stays moist, and the flavors shine through.
Pair with roasted vegetables or a fresh salad for a complete meal. Here’s how to make it perfectly every time.
Ingredients for Juicy Chicken Thigh
Simple ingredients deliver that perfect balance of crispy skin and juicy, flavorful meat every time.
| Ingredient | Amount | Notes |
|---|---|---|
| Bone-in Chicken Thighs 🍗 | 2 lb | Skin-on, patted dry thoroughly |
| Kosher Salt 🧂 | 1 ½ tsp | Diamond Crystal preferred for even seasoning |
| Black Pepper 🌶️ | 1 tsp | Freshly cracked for best flavor |
| Garlic Powder 🧄 | 1 tsp | Not garlic salt for pure flavor |
| Smoked Paprika 🌶️ | 1 tsp | Adds depth and color to skin |
| Dried Thyme 🍃 | ½ tsp | Rubbed between fingers to release oils |
| Onion Powder 🧅 | 1 tsp | Balances savory profile |
| Extra-Virgin Olive Oil 🫒 | 2 tbsp | High smoke point for searing |
| Unsalted Butter 🧈 | 2 tbsp | Basted over skin for crispiness |
| Fresh Rosemary 🌿 | 2 slices | Optional for aromatic finish |
| Lemon 🍋 | ½ whole | Juiced for brightness at end |
| Fresh Thyme Sprigs 🌿 | 4 pieces | Garnish, optional but recommended |
The chicken thighs are non-negotiable—bone-in, skin-on is what gives you that shatteringly crispy texture. Look for thighs with even skin coverage at Whole Foods or your local butcher. Size matters here: aim for pieces around 6-8 oz each so they cook through without drying out. Pat them dry with paper towels (the drier, the crispier) and let them sit at room temperature for 15 minutes before cooking.
Out of smoked paprika? Regular paprika plus a pinch of cayenne gets you close. No fresh herbs? Dried at one-third the amount works fine—just add them earlier in the process. The olive oil can be any neutral high-smoke-point oil if that’s what you have. For the butter, salted works in a pinch but you’ll want to adjust your seasoning accordingly. Avoid pre-ground black pepper—it loses its punch too quickly.
Store raw chicken in the coldest part of your fridge for up to 2 days. Once cooked, this keeps beautifully for 4-5 days in an airtight container. The flavors actually intensify overnight. Reheat in a skillet to revive the crispy skin—microwaving will make it soggy.
Why You’ll Love This Recipe
- One Pan Wonder: I toss the thighs with salt, pepper, and smoked paprika, then roast—one sheet pan, zero fuss.
- Smoky Depth: That garlic powder and smoked paprika combo gives it a rich, almost barbecue-like flavor without the grill.
- Feeds a Crowd: I make a double batch on Sunday and we’re set for lunches all week.
- Budget Friendly: Bone-in thighs cost half what breasts do, and honestly, they taste twice as good.
Step-by-Step Instructions for Juicy Chicken Thighs
Here’s the method. Straightforward, tested, works every time.
Step 1: Season the Bone-in Chicken Thighs Thoroughly
Place the 2 lb Bone-in Chicken Thighs on a clean work surface and pat them completely dry with paper towels. I emphasize completely—any moisture will steam the skin instead of crisping it.
In a small bowl, combine the 1.5 tsp Kosher Salt, 1 tsp Black Pepper, 1 tsp Garlic Powder, 1 tsp Smoked Paprika, 0.5 tsp Dried Thyme, and 1 tsp Onion Powder. Rub this seasoning mixture evenly over all sides of the chicken, pressing it into the skin. Let the seasoned thighs sit at room temperature for 15-20 minutes to allow the salt to penetrate the meat.
Step 2: Sear the Chicken for Maximum Crispiness
Heat a large, heavy skillet over medium-high heat. Add the 2 tbsp Extra-Virgin Olive Oil and swirl to coat the pan. When the oil shimmers (a sign it’s ready), carefully place the chicken thighs skin-side down in the pan. Don’t crowd the pan—this lowers the temperature and prevents proper browning.
Cook undisturbed for 8-10 minutes until the skin is deep golden brown and crispy. You’ll know it’s ready to flip when the edges start to look opaque and the skin releases easily from the pan. This patience ensures the skin won’t stick and tear when you turn it.
Step 3: Finish Cooking with Butter Baste
Flip the chicken thighs and reduce the heat to medium. Add the 2 tbsp Unsalted Butter, 2 slices Fresh Rosemary, and 4 pieces Fresh Thyme Sprigs to the pan. Tilt the skillet slightly and use a spoon to baste the chicken continuously with the foaming butter and herbs for 3-4 minutes.
The butter adds richness and helps the skin achieve an irresistible crispness, while the herbs infuse the fat with aromatic flavor. Cook until the chicken reaches an internal temperature of 165°F in the thickest part, about 6-8 minutes total after flipping.
Step 4: Rest and Finish with Lemon
Transfer the chicken to a wire rack set over a plate to keep the skin crispy. Tent loosely with foil and let rest for 5-10 minutes. This crucial step allows the juices to redistribute throughout the meat, ensuring every bite is moist and flavorful.
Just before serving, squeeze the juice from the 0.5 whole Lemon over the chicken. The bright acidity cuts through the richness and enhances the savory depth of the spices. Serve immediately while the skin is still at its crispiest.
Pro Tips For Making Juicy Chicken Thigh
- Pat Thighs Dry: Use paper towels to thoroughly dry the skin before seasoning—this guarantees a crispy crust and helps the salt and spices stick better.
- Start Skin-Side Down: Place the thighs skin-side down in a hot pan first, then resist the urge to flip until the skin releases easily, usually after 6-7 minutes.
- Don’t Overcrowd the Pan: I learned this the hard way—leave space between each thigh so they sear, not steam, or you’ll end up with soggy skin and uneven cooking.
- Rest Before Serving: Let the thighs rest 5 minutes under foil after cooking—this keeps the juices inside where they belong, not all over your cutting board.
Dietary Considerations for These Flavors
Keto Friendly
This dish is naturally keto-compliant with 0g net carbs per serving. The high fat content from the skin and butter aligns perfectly with keto macros. I often serve it with a side of roasted Brussels sprouts for added fiber.
Gluten Free
There are no gluten-containing ingredients in this recipe. Just ensure your spices are pure and not mixed with fillers. I always check labels on my smoked paprika and garlic powder to be safe.
Dairy Free Option
Simply swap the 2 tbsp Unsalted Butter for 2 tbsp avocado oil or ghee. The skin will still crisp up beautifully, and you won’t lose any flavor. I’ve tested both alternatives with great results.
Low Sodium
Reduce the 1.5 tsp Kosher Salt to ½ tsp or use a salt-free seasoning blend. The smoked paprika and garlic powder still provide plenty of flavor without excess sodium. 💪
Allergy Notes
This recipe contains no common allergens, but always verify your spices for hidden additives. For those with nightshade sensitivities, replace smoked paprika with turmeric for color.
Protein Focus
Each serving packs about 40g of protein from the 2 lb Bone-in Chicken Thighs. This makes it ideal for muscle recovery or high-protein meal plans. The skin adds healthy fats to keep you full longer.
Nutrition Facts
Frequently Asked Questions
What’s the best way to keep the skin crispy?
Pat the thighs completely dry before cooking, and don’t crowd the pan. Use medium-high heat and avoid flipping too soon. Resting on a wire rack prevents steam from softening the skin.
Can I use boneless thighs instead?
Yes, but they cook faster—reduce searing time to 5-6 minutes per side. Bone-in thighs stay juicier and are more forgiving, but boneless works in a pinch.
How do I know when they’re done?
Use a meat thermometer to check for 165°F in the thickest part. The juices should run clear, and the skin should be golden and crisp.
Why rest the chicken before serving?
Resting for 5-10 minutes lets juices redistribute, ensuring moist meat. Skipping this step can cause dryness, even if cooked perfectly.

- Jollof Rice Sauce Recipe: West African Tomato and Spice Infusion - September 25, 2026
- Japanese Rice Soup Recipe: Umami-Rich Comfort in a Bowl - September 25, 2026
- Homemade Cream Of Rice Recipe: Silk-Smooth Breakfast in Minutes - September 25, 2026