
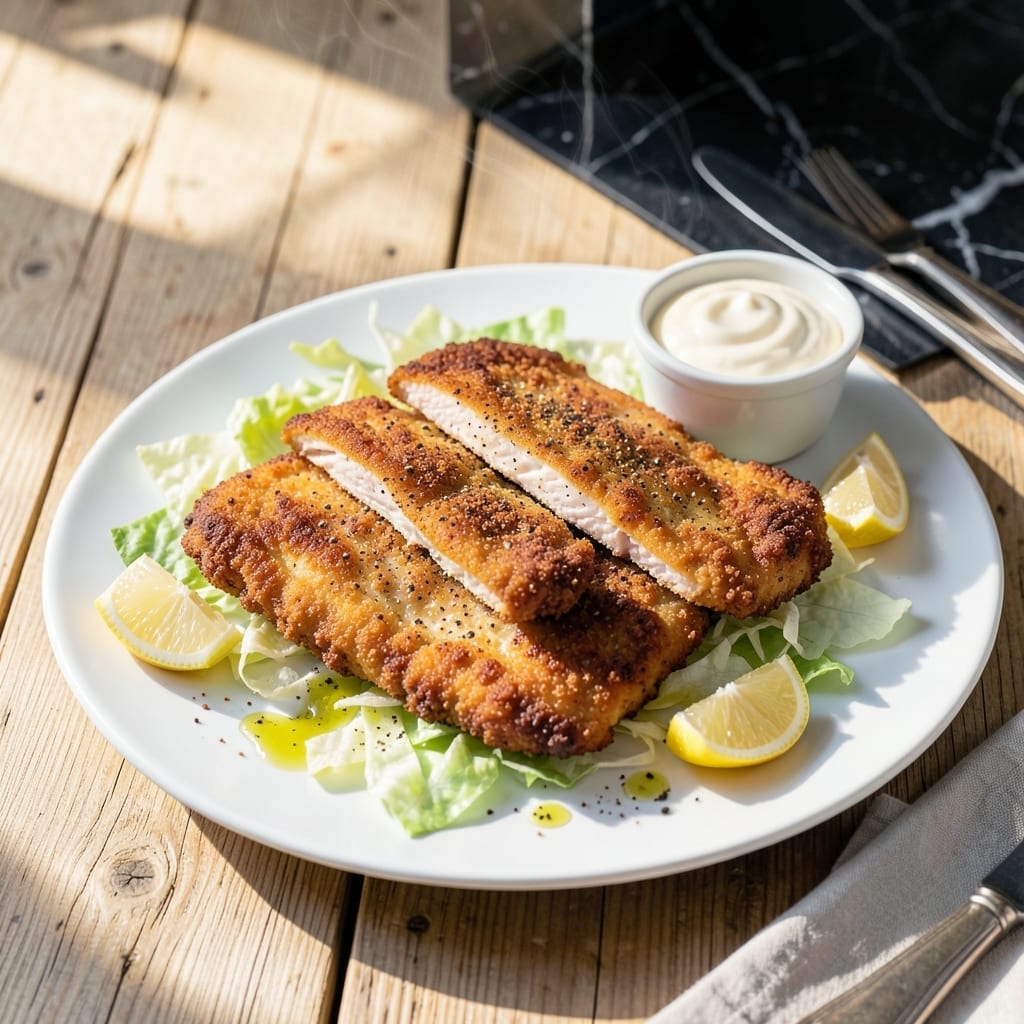
This buttermilk-brined method transforms ordinary chicken into a crispy, golden cutlet that rivals any restaurant version. The overnight brine ensures juicy, flavorful meat that stays tender through frying.
A double-dredge in seasoned flour creates an extra crispy crust that shatters with each bite. The secret lies in maintaining consistent oil temperature, which guarantees even cooking without greasiness.
You’ll end up with perfectly cooked chicken—juicy inside, crispy outside—with a coating that adheres beautifully. Serve hot for the best texture, paired with classic sides like mashed potatoes or coleslaw.
This technique delivers professional results every time, with minimal effort and maximum flavor. The brine makes all the difference.
Ingredients for Fried Chicken Cutlet
Transform ordinary chicken with this buttermilk-brined, double-dredged crispy cutlet ingredient list.
| Ingredient | Amount | Notes |
|---|---|---|
| Boneless Skinless Chicken Breasts 🍗 | 1 ½ lb | Pounded to 1/2-inch thickness |
| Buttermilk 🥛 | 2 cups | Full-fat for best flavor |
| All-Purpose Flour 🌾 | 2 cups | Divided for double-dredging |
| Kosher Salt 🧂 | 1 tbsp | Diamond Crystal preferred |
| Black Pepper 🌶️ | 1 tsp | Freshly ground for best flavor |
| Paprika 🌶️ | 1 tsp | Sweet or smoked variety |
| Garlic Powder 🧄 | 1 tsp | Not garlic salt substitute |
| Onion Powder 🧅 | 1 tsp | Freshly ground preferred |
| Cayenne Pepper 🔥 | ¼ tsp | Adjust for heat preference |
| Large Eggs 🥚 | 2 whole | Beaten for dredge adhesion |
| Vegetable Oil 🫒 | 4 cups | For deep frying, high smoke point |
| Baking Powder 🧂 | ½ tsp | For extra crispiness |
The chicken quality matters most here. Boneless, skinless breasts from Whole Foods or Costco have consistent thickness—ideal for even cooking. For the buttermilk, full-fat delivers superior tenderness and flavor. The flour should be all-purpose (King Arthur or Gold Medal), as cake flour lacks structure. Pounding the chicken to uniform thickness prevents dry spots during frying.
No buttermilk? Whole milk plus 1 tbsp vinegar per cup works in a pinch. For gluten-free, swap all-purpose flour for cup4cup. The cayenne can be omitted for mild heat, or increased to 1/2 tsp for spicy kick. Peanut oil offers better flavor than vegetable oil if available. The baking powder in the dredge creates micro-bubbles for extra crunch.
Store raw brined chicken in the fridge for up to 24 hours. Fried leftovers keep 3-4 days refrigerated, though best eaten fresh. Reheat in a 350°F oven to maintain crispiness. Never microwave—it’ll turn soggy.
Why You’ll Love This Recipe
- One Pan Wonder: I love that I only need a skillet and a bowl—no fancy equipment, just simple steps with chicken, buttermilk, and flour.
- Crispy Perfection: That buttermilk soak makes the chicken so tender, while the flour crust gets golden and crunchy with just salt and pepper.
- Weeknight Hero: Honestly, it’s my go-to for busy evenings—ready in 30 minutes and pairs with anything from mashed potatoes to a simple salad.
- Budget Friendly: Chicken breasts stretch far, and the ingredients are pantry staples. I’ll be real: it feeds my family without breaking the bank.
Step-by-Step Instructions for Fried Chicken Cutlets
This method guarantees ultra-crispy results with juicy, flavorful chicken every time.
Step 1: Brine and Prepare the Chicken
Begin by pounding the boneless skinless chicken breasts to an even ½-inch thickness using a meat mallet. This ensures uniform cooking and prevents dry spots. Submerge the pieces in the buttermilk, making sure they’re fully coated.
Let the chicken brine in the refrigerator for at least 4 hours or overnight for maximum tenderness and flavor infusion. The buttermilk’s acidity breaks down proteins while adding richness. Pat the pieces dry with paper towels before dredging—this is essential for crispy coating adhesion.
Step 2: Create the Seasoned Flour Mixture
In a large shallow dish, whisk together 1½ cups of the all-purpose flour with the kosher salt, black pepper, paprika, garlic powder, onion powder, cayenne pepper, and baking powder. The baking powder adds an extra crispiness boost to your coating.
In a separate bowl, beat the large eggs until thoroughly combined. This two-step dredging process (flour-egg-flour) creates the perfect crunchy barrier that locks in moisture. Reserve the remaining ½ cup of all-purpose flour for the second dredge.
Step 3: Double-Dredge for Maximum Crisp
Dredge each piece of chicken in the seasoned flour mixture, pressing firmly to adhere. Shake off excess, then dip in the beaten eggs, letting any excess drip off. Immediately press into the reserved all-purpose flour, again ensuring complete coverage.
Place the coated cutlets on a wire rack set over a baking sheet. This elevation prevents the coating from getting soggy as it rests. Let them sit for 10-15 minutes to allow the dredge to set—this prevents the coating from falling off during frying.
Step 4: Fry to Golden Perfection
Heat the vegetable oil in a deep, heavy-bottomed pot or Dutch oven to 350°F. Use a deep-fry thermometer for accuracy. The oil should come about halfway up the sides of the pot to allow for even cooking and proper circulation.
Carefully lower 2-3 cutlets into the hot oil at a time—overcrowding lowers the oil temperature and results in greasy chicken. Fry for 4-5 minutes per side until the coating is deep golden brown and the internal temperature reaches 165°F. The coating should be audibly sizzling throughout cooking.
Step 5: Drain and Serve Immediately
Transfer the fried cutlets to a paper towel-lined plate or wire rack to drain excess oil. The paper towels absorb surface oil while the rack prevents steam from making the coating soggy. Season lightly with additional kosher salt while still hot if desired.
Serve immediately while the coating is at its crispiest. The contrast between the shatteringly crisp exterior and the juicy, buttermilk-brined interior is what makes this dish exceptional. For best results, fry in batches and keep finished cutlets warm in a 200°F oven while completing the remaining pieces.
Pro Tips For Making Fried Chicken Cutlet
- Pound the Breasts: Use a rolling pin or meat mallet to even out the chicken to ½-inch thickness—I learned this the hard way after too many dry, overcooked edges where the meat was thin.
- Brine First: Soak the chicken in salted buttermilk for at least 2 hours (overnight if you can swing it). It keeps the cutlets juicy even if they sit a few extra minutes while you fry.
- Skip Cold Oil: Resist the urge to start frying until the oil hits 350°F. After burning three batches, I finally figured out that low heat just gives you greasy, sad cutlets.
- Double Dredge: Dip the chicken in flour, then buttermilk, then flour again for that extra-crispy crust. Sounds like a hassle, but it actually changes the outcome every time.
Perfect Pairings for This Dish
Classic Side Dishes
Serve with creamy mashed potatoes—I use Yukon Golds with butter and whole milk. The cool creaminess balances the cutlet’s hot crispiness perfectly. Add 1 tbsp sour cream for extra tang.
Fresh Salad Pairings
A crisp coleslaw with green cabbage and carrots adds crunch. I make mine with ½ cup mayo, 2 tbsp apple cider vinegar, and 1 tsp celery seed. The acidity cuts through the richness beautifully. 🥗
Beverage Matches
An ice-cold sweet tea with lemon is my go-to—it complements the savory notes. For beer lovers, a crisp lager like Budweiser or Coors works well. The carbonation cleanses your palate between bites.
Sauce Options
Offer honey mustard made with 2 tbsp Dijon and 2 tbsp honey for dipping. A spicy Sriracha mayo (mix ¼ cup mayo with 1 tbsp Sriracha) adds heat. Both enhance without overpowering the cutlet’s flavor.
Quick Breads
Warm cornbread with Jiffy mix plus 1 cup sour cream stays moist. Or try biscuits made with White Lily flour—they’re perfect for soaking up any juices. 💛
Vegetable Sides
Steamed green beans with 1 tbsp butter and garlic salt add freshness. Or roast broccoli at 400°F with olive oil and Parmesan for 15 minutes for a crispy contrast.
Nutrition Facts
Frequently Asked Questions
Can I use chicken thighs instead of breasts?
Yes! Thighs stay juicier and are more forgiving during frying. Pound them to ½-inch thickness for even cooking. The flavor is richer, but the texture will be slightly different.
Why does the coating fall off during frying?
This usually happens if the chicken wasn’t dry before dredging or didn’t rest after coating. Pat pieces very dry with paper towels and let them sit 10-15 minutes post-dredge for best adhesion.
How do I keep the cutlets crispy if serving a crowd?
Fry in batches and keep finished pieces warm on a wire rack in a 200°F oven. This prevents steam buildup that makes the coating soggy. Serve within 30 minutes for peak crispiness.
What oil works best for frying?
Use oils with high smoke points like peanut, vegetable, or canola. Peanut oil adds great flavor. Maintain 350°F throughout frying for even cooking and crispiness.

- Jollof Rice Sauce Recipe: West African Tomato and Spice Infusion - September 25, 2026
- Japanese Rice Soup Recipe: Umami-Rich Comfort in a Bowl - September 25, 2026
- Homemade Cream Of Rice Recipe: Silk-Smooth Breakfast in Minutes - September 25, 2026