
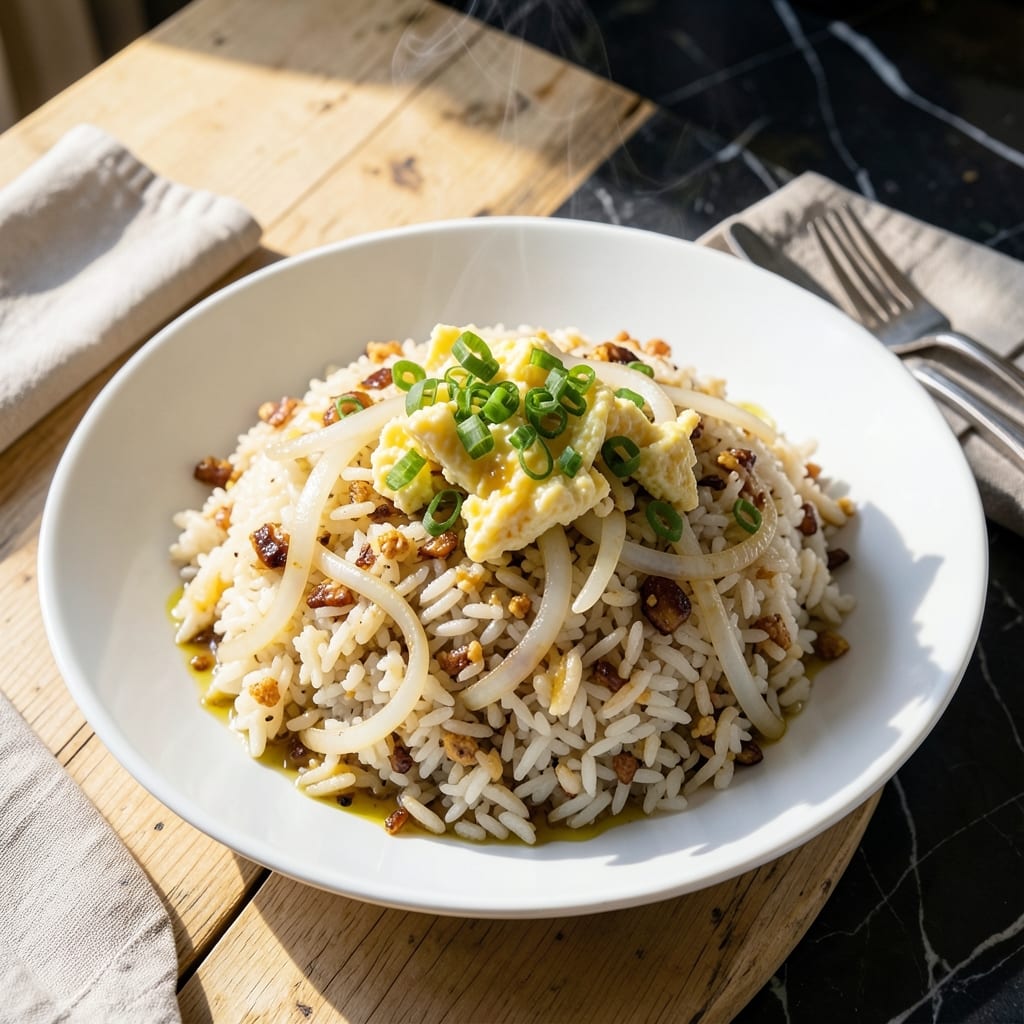
Filipino-style fried rice gets an upgrade with this kanki version, where garlic takes center stage in every bite. I’ve perfected this method over years of weekend cooking, focusing on the right balance of savory and subtle sweetness.
The key is cooking the garlic just until golden, then letting it infuse the rice with its aromatic depth. Simple ingredients come together quickly in a hot wok, creating a dish that’s both comforting and packed with flavor.
You’ll end up with a plate of rice that’s lightly crispy in spots, with each grain coated in that signature garlicky essence. The beauty of this dish lies in its simplicity and the way it transforms leftover rice into something special.
Perfect for breakfast or as a side to any Filipino meal. This creation is ready in under 30 minutes.
Ingredients for Kanki Fried Rice
Simple pantry staples transform into this aromatic Filipino-style fried rice in minutes.
| Ingredient | Amount | Notes |
|---|---|---|
| Cooked Jasmine Rice 🍚 | 4 cups | Day-old, chilled preferred |
| Garlic Cloves 🧄 | 12 cloves | Finely minced for maximum flavor |
| Neutral Cooking Oil 🛢️ | ¼ cup | High smoke point like vegetable oil |
| Small White Onion 🧅 | 1 whole | Finely diced for even distribution |
| Large Eggs 🥚 | 2 whole | Beaten lightly for scrambling |
| Green Onions 🧅 | 3 whole | Thinly sliced, whites and greens separated |
| Soy Sauce 🥣 | 2 tbsp | Low-sodium or regular variety |
| Oyster Sauce 🍶 | 1 tbsp | Vegetarian oyster sauce if needed |
| Fish Sauce 🐟 | 1 tsp | Optional for depth of flavor |
| Ground Black Pepper 🌶️ | ½ tsp | Freshly ground preferred |
| Salt 🧂 | ½ tsp | Adjust to taste after cooking |
| Lemon 🍋 | ½ whole | Juiced for finishing touch |
The garlic is non-negotiable here. Use fresh cloves—pre-minced lacks the punch. I source mine from Asian markets where they’re often sold in bulk. Day-old jasmine rice is ideal (the grains stay separate), but any leftover rice works. The oil needs to handle high heat—vegetable or peanut oil are perfect. Avoid olive oil here; its smoke point is too low for the wok.
No oyster sauce? Hoisin or soy sauce plus a pinch of sugar gets you close. Vegetarian? Swap in mushroom-based oyster sauce. The fish sauce is traditional but skip it for a vegetarian version. Eggs can be omitted for a simpler dish. For extra richness, add a teaspoon of sesame oil at the end—it deepens the flavor beautifully.
Cooked rice keeps in the fridge for 3-4 days, but it’s best used within 2 days for texture. The garlic flavor intensifies over time, so eat within 2 days for peak freshness. Leftovers reheat well with a splash of water in a hot pan.
Why You’ll Love This Recipe
- One Pan Meal: I love that everything—jasmine rice, eggs, onions—comes together in a single skillet. Minimal cleanup, maximum flavor.
- Garlic-Aromatic Kick: The sizzling garlic in hot oil fills my kitchen with an irresistible scent before I even add the rice.
- Weeknight Lifesaver: Honestly, it’s my go-to when I need dinner on the table in 15 minutes flat.
- Budget Stretcher: Leftovers taste just as good the next day, and the ingredients cost next to nothing.
Step-by-Step Instructions for Filipino-Style Garlicky Fried Rice
This method ensures maximum garlic flavor and perfect texture every time you make it.
Step 1: Sauté Aromatics Until Fragrant
Heat 0.25 cup Neutral Cooking Oil in a large wok or skillet over medium-high heat until it shimmers but doesn’t smoke. Add all 12 cloves Garlic Cloves and stir constantly for 1-2 minutes until golden brown and extremely fragrant.
Immediately add the 1 whole Small White Onion and continue stirring for another 2-3 minutes until the onions soften and turn translucent. Remove half of the garlic and onions with a slotted spoon and reserve for garnish—this prevents burning while keeping intense flavor in the dish.
Step 2: Scramble Eggs and Combine with Rice
Push the remaining aromatics to one side of the pan and pour in the 2 whole Large Eggs. Scramble gently with a spatula for 30-45 seconds until just set but still slightly runny—they’ll finish cooking with the rice.
Add all 4 cups Cooked Jasmine Rice, breaking up any clumps with your spatula. Stir-fry for 2-3 minutes until every grain is coated with oil and the rice begins to crisp slightly. I always use day-old rice for this step—it fries up fluffier without turning mushy.
Step 3: Season and Finish with Sauces
Make a well in the center of the rice and add 2 tbsp Soy Sauce, 1 tbsp Oyster Sauce, 1 tsp Fish Sauce, 0.5 tsp Ground Black Pepper, and 0.5 tsp Salt. Stir everything together thoroughly for 1-2 minutes until the rice is evenly colored and the sauces are fully incorporated.
Taste and adjust seasoning if needed. The rice should have a deep umami flavor with a slight sheen from the sauces. If it seems dry, add a splash of water and stir-fry for another 30 seconds.
Step 4: Garnish and Serve Immediately
Stir in the reserved garlic and onions, then add the 3 whole Green Onions (both whites and greens). Cook for 30 seconds just to wilt the greens slightly. Squeeze 0.5 whole Lemon over the top and give it one final toss.
Transfer to a serving dish immediately while hot. Each grain should be separate and coated with sauce, with visible bits of garlic and onion throughout. The lemon juice adds a bright finish that cuts through the richness.
Pro Tips For Making Kanki Fried Rice
- Use Cold Rice: Always start with day-old, cold jasmine rice—fresh rice turns to mush in the wok. I learned this the hard way after making a gloopy batch that stuck to the pan like glue.
- High Heat Only: Crank your burner to max and keep the oil smoking hot before adding garlic and onion. After burning three batches at medium heat, I finally figured out this is the only way to get that signature wok hei flavor.
- Scramble Eggs First: Push the rice to one side, add a little extra oil, then scramble the eggs in the empty space before mixing everything together. Sounds weird, but it works—you’ll get fluffy egg bits instead of rubbery streaks.
- Skip Overcrowding: Cook in batches if your pan isn’t huge—dumping all the rice in at once steams it instead of frying. My grandmother swore by this, and she was right: a crowded wok means soggy fried rice.
Pro Cooking Tips for Great kanki fried rice
Wok Heat Control
Your wok must be screaming hot before adding oil—I test with a flick of water that should dance and evaporate instantly. Maintain medium-high heat throughout, but be ready to lower it if garlic browns too quickly. A well-seasoned carbon steel wok distributes heat best for this dish. 🔥
Garlic Timing
The 12 cloves must hit the oil when it’s hot but not smoking. Stir constantly for 1-2 minutes until golden. Remove half immediately to prevent burning—the residual heat continues cooking. I use a slotted spoon for quick removal.
Rice Prep
Day-old jasmine rice is ideal because it’s drier. Break up clumps with your hands before adding to the wok. Spread rice in an even layer and let it sit undisturbed for 20-30 seconds between stirs to develop those crispy bits.
Sauce Integration
Create a well in the rice and add soy, oyster, and fish sauces directly to the hot surface. This caramelizes the sauces slightly before mixing. Stir vigorously for 1-2 minutes to coat every grain evenly.
Egg Technique
Push aromatics aside before adding beaten eggs. Let them set for 10 seconds before scrambling gently. The eggs should remain slightly runny when mixed with rice—they’ll finish cooking during the stir-fry.
Final Touches
Add reserved garlic and onions back at the very end to preserve their texture. The lemon juice goes in last—its acidity brightens all the flavors. Serve immediately while the rice is still sizzling. 💫
Nutrition Facts
Frequently Asked Questions
Can I use fresh rice instead of day-old?
Fresh rice contains too much moisture and will turn mushy. For best results, use day-old jasmine rice that’s been chilled. Spread it on a tray to dry slightly if needed.
What if I don’t have oyster sauce?
Substitute with 1 tbsp hoisin sauce or 1 tbsp soy sauce plus 1 tsp sugar. For a vegetarian option, use mushroom-based oyster sauce. The flavor remains rich and savory.
Why does the garlic burn so quickly?
Garlic burns fast at medium-high heat. Remove half after 1-2 minutes of cooking to preserve flavor. Constant stirring prevents burning while keeping the aroma intact.
Can I make this ahead of time?
It’s best served immediately, but leftovers keep for 2 days in the fridge. Reheat in a hot pan with a splash of water to restore texture. Avoid microwaving as it makes the rice soggy.

- Mujadara Rice and Lentils Recipe: Earthy Spiced Lentils With Caramelized Onions - November 1, 2026
- Naija Fried Rice Recipe: Street-Style Spice With Veggie Crunch - November 1, 2026
- Mushy Rice Recipe: Fluffy Grains Transformed in Minutes - November 1, 2026