
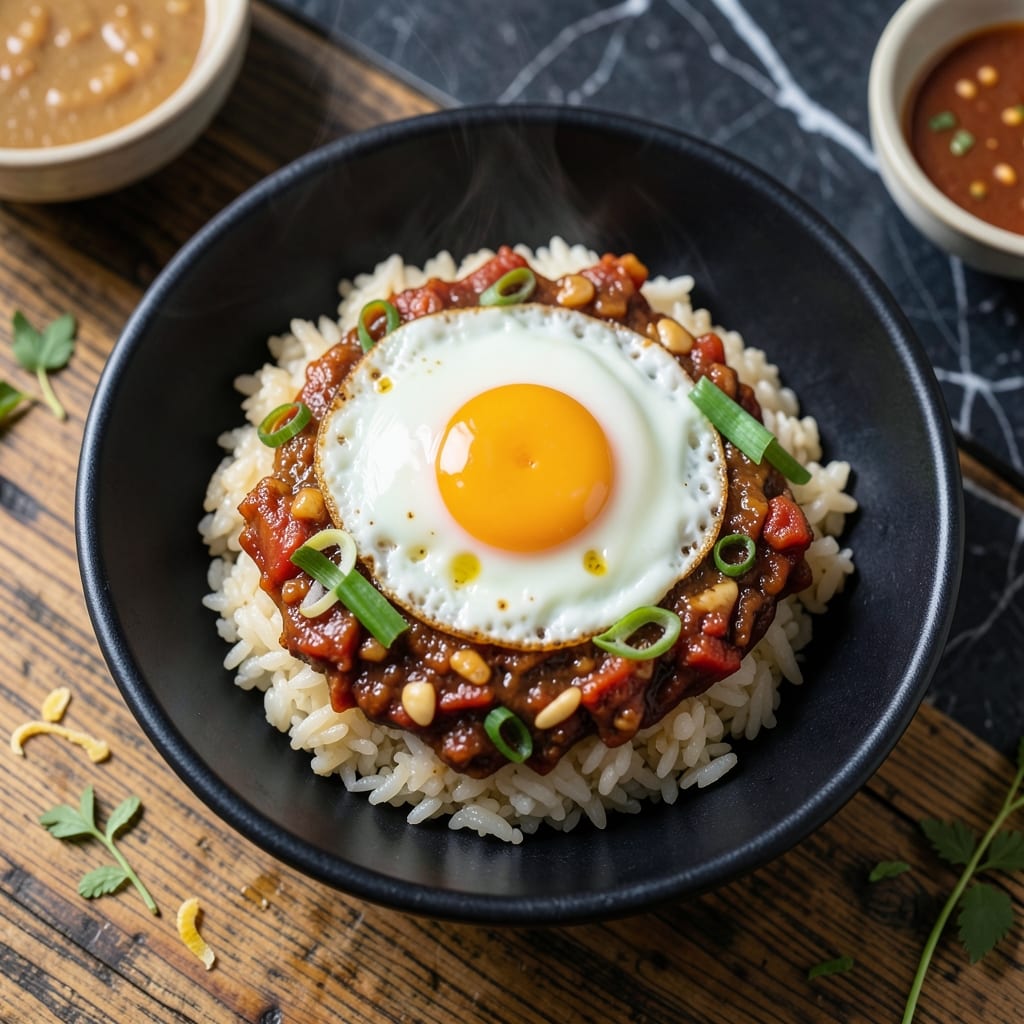
This Korean-inspired dish transforms leftover rice into a flavorful meal with spicy kimchi and a runny fried egg topping.
I developed this recipe to showcase traditional flavors while keeping it simple. The combination of fermented kimchi, warm rice, and a perfectly cooked egg creates a satisfying balance of heat, texture, and richness in every bite.
Ingredients for Kimchi Rice Bowl
Transform leftover rice with bold Korean flavors and a rich fried egg topping.
| Ingredient | Amount | Notes |
|---|---|---|
| Cooked White Rice 🍚 | 4 cups | Day-old or chilled preferred |
| Kimchi 🥬 | 2 cups | Well-fermented, chopped with juices |
| Large Eggs 🥚 | 4 whole | For runny yolk topping |
| Vegetable Oil 🫒 | 2 tbsp | Or sesame oil for depth |
| Garlic Cloves 🧄 | 3 cloves | Minced finely |
| Green Onions 🧅 | 4 whole | Thinly sliced for garnish |
| Soy Sauce 🥄 | 2 tbsp | Low-sodium if preferred |
| Sesame Seeds 🌰 | 1 tbsp | Toasted for garnish |
| Gochujang 🌶️ | 1 tbsp | Korean chili paste optional |
| Sesame Oil 🫒 | 1 tsp | For finishing aroma |
| Sugar 🍚 | 1 tsp | Balances kimchi acidity |
| Salt 🧂 | ½ tsp | Adjust to taste |
| Black Pepper 🌶️ | ¼ tsp | Freshly ground |
The kimchi quality is non-negotiable here. Seek out napa cabbage kimchi from an Asian market or Mother-In-Law’s brand at Whole Foods—it should be tangy, spicy, and well-fermented (the juices are liquid gold). Day-old rice works best as it fries without turning mushy. For the eggs, pasture-raised from Trader Joe’s or your local farmers market yields the richest yolks.
No kimchi? Sauerkraut plus sriracha offers a similar tangy heat (drain well first). Gochujang missing? Miso paste mixed with chili flakes works in a pinch. For a vegan version, skip the egg and add crispy tofu cubes instead. The sesame oil is essential—don’t substitute. If you’re sensitive to spice, reduce the kimchi by half and add a pinch of sugar to balance.
This dish is best served immediately while the egg yolk is still runny. Leftovers keep for 2-3 days in the fridge, though the rice may dry out. Reheat in a skillet with a splash of water to restore texture. The kimchi flavor intensifies over time—1 week max for food safety.
Why You’ll Love This Recipe
- One-Pan Meal: I just toss rice, kimchi, garlic, and eggs into a pan—no extra dishes, no fuss.
- Umami Bomb: The fermented kimchi and sizzling garlic create this deep, tangy flavor that hits all the right notes.
- Lunch or Dinner: I make it for a quick lunch or double the batch for dinner—equally satisfying both times.
- Budget Stretcher: A little kimchi and a couple eggs turn plain rice into a filling meal that doesn’t break the bank.
Step-by-Step Instructions for Kimchi Rice Bowl
This method delivers bold, balanced flavors with perfect texture in every bite.
Step 1: Sauté Aromatics and Kimchi
Heat the 2 tbsp vegetable oil in a large skillet or wok over medium-high heat. Add the minced 3 cloves garlic cloves and stir for 30 seconds until fragrant but not browned.
Immediately add the 2 cups kimchi with its juices. Cook for 4-5 minutes, stirring occasionally, until the kimchi softens and the juices begin to reduce. This step intensifies the kimchi’s umami depth while mellowing its sharp acidity.
Sprinkle in the 1 tsp sugar and 0.5 tsp salt, stirring to dissolve completely. The sugar balances the kimchi’s tang, while the salt enhances all the flavors developing in the pan.
Step 2: Combine with Rice and Season
Add the 4 cups cooked white rice to the skillet, breaking up any clumps with a wooden spoon. I prefer day-old rice as it fries better without turning mushy. Stir-fry for 3-4 minutes until the rice is heated through and begins to crisp slightly.
Drizzle the 2 tbsp soy sauce and 1 tbsp gochujang over the rice. The gochujang adds a deep, fermented heat that complements the kimchi perfectly. Stir vigorously for 1-2 minutes until the rice is evenly coated and the sauce clings to each grain.
Taste and adjust seasoning if needed, remembering the fried eggs will add richness later. The rice should be vibrant with color and aroma at this stage.
Step 3: Fry the Eggs to Perfection
In a separate nonstick skillet, heat a small amount of the vegetable oil over medium heat. Crack the 4 whole large eggs into the pan, keeping them spaced apart. Cook for 2-3 minutes until the whites are set but the yolks remain runny.
For restaurant-quality presentation, I cover the pan for the last 30 seconds to gently set the tops of the eggs without fully cooking the yolks. Season lightly with a pinch of the 0.25 tsp black pepper.
The runny yolks are essential—they’ll coat the rice with a luxurious, creamy texture when broken into the bowl.
Step 4: Assemble and Garnish
Divide the kimchi rice among four bowls. Top each serving with one fried egg, positioning it prominently in the center. The contrast between the hot rice and the warm egg creates an irresistible temperature play.
Sprinkle with the thinly sliced 4 whole green onions and the 1 tbsp sesame seeds for freshness and crunch. Drizzle each bowl with 1 tsp sesame oil divided evenly—this adds a nutty aroma that ties all the flavors together.
Serve immediately while the egg yolks are still runny. The sesame oil should glisten on the surface, and the green onions should maintain their bright color against the vibrant red rice.
Pro Tips For Making Kimchi Rice Bowl
- Use Day-Old Rice: Fresh rice turns mushy—use cold, leftover rice straight from the fridge. The grains hold their shape and crisp up better when stir-fried with kimchi.
- Drain the Kimchi: Squeeze out excess liquid from the kimchi before cooking to prevent a watery bowl. Save the juice for stews or soups—it’s packed with flavor.
- Hot Pan, Cold Eggs: Crank the heat to medium-high before adding eggs for a perfectly runny yolk. Crack them directly into the pan—no pre-mixing needed.
- Mince Garlic Fine: Finely minced garlic distributes better in the dish and cooks evenly without burning. I learned this the hard way after biting into a chunk of raw garlic.
Regional Styles of This Dish
Korean Classic
This is the traditional bokkeumbap style from Seoul, where street vendors serve it sizzling hot in cast iron bowls. The key is using well-aged kimchi with plenty of sour juice for maximum tang. I always add 1 extra tbsp of gochujang for that authentic spicy kick. 🗺️
Busan Seafood Twist
Coastal Busan adds 1 cup chopped squid or ½ cup shrimp to their version, cooked with the kimchi for added brininess. The seafood soaks up the kimchi’s bold flavors beautifully. I love this variation for summer beach picnics.
Jeonju Royal Style
Jeonju’s royal court cuisine elevates this dish with thinly sliced beef bulgogi mixed into the rice. The sweet-savory marinade on the beef pairs perfectly with the kimchi’s heat. Use ribeye for the most tender result.
Vegan Gwangju
Gwangju’s Buddhist temples make a plant-based version with crispy tofu cubes replacing the egg. They also add shitake mushrooms for extra umami. The tofu gets marinated in soy sauce and garlic before frying.
This version keeps all the traditional flavors while being completely plant-based. 💛
Seoul Street Food
For the ultimate Seoul street food experience, serve your bowl with a side of mandu (Korean dumplings). The crispy dumplings add a satisfying textural contrast to the soft rice. I find pork and cabbage mandu works best.
Nutrition Facts
Frequently Asked Questions
Can I use fresh rice instead of day-old?
Fresh rice works but may turn mushy when stir-fried. Spread hot rice on a tray and refrigerate for 30 minutes to firm it up before cooking. This mimics day-old texture.
What if my kimchi isn’t very sour?
Add 1 tbsp rice vinegar or 1 tsp lemon juice when cooking the kimchi. This boosts acidity to balance the flavors. Taste as you go.
How do I make it spicier?
Stir in extra gochujang or add ½ tsp red pepper flakes with the kimchi. For serious heat, top with sliced jalapeños or a drizzle of sriracha.
Can I meal prep this for the week?
Store components separately in airtight containers for 3 days max. Reheat rice in a skillet with a splash of water, then top with a fresh fried egg.

- Mujadara Rice and Lentils Recipe: Earthy Spiced Lentils With Caramelized Onions - November 1, 2026
- Naija Fried Rice Recipe: Street-Style Spice With Veggie Crunch - November 1, 2026
- Mushy Rice Recipe: Fluffy Grains Transformed in Minutes - November 1, 2026