
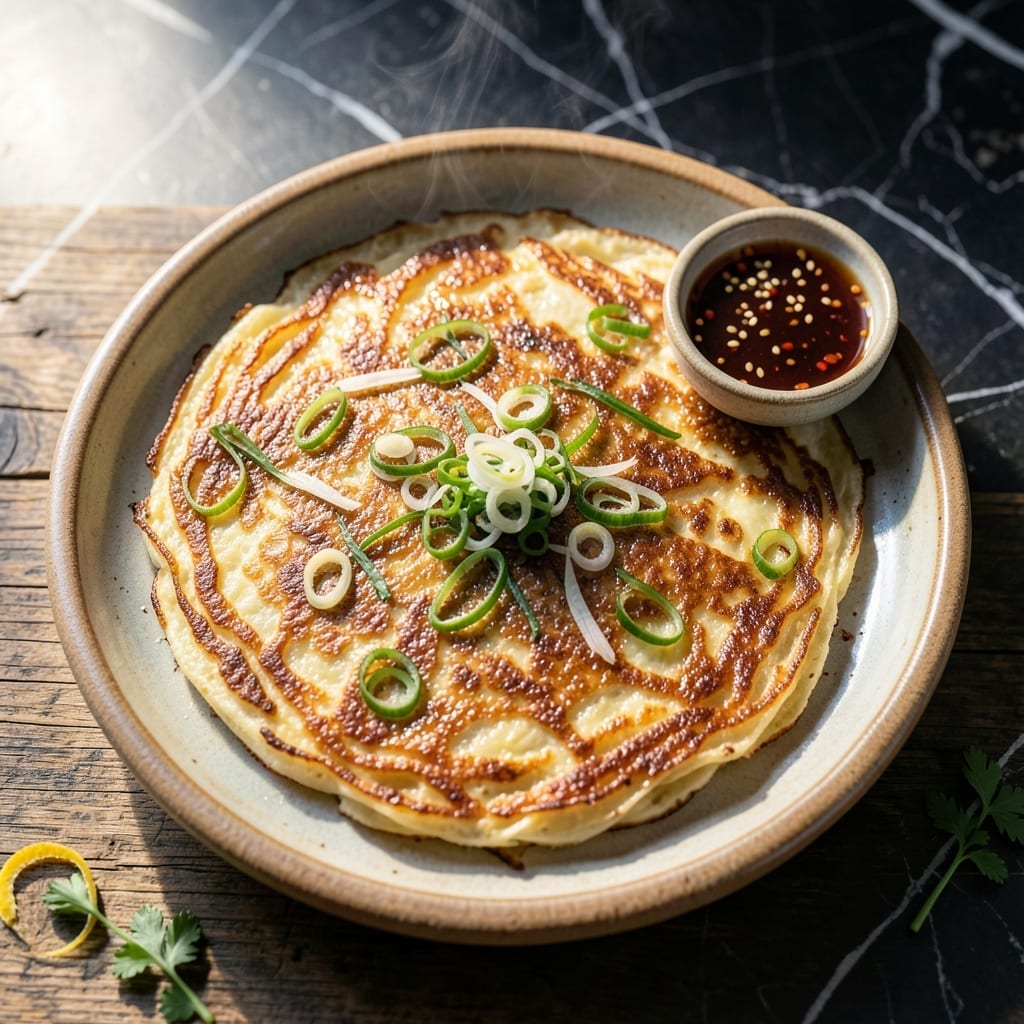
I developed this rice flour pancake after testing versions in my tiny Boston kitchen, seeking that authentic Korean crisp texture. The rice flour creates a delicate, lacy crust that shatters with each bite.
Green onions add a fresh, sharp contrast to the mild batter, while the rice flour ensures a savory depth you won’t get with standard flour. The key is mixing the batter just until combined—overworking it ruins the texture.
Cooked in a hot pan with a touch of oil, these pancakes develop golden edges and a tender center. They’re perfect for breakfast or as a savory snack with dipping sauce.
This method delivers consistent results, even in cramped kitchen spaces. The crispness comes from patience and proper heat control.
Ingredients for Korean Pancake Recipe Rice Flour
Rice flour and green onions create that signature crisp texture everyone loves.
| Ingredient | Amount | Notes |
|---|---|---|
| Rice Flour 🌾 | 1 ½ cups | Fine grind for lacy texture |
| All-Purpose Flour 🌾 | ½ cup | Balances rice flour density |
| Green Onions 🧅 | 6 whole | Thinly sliced, white and green parts |
| Large Eggs 🥚 | 2 whole | Beaten for batter binding |
| Water 💧 | 1 ¼ cups | Cold for crispier batter |
| Salt 🧂 | 1 tsp | Kosher or sea salt preferred |
| Vegetable Oil 🫒 | ¼ cup | For frying, neutral flavor |
| Garlic Cloves 🧄 | 2 cloves | Minced for aromatic depth |
| Soy Sauce 🥢 | 2 tbsp | Low-sodium for controlled saltiness |
| Sesame Oil 🫒 | 1 tsp | Toasted, for finishing drizzle |
| Black Pepper 🌶️ | ½ tsp | Freshly ground for best flavor |
| Sugar 🍚 | ½ tsp | Optional, balances savory notes |
The rice flour is non-negotiable here—look for fine grind (Bob’s Red Mill works) at Whole Foods or any Asian market. Green onions should be fresh and crisp (no wilted bunches). I grab mine from Trader Joe’s for their reliable quality. The batter comes together fast, so have all ingredients prepped before mixing. Cold water is the secret to that shatter-crisp crust (don’t skip this).
Need to swap all-purpose flour? Cornstarch at half the amount lightens the texture even more. No green onions? Chives or scallions work in a pinch. Soy sauce can be tamari for gluten-free. Out of sesame oil? Skip it—the pancakes will still be delicious, just less aromatic. The egg binds everything, so if you’re vegan, use a flax egg (1 tbsp ground flax + 3 tbsp water per egg).
Batter keeps in the fridge for 1 day (stir before using). Cooked pancakes stay crisp if reheated in a toaster oven or air fryer. Leftovers? 3 days max in an airtight container, but they’re best eaten fresh. Freezing works for 1 month—just thaw completely before reheating.
Why You’ll Love This Recipe
- Minimal Effort: I just mix rice flour, eggs, and water—no fancy techniques, no stress.
- Crispy & Fresh: That golden crust with tender green onions inside? Honestly, I could eat the whole batch.
- Weeknight Hero: Between us, it’s my go-to for last-minute dinners or lazy brunches.
- Budget Friendly: Rice flour and green onions stretch far, and leftovers reheat beautifully.
Step-by-Step Instructions for Korean Pancake with Rice Flour
This method delivers crispy edges with a tender center and that signature green onion punch.
Step 1: Mix the Batter to Perfect Consistency
In a large bowl, whisk together the 1.5 cups rice flour and 0.5 cup all-purpose flour until fully combined. This blend creates the ideal lacy texture that makes these pancakes so special.
Add the 1.25 cups water gradually while whisking to prevent lumps. The batter should be smooth and slightly thicker than heavy cream. I like to let it rest for 5 minutes while I prep the remaining ingredients—this helps the flours fully hydrate.
Stir in the 1 tsp salt, 0.5 tsp black pepper, and 0.5 tsp sugar. These seasonings balance the savory notes and enhance the overall flavor without overpowering the delicate green onion taste.
Step 2: Prepare the Aromatic Vegetables
Thinly slice the 6 whole green onions on a diagonal, using both the white and green parts for maximum flavor. The diagonal cut creates longer pieces that add visual appeal and make each bite more interesting.
Mince the 2 cloves garlic cloves finely. I always use fresh garlic for this recipe—it makes a noticeable difference in aroma and taste. Combine the green onions and garlic in a small bowl and set aside until ready to use.
Beat the 2 whole large eggs lightly in a separate bowl. They’ll be added to the batter just before cooking to ensure the pancakes bind properly without becoming too dense.
Step 3: Combine Wet Ingredients and Fold in Vegetables
Pour the beaten eggs into the batter and whisk until fully incorporated. The mixture should now look slightly glossy and coat the back of a spoon. This is the perfect consistency for creating those crispy, lacy edges.
Add the sliced green onions and minced garlic to the batter. Fold them in gently with a spatula, making sure they’re evenly distributed throughout. The green onions should be visible throughout the batter—they’re the star of this dish.
Stir in the 2 tbsp soy sauce. I use low-sodium soy sauce here to control the saltiness, as we’ve already added salt to the batter. This ensures the flavor is balanced without being too salty.
Step 4: Cook Until Golden and Crispy
Heat 2 tablespoons of the 0.25 cup vegetable oil in a large non-stick skillet over medium-high heat. When the oil shimmers and a drop of batter sizzles when added, you’re ready to start cooking.
Ladle about ½ cup of batter into the hot oil for each pancake, spreading it slightly with the back of the spoon. Cook for 3-4 minutes until the edges turn golden brown and crispy, and small bubbles form on the surface.
Carefully flip the pancake and cook for another 2-3 minutes until the other side is equally golden and crisp. Press down gently with your spatula to ensure even contact with the pan. Transfer to a paper towel-lined plate to drain excess oil.
Step 5: Serve with Finishing Touches
Repeat with the remaining batter, adding more vegetable oil to the pan as needed. I usually get about 8 small pancakes from this recipe, perfect for serving 4 with two each.
Just before serving, drizzle each pancake with a few drops of the 1 tsp sesame oil. This adds a beautiful aroma and depth of flavor that ties all the ingredients together.
Serve immediately while hot and crispy. The contrast between the crispy exterior, tender interior, and the fresh green onion flavor is what makes this dish so irresistible. These pancakes are best enjoyed right away!
Pro Tips For Making Korean Pancake Recipe Rice Flour
- Heat the Pan First: Get your pan screaming hot before adding oil—about 2 minutes on medium-high. I learned this the hard way after too many pale, greasy pancakes.
- Chill the Batter: Let the batter rest 10 minutes in the fridge. Sounds weird, but it works: the rice flour hydrates better and the pancakes crisp up nicer.
- Skip Overmixing: Stir just until the flours disappear—small lumps are fine. After burning three batches, I finally figured out that overworking makes them tough.
- Use Ice-Cold Water: Swap tap water for ice-cold to slow gluten formation. My grandmother swore by this, and she was right: the texture stays lighter.
Storing and Reheating korean pancake recipe rice flour
Refrigerator Storage
Let your pancakes cool completely before storing—this prevents sogginess. Place them in a single layer on a paper towel-lined airtight container. They’ll keep in the fridge for up to 3 days, though I find they’re best within 24 hours. ❄️
Freezer Method
For longer storage, freeze cooked pancakes in a single layer on a baking sheet first. Once solid, transfer to a freezer bag with parchment between layers. They’ll stay fresh for up to 1 month. I use Ziploc freezer bags for space efficiency.
Toaster Oven Reheating
This is my go-to method for reviving crispness. Preheat to 375°F and reheat for 5-7 minutes until hot and crispy. No need to thaw—just add 1-2 minutes if frozen. The toaster oven circulates air better than a microwave.
Air Fryer Option
For a quicker method, use your air fryer at 350°F for 3-4 minutes. Check halfway through—these can go from crisp to overdone fast. I spritz mine with a little oil before reheating for extra crunch. 🔥
Stovetop Refresh
Heat a non-stick pan over medium heat with 1 tsp vegetable oil. Cook each pancake for 2-3 minutes per side until heated through. Press down lightly with a spatula to restore that lacy texture.
Sauce Storage Tip
If serving with dipping sauce, store it separately in a small jar. It’ll keep for up to 5 days in the fridge. I always make extra sauce—it’s great on salads or rice bowls too.
Nutrition Facts
Frequently Asked Questions
Can I use regular flour instead of rice flour?
Rice flour is key for the lacy texture, but you can substitute with cornstarch at half the amount. Regular flour alone will make them denser.
Why does the batter need cold water?
Cold water keeps the gluten from developing too much, resulting in a crispier pancake. Warm water would make them tough.
How do I prevent soggy pancakes?
Cook at medium-high heat and don’t overcrowd the pan. Drain on paper towels and serve immediately for maximum crispness.
Can I add other vegetables?
Try shredded carrots, zucchini, or kimchi for extra flavor. Just pat dry to avoid excess moisture.

- Rice Pudding Recipe With Eggs and Milk: Old-Fashioned Custard-Style Comfort - September 30, 2026
- Rice Noodle Sauce Recipe: Bold Umami Depth for Authentic Stir-Fry - September 30, 2026
- Rice Pilaf Recipe: Fragrant Basmati With Toasted Vermicelli - September 30, 2026