
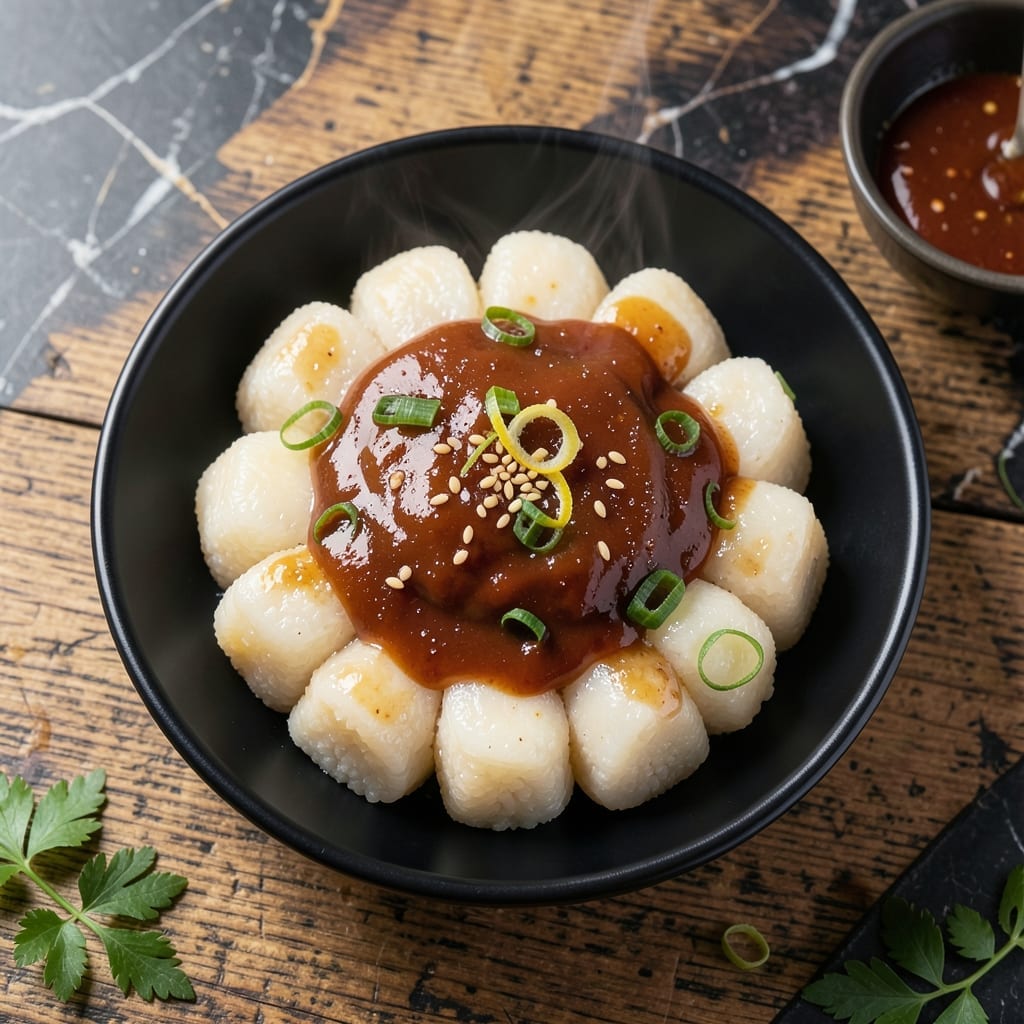
Making Korean rice cakes from scratch transforms simple rice flour into chewy, pillowy bites. This traditional method delivers authentic texture and flavor without shortcuts.
The process involves steaming and shaping the dough, then coating it in a sweet-spicy glaze. I developed this recipe after testing multiple ratios to achieve the perfect balance of softness and elasticity.
What emerges are tender, slightly sticky rice cakes that soak up the glaze beautifully. Each bite offers a satisfying chew with layers of sweet, spicy, and savory notes.
Serve warm for the best experience. The glaze thickens slightly as it cools, creating an irresistible sticky coating.
Ingredients for Korean Rice Cake Recipe from Scratch
Transform simple rice flour into chewy, pillowy rice cakes with these authentic ingredients.
| Ingredient | Amount | Notes |
|---|---|---|
| Rice Flour 🌾 | 2 cups | Sweet rice flour preferred |
| Water 💧 | 1 ¼ cups | Warm, for dough formation |
| Salt 🧂 | ½ tsp | Fine sea salt |
| Sugar 🍬 | 2 tbsp | Granulated, for glaze |
| Soy Sauce 🫒 | 3 tbsp | Low-sodium recommended |
| Gochujang 🌶️ | 2 tbsp | Korean red chili paste |
| Garlic Cloves 🧄 | 3 cloves | Minced for glaze |
| Sesame Oil 🫒 | 1 tbsp | Toasted for aroma |
| Rice Vinegar 🍶 | 1 tbsp | For glaze balance |
| Green Onions 🧅 | 3 whole | Thinly sliced for garnish |
| Sesame Seeds 🌰 | 1 tbsp | Toasted for garnish |
| Cornstarch 🌾 | 1 tbsp | For dusting surface |
| Vegetable Oil 🫒 | 1 tsp | For greasing steamer |
The rice flour is non-negotiable here—sweet rice flour (also called glutinous rice flour) delivers the signature chew. Look for it in the Asian aisle at Whole Foods or any Korean market. The gochujang should be vibrant red and slightly fermented-smelling; Sempio is a reliable brand. Avoid regular rice flour—it won’t give you the right texture. Freshly minced garlic makes a noticeable difference in the glaze’s depth.
No gochujang? Mix 1 tbsp sriracha with 1 tbsp miso paste for a passable substitute. Out of sesame oil? Toasted peanut oil works in a pinch. The glaze can handle variations in sugar—brown sugar adds molasses notes, honey (if not vegan) brings floral sweetness. For the rice vinegar, apple cider vinegar at half the amount is an acceptable swap.
Store dry ingredients (flour, cornstarch) in airtight containers for up to 6 months. The glaze keeps for 1 week refrigerated. Rice cakes are best eaten fresh but can be frozen for 1 month—reheat by steaming to restore chewiness.
Why You’ll Love This Recipe
- 5-Minute Mix: I just stir rice flour, water, and a pinch of salt—no fancy tools, no fuss.
- Chewy-Sweet Balance: The sugar and soy sauce give it that addictive sweet-savory kick every time.
- Endless Pairings: Honestly, it works in soups, stir-fries, or even skewered and grilled for a quick snack.
Step-by-Step Instructions for Korean Rice Cake From Scratch
Master the technique for perfectly chewy rice cakes with a glossy, sweet-spicy glaze coating.
Step 1: Prepare and Steam the Rice Cake Dough
In a large bowl, whisk together the 2 cups Rice Flour, 0.5 tsp Salt, and 1.25 cups Water until completely smooth with no lumps. The batter should have the consistency of thick pancake batter. I find using warm water helps the rice flour hydrate more evenly.
Lightly grease your steamer insert with the 1 tsp Vegetable Oil to prevent sticking. Pour the batter into the prepared steamer, spreading it into an even layer about ½-inch thick. The surface should be smooth and level for uniform cooking.
Bring 2 inches of water to a boil in your steamer base, then place the insert on top. Cover tightly and steam for 20-25 minutes until the center is set and a toothpick inserted comes out clean. The rice cake should be firm but slightly springy to the touch.
Step 2: Cool and Shape the Rice Cakes
Once steamed, transfer the rice cake to a surface dusted with the 1 tbsp Cornstarch. This prevents sticking as you work. Let it cool for 5 minutes until just warm enough to handle safely—the texture will firm up as it cools.
Using a sharp knife or bench scraper, cut the rice cake into 1-inch squares or rectangles. For traditional Korean rice cakes, I prefer 1×2-inch logs for better sauce coverage. Handle gently but confidently—these will become more pliable as they cool completely.
Step 3: Prepare the Sweet-Spicy Glaze
In a small saucepan, combine the 3 tbsp Soy Sauce, 2 tbsp Gochujang, 2 tbsp Sugar, 1 tbsp Rice Vinegar, and the minced 3 cloves Garlic Cloves. Cook over medium heat for 3-4 minutes, stirring constantly, until the sugar dissolves and the mixture thickens slightly.
Remove from heat and stir in the 1 tbsp Sesame Oil. The glaze should coat the back of a spoon and have a glossy sheen. Taste and adjust seasoning if needed—this is where the signature sweet, salty, spicy balance comes together.
Step 4: Coat and Finish the Rice Cakes
Place the cooled rice cakes in a large bowl and pour the warm glaze over them. Using a silicone spatula, gently fold the rice cakes until every piece is evenly coated. The glaze should cling to the surfaces, creating that characteristic shiny appearance.
Transfer to a serving platter and immediately sprinkle with the thinly sliced 3 whole Green Onions and 1 tbsp Sesame Seeds. The contrast of the vibrant green and white against the glossy brown glaze makes for an irresistible presentation.
Let rest for 5 minutes before serving to allow the flavors to meld. The rice cakes should be chewy with a slight resistance, not hard or gummy, with each bite delivering the perfect balance of sweet, spicy, and umami flavors.
Pro Tips For Making Korean Rice Cake Recipe From Scratch
- Steam, Don’t Boil: I learned this the hard way—boiling the rice flour batter ruins the texture. Steam it gently for 20-25 minutes until firm but still slightly sticky.
- Use Fine Rice Flour: Sounds obvious, but coarse rice flour makes grainy rice cakes. Splurge on the fine-milled stuff for that smooth, chewy texture.
- Don’t Over-Knead: After steaming, knead just until smooth—about 2-3 minutes. Overworking it turns the dough tough and rubbery.
- Salt the Water: Add ½ teaspoon of salt to the water when mixing the batter. It balances the sweetness and makes the flavors pop.
Dietary Considerations for This Recipe
Gluten-Free Friendly
This recipe is naturally 100% gluten-free since it uses sweet rice flour instead of wheat. I always double-check my gochujang label—Sempio brand is certified gluten-free. The chewy texture comes from the rice flour’s natural starch, not gluten. 💪
Vegan Adaptations
To make this fully vegan, simply swap the granulated sugar for coconut sugar or agave. All other ingredients, including the soy sauce and sesame oil, are already plant-based. I’ve tested this with coconut sugar—it adds a nice caramel note.
Soy-Free Options
Replace the soy sauce with coconut aminos for a soy-free version. The flavor profile is slightly sweeter, so reduce the sugar by 1 tbsp. I’ve found Coconut Secret brand works beautifully here.
Allergen Notes
This dish contains sesame in both the oil and seed garnish. For sesame allergies, use avocado oil and omit the seeds. The rice flour is top-8-allergen-free, making this safe for most dietary restrictions.
Low-Sodium Adjustments
Cut the soy sauce to 2 tbsp and add 1 tbsp water to maintain volume. Use low-sodium gochujang if available. I also reduce the salt in the dough to ¼ tsp when making this for my dad. 🌟
Sugar Modifications
For a less sweet glaze, reduce the sugar to 1 tbsp or use sugar-free sweetener. The gochujang already adds natural sweetness. Balance with an extra ½ tsp rice vinegar to maintain the tangy contrast.
Nutrition Facts
Frequently Asked Questions
Why does my dough crack when shaping?
It’s likely too dry. Add 1-2 tbsp warm water to the batter before steaming. Also, don’t skip the 5-minute cooling step after steaming—this makes the dough more pliable.
Can I bake instead of steam the rice cakes?
Baking dries them out. Steaming is essential for that signature chewy texture. If you must, use a water bath in the oven at 350°F for 30 minutes, but results won’t be as good.
How do I store leftovers?
Keep in an airtight container for up to 3 days in the fridge. Reheat by steaming for 5 minutes to restore chewiness. Avoid microwaving—it makes them rubbery.
What if my glaze is too thin?
Simmer it longer over medium-low heat until it thickens. If it’s too thick, stir in 1 tsp water at a time. The glaze should coat the back of a spoon.

- Jollof Rice Sauce Recipe: West African Tomato and Spice Infusion - September 25, 2026
- Japanese Rice Soup Recipe: Umami-Rich Comfort in a Bowl - September 25, 2026
- Homemade Cream Of Rice Recipe: Silk-Smooth Breakfast in Minutes - September 25, 2026