
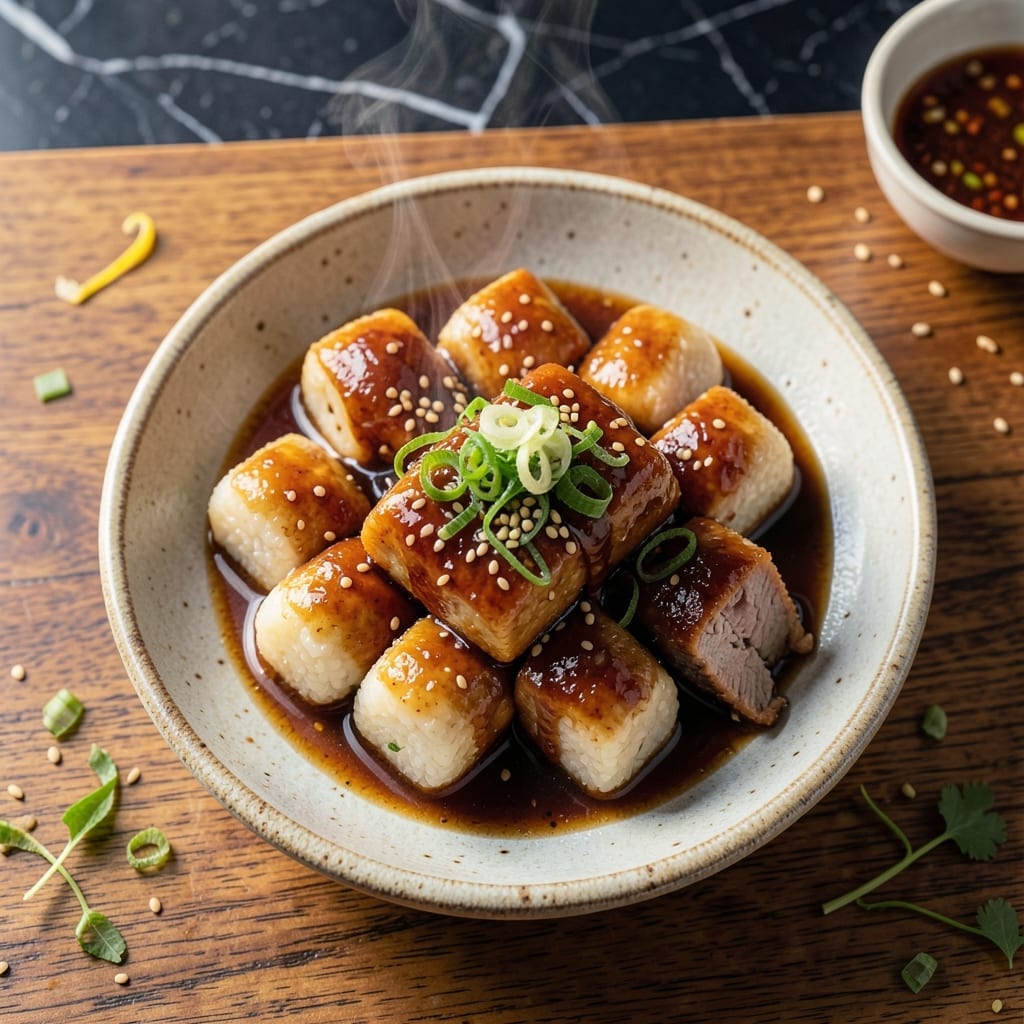
I developed this non-spicy Korean rice cake recipe after realizing how many people miss out on this chewy delight due to heat sensitivity. The secret lies in the sweet soy glaze that delivers authentic flavor without any chili.
Traditional techniques meet simple ingredients here. Rice cakes soak up the savory-sweet sauce while maintaining their signature chewy texture. This method works in any home kitchen with basic equipment.
The result is a mild yet deeply satisfying dish that highlights the natural sweetness of rice cakes. Each bite offers that perfect balance of soft and slightly resistant texture that makes Korean rice cakes so beloved.
Perfect for those who want to explore Korean flavors without the heat. This version stays true to the original while being completely accessible to sensitive palates.
Ingredients for Korean Rice Cake Recipe Non Spicy
Simple ingredients create authentic Korean flavors without any heat or complexity.
| Ingredient | Amount | Notes |
|---|---|---|
| Korean Rice Cakes 🍚 | 1 lb | Cylindrical, pre-soaked if hard |
| Soy Sauce 🫒 | ½ cup | Low-sodium preferred for balance |
| Brown Sugar 🍚 | ¼ cup | Light or dark, packed |
| Rice Vinegar 🍶 | 2 tbsp | Mild, clear variety |
| Sesame Oil 🫒 | 1 tbsp | Toasted for depth |
| Garlic Cloves 🧄 | 4 cloves | Minced for even distribution |
| Fresh Ginger 🌿 | 1 tbsp | Peeled, finely grated |
| Green Onions 🧅 | 4 whole | Thinly sliced, white and green parts |
| Vegetable Broth 💧 | 1 cup | Low-sodium for control |
| Cornstarch 🌾 | 1 tbsp | For glaze thickening |
| Sesame Seeds 🌰 | 2 tsp | Toasted for garnish |
| Neutral Cooking Oil 🫒 | 1 tbsp | For pan-searing rice cakes |
| Water 💧 | ½ cup | For broth adjustment |
The rice cakes are non-negotiable—look for cylindrical tubes at Korean markets or well-stocked Asian aisles (H Mart is reliable). If they’re hard, soak in warm water for 10-15 minutes before cooking. For soy sauce, Kikkoman or Yamasa deliver consistent quality. Fresh ginger and garlic are essential; pre-minced versions lack the bright, sharp flavor needed to balance the sweetness.
Substitute brown sugar with coconut sugar or maple syrup at a 1:1 ratio. No rice vinegar? Apple cider vinegar at half the amount works, but its flavor is more assertive. Skip the vegetable broth and use water in a pinch, though you’ll lose depth. For gluten-free, tamari instead of soy sauce maintains the umami without wheat.
Store rice cakes in the fridge, submerged in water, for up to 5 days. The glaze keeps in an airtight container for 1 week—reheat gently with a splash of water to loosen. Leftover rice cakes freeze well for 3 months, though texture softens slightly upon thawing.
Why You’ll Love This Recipe
- One Pot Wonder: I throw everything in a single pan—rice cakes, soy sauce, brown sugar—and let the stovetop do the work.
- Sweet-Savory Magic: The brown sugar caramelizes with the soy sauce, while sesame oil adds this nutty depth that’s honestly addictive.
- Feeds a Crowd: I make a big batch for potlucks, and it disappears faster than anything else on the table.
- Leftovers? Even Better: The rice cakes soak up more flavor overnight—my lunch tomorrow is already sorted.
Step-by-Step Instructions for Korean Rice Cake Non Spicy
Master this technique for perfectly tender rice cakes with a glossy, sweet-savory glaze every time.
Step 1: Prepare the Aromatic Base
In a medium saucepan, combine the 0.5 cup Soy Sauce, 0.25 cup Brown Sugar, 2 tbsp Rice Vinegar, 1 tbsp Sesame Oil, minced 4 cloves Garlic Cloves, and 1 tbsp Fresh Ginger. This aromatic blend forms the flavor foundation for your glaze.
Heat over medium heat for 3-4 minutes, stirring frequently until the brown sugar completely dissolves and the mixture becomes fragrant. Watch for tiny bubbles at the edges—this indicates the sugar has fully incorporated without burning.
I always bloom the garlic and ginger in the warm oil first to release their essential oils, creating a more complex flavor profile that will infuse into the rice cakes.
Step 2: Thicken the Glaze and Add Broth
In a small bowl, whisk together the 1 tbsp Cornstarch with 0.5 cup Water until completely smooth with no lumps. This slurry will transform your liquid mixture into a glossy glaze that clings beautifully to the rice cakes.
Pour the slurry into the saucepan along with the 1 cup Vegetable Broth. Increase heat to medium-high and bring to a gentle boil, stirring constantly. The mixture will thicken noticeably within 2-3 minutes as it reaches a syrup-like consistency.
Reduce heat to low once thickened and keep warm. The glaze should coat the back of a spoon but still be pourable—this balance ensures it adheres to the rice cakes without becoming gummy.
Step 3: Sear the Rice Cakes
Heat the 1 tbsp Neutral Cooking Oil in a large skillet over medium-high heat. Add the 1 lb Korean Rice Cakes in a single layer, being careful not to overcrowd the pan. If your rice cakes were pre-soaked, pat them dry first for better searing.
Sear undisturbed for 2-3 minutes per side until they develop a light golden crust. The edges should appear slightly translucent when ready to flip. This brief searing step enhances the chewy texture and prevents the rice cakes from absorbing too much glaze.
If working in batches, transfer seared rice cakes to a plate and keep warm while finishing the remainder.
Step 4: Finish with Glaze and Garnish
Pour the warm glaze over the seared rice cakes in the skillet. Gently toss to coat evenly, allowing the rice cakes to absorb some of the sauce for 1-2 minutes over medium-low heat. The rice cakes will plump slightly and become glossy.
Remove from heat and sprinkle with the thinly sliced 4 whole Green Onions and 2 tsp Sesame Seeds. The residual heat will soften the green onions slightly while keeping their fresh crunch. Toss once more to distribute the garnishes evenly.
Serve immediately while warm. The rice cakes should be tender with a slight bounce, coated in a shiny glaze that pools slightly at the bottom of the serving dish. The sesame seeds add a delicate nutty aroma that complements the sweet-savory profile perfectly.
Pro Tips For Making Korean Rice Cake Recipe Non Spicy
- Soak the Cakes: Give the rice cakes a 10-minute soak in warm water before cooking—this prevents that gummy, undercooked center I used to get every time.
- Bloom the Sugar: Toast the brown sugar in a dry pan for 30 seconds before adding liquids; it deepens the sweetness and blends better with the soy sauce.
- Skip the Boil: Resist the urge to boil the sauce hard—keep it at a gentle simmer or the rice cakes will turn mushy and the soy sauce will scorch.
- Finish with Oil: Drizzle the sesame oil at the very end, off the heat, so it stays fragrant instead of tasting bitter from overheating.
Storing and Reheating This Dish
Refrigerator Storage
Let the rice cakes cool completely, then transfer to an airtight container. They’ll keep in the fridge for up to 4 days submerged in any leftover glaze to maintain moisture. The flavors deepen overnight as the sauce continues to infuse. ❄️
Freezer Storage
For longer storage, freeze the rice cakes in a single layer on a tray first, then transfer to a freezer bag. They’ll stay fresh for up to 3 months. I recommend portioning them into meal-sized servings for easy reheating later.
Stovetop Reheating
Add the rice cakes and a splash of vegetable broth to a skillet over medium-low heat. Cover and warm for 5-7 minutes, stirring occasionally. This method restores the chewy texture beautifully. 🔥
Microwave Reheating
Place rice cakes in a microwave-safe dish with a damp paper towel on top. Heat on 70% power for 2-3 minutes, then stir and repeat if needed. The towel prevents drying out while warming evenly.
Glaze Storage
Store any extra glaze separately in a jar in the fridge for up to 1 week. Reheat gently with a splash of water to loosen before using. It’s perfect for quick meals or drizzling over rice.
Nutrition Facts
Frequently Asked Questions
What if my rice cakes are too hard to chew?
Soak them in warm water for 10-15 minutes before cooking. This softens them to the perfect chewy texture. Hard rice cakes won’t absorb the glaze well, so soaking is essential for best results.
Can I make this dish gluten-free?
Yes! Simply swap the soy sauce for tamari or a certified gluten-free soy sauce alternative. All other ingredients are naturally gluten-free, so the dish remains just as flavorful.
How do I prevent the glaze from becoming too thick?
Add a splash of water or vegetable broth while reheating. If the glaze thickens too much during cooking, reduce heat to low and stir in 1-2 tbsp of liquid to restore the perfect consistency.

- Jollof Rice Sauce Recipe: West African Tomato and Spice Infusion - September 25, 2026
- Japanese Rice Soup Recipe: Umami-Rich Comfort in a Bowl - September 25, 2026
- Homemade Cream Of Rice Recipe: Silk-Smooth Breakfast in Minutes - September 25, 2026