
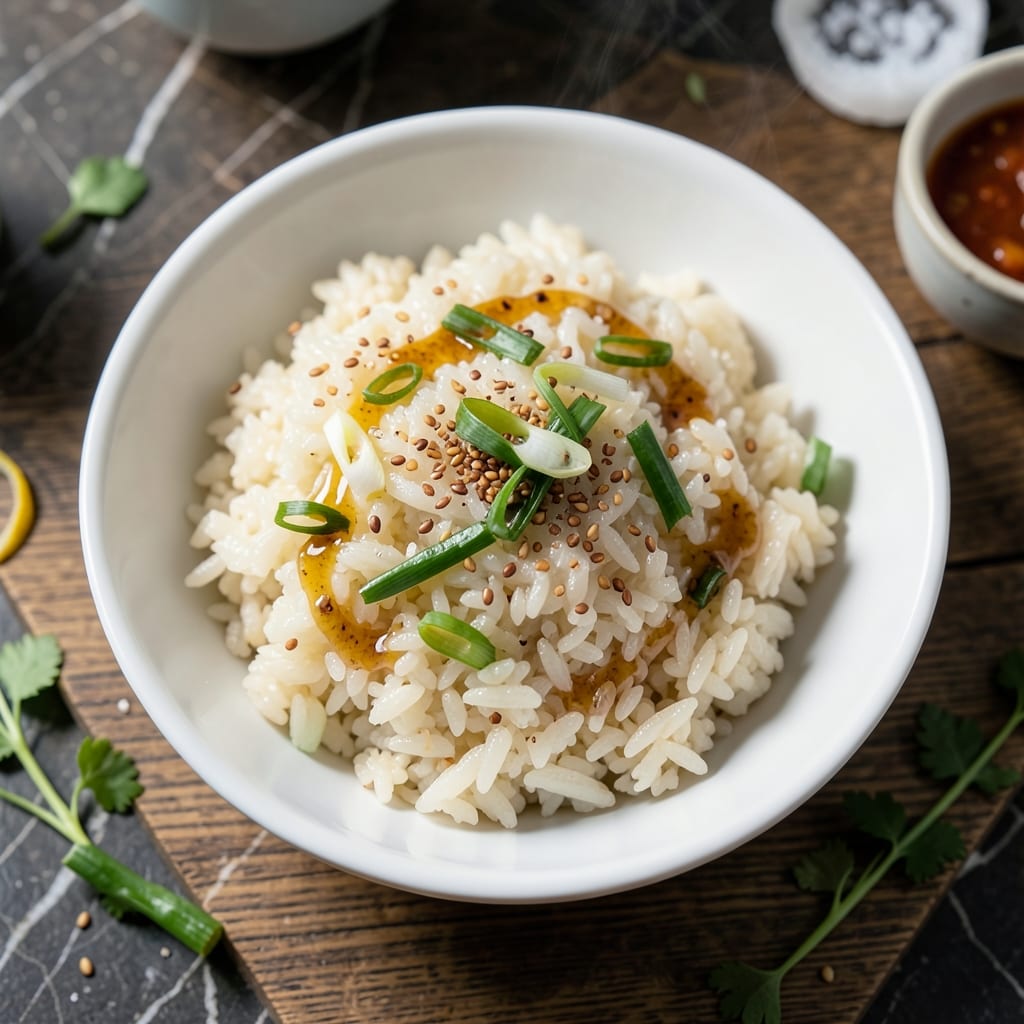
This method delivers the authentic texture and aroma that defines Korean short-grain rice. The grains cling together just enough to pick up with chopsticks, releasing a sweet, nutty fragrance as they cook.
Soaking the rice for 30 minutes before cooking ensures even hydration and prevents dry spots. I use a 1:1.25 rice-to-water ratio in a heavy pot with a tight lid to trap steam.
The result is chewy, glossy grains that hold their shape while absorbing flavors from accompanying dishes. This forms the perfect base for bibimbap or pairs beautifully with grilled meats.
Serve warm for the best texture. The rice stays tender for hours, making it ideal for meal prep.
Ingredients for Korean Sticky Rice
Six simple ingredients create authentic Korean-style sticky rice with perfect chew and aroma.
| Ingredient | Amount | Notes |
|---|---|---|
| Korean Short-Grain Rice 🍚 | 2 cups | Rinsed until water runs clear |
| Water 💧 | 2 ½ cups | Filtered for best results |
| Fine Sea Salt 🧂 | ½ tsp | Adjust to taste preference |
| Toasted Sesame Oil 🫒 | 1 tsp | For serving, optional |
| Sesame Seeds 🌰 | 1 tbsp | Toasted, for garnish |
| Scallions 🧅 | 2 whole | Thinly sliced for garnish |
The rice is everything here. Korean short-grain (often labeled sushi rice) is non-negotiable—jasmine or basmati won’t give you that signature stickiness. Look for brands like CJ or Sinto at Asian markets (or the international aisle at Whole Foods). The grains should be plump and slightly translucent. Avoid pre-rinsed versions—they often lose too much starch, which is key for that clingy texture.
No short-grain rice? Arborio or other medium-grain can work in a pinch, but expect a slightly different texture. The water ratio might need tweaking—start with 1:1.1 and adjust. For extra flavor, swap half the water for vegetable broth. The sesame oil and seeds are optional garnishes, but they add that authentic finish (worth the extra minute).
Uncooked rice keeps indefinitely in a cool, dark place. Once cooked, it holds beautifully for 4-5 days in the fridge. Freeze in portions for up to 3 months—just add a splash of water when reheating to restore moisture. Perfect for meal prep.
Why You’ll Love This Recipe
- One Pot Wonder: I just rinse, soak, and cook—no fancy steps, and the rice turns out perfectly every time.
- Nutty Perfection: The toasted sesame oil and seeds add this rich, nutty depth that makes it irresistible.
- Pairs With Everything: Honestly, it’s my base for bibimbap, soups, or even just a fried egg on top.
- Budget Stretcher: A pound of short-grain rice feeds my family for days, and it costs pennies per serving.
Step-by-Step Instructions for Korean Sticky Rice
This method guarantees perfectly chewy rice with that signature sweet, nutty aroma every time.
Step 1: Rinse the Rice Until Water Runs Clear
Place the 2 cups Korean Short-Grain Rice in a large bowl and cover it with cold water. Gently swirl the rice with your hand for 10-15 seconds, then carefully pour off the cloudy water. Repeat this process 4-5 times until the water runs completely clear.
This thorough rinsing removes excess starch from the surface of the grains, which is crucial for achieving the ideal sticky yet distinct texture. I’ve found that skipping this step or rushing through it results in gummy rice that lacks the desired chewiness. The water should look virtually transparent when you’re done.
Step 2: Soak the Rice for Optimal Texture
After rinsing, add the 2.5 cups Water to the rice and let it soak at room temperature for 30 minutes. This soaking period allows the grains to absorb moisture evenly, which promotes uniform cooking and that characteristic pillowy texture.
During this time, the rice will plump slightly and the water may take on a milky appearance. Don’t be concerned by this—it’s simply the remaining starch releasing into the water. Soaking also reduces the overall cooking time by about 5 minutes.
Step 3: Cook the Rice with Precise Heat Control
Drain the rice thoroughly in a fine-mesh sieve, then transfer it to a heavy-bottomed pot with a tight-fitting lid. Add the 2.5 cups Water and 0.5 tsp Fine Sea Salt. Bring to a boil over medium-high heat uncovered.
Once boiling, immediately reduce the heat to low, cover, and simmer for 15 minutes. Resist the temptation to lift the lid during cooking—steam is essential for proper rice development. After 15 minutes, remove from heat and let it steam, covered, for another 10 minutes.
Step 4: Fluff and Rest Before Serving
After the resting period, gently fluff the rice with a wooden spoon or rice paddle, working from the bottom up to separate the grains without crushing them. The rice should be glossy, with each grain distinct yet clinging lightly to its neighbors when pressed.
Transfer to a serving bowl and let it sit for 5 minutes to allow the texture to fully set. This final rest ensures the rice achieves its maximum stickiness while maintaining individual grain integrity.
Step 5: Garnish and Serve
Drizzle the rice with 1 tsp Toasted Sesame Oil for added aroma. Sprinkle evenly with 1 tbsp Sesame Seeds and 2 whole Scallions, thinly sliced, for freshness and visual appeal.
The finished dish should have a subtle sheen, with the sesame seeds and scallions providing both color contrast and complementary flavors. Serve immediately while hot—the texture is at its peak when freshly cooked.
Pro Tips For Making Korean Sticky Rice
- Rinse Thoroughly: Wash the short-grain rice 4-5 times until the water runs nearly clear—this removes excess starch so the grains stick just right, not mushy.
- Use a 1:1.1 Ratio: For perfect texture, measure 1 part rice to 1.1 parts water (about 20% more than equal). I learned this the hard way after too many dry batches.
- Skip the Peek: Resist lifting the lid while steaming—even once. The sudden temperature drop turns your rice gluey instead of tender.
- Toast the Seeds: Dry-toast sesame seeds in a pan for 1-2 minutes before sprinkling. Sounds small, but it wakes up their nutty flavor against the rice’s mild sweetness.
Essential Equipment for This Dish
Rice Cooker Option
While traditional stovetop works beautifully, a Korean rice cooker like Cuckoo or Tiger simplifies the process. Use the same 1:1.25 rice-to-water ratio and follow the manufacturer’s settings. I love that these cookers automatically adjust heat and steam. 💡
Heavy Pot Requirement
For stovetop cooking, a heavy-bottomed pot with a tight lid is essential. I use my Le Creuset Dutch oven for even heat distribution. Thin pots burn the bottom layer, and loose lids release too much steam, leading to uneven cooking.
Fine-Mesh Sieve
A fine-mesh sieve is crucial for draining rice after rinsing and soaking. The small holes prevent rice grains from slipping through while allowing water to drain completely. I prefer OXO Good Grips for their durability and comfortable handles.
Wooden Rice Paddle
Invest in a wooden rice paddle for fluffing. Its flat surface gently separates grains without crushing them. Plastic utensils can melt, and metal ones may scratch your pot. Look for one with a slight curve to hug the pot’s shape.
Glass Measuring Cups
For accurate measurements, use glass measuring cups with clear markings. I keep a 2-cup Pyrex in my rice-making kit. The transparency lets me verify the 1:1.25 ratio precisely, which is critical for consistent texture.
Timer for Precision
A simple kitchen timer ensures you don’t overcook. I set mine for 15 minutes of simmering and 10 minutes of steaming. Digital timers with multiple alarms work best for tracking both stages accurately.
Nutrition Facts
Frequently Asked Questions
Why is rinsing so important for this rice?
Rinsing removes excess starch that could make the rice gummy. 4-5 rinses until water runs clear ensures perfect texture. This step is non-negotiable for authentic results.
Can I use a different rice variety?
Stick with Korean short-grain for best results. Medium-grain like Arborio can work with adjusted water ratio (1:1.1), but texture will differ slightly.
How do I store leftovers?
Refrigerate in an airtight container for up to 5 days or freeze for 3 months. Add a splash of water when reheating to restore moisture.
Why does the rice need to rest after cooking?
The final 10-minute steam and 5-minute rest allow grains to absorb all moisture and set properly. Skipping this makes rice dry and crumbly.

- Mujadara Rice and Lentils Recipe: Earthy Spiced Lentils With Caramelized Onions - November 1, 2026
- Naija Fried Rice Recipe: Street-Style Spice With Veggie Crunch - November 1, 2026
- Mushy Rice Recipe: Fluffy Grains Transformed in Minutes - November 1, 2026