
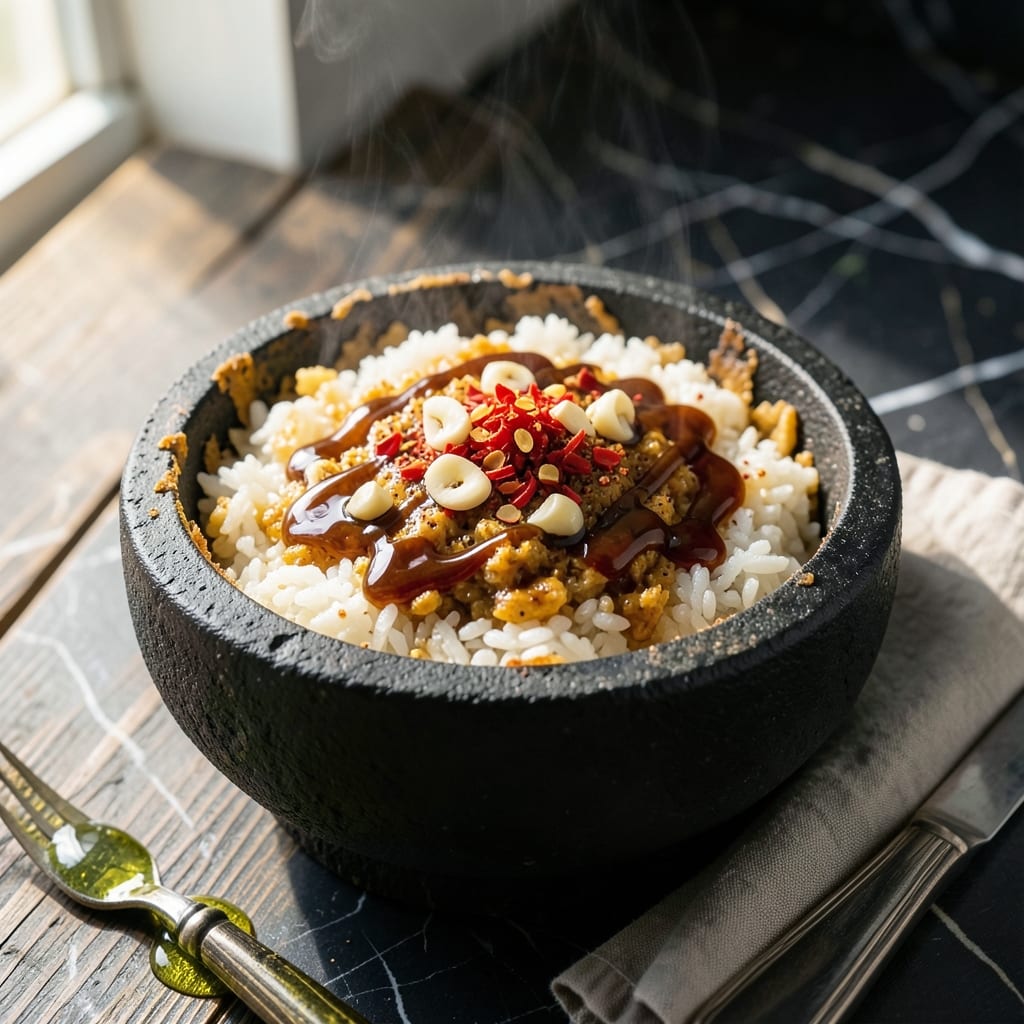
There’s a reason Korean stone pot rice is legendary. The crispy, golden crust at the bottom is worth the wait. This dish transforms simple ingredients into something deeply satisfying.
I’ve perfected the technique for achieving that signature crispy layer—naturally formed as the rice cooks in the stone pot. The heat creates a nutty, toasted depth that’s impossible to replicate any other way.
The key is patience. Letting the rice sit undisturbed ensures the crust forms evenly. Top with your favorite proteins and vegetables, or keep it simple to let the rice shine.
Serve it sizzling hot, with the crust scraping off in satisfying bits. This is comfort food at its most authentic.
Ingredients for Korean Stone Pot Rice
Simple staples create that legendary crispy crust and nutty depth everyone loves.
| Ingredient | Amount | Notes |
|---|---|---|
| Short-Grain White Rice 🍚 | 2 cups | Rinsed until water runs clear |
| Vegetable Oil 🫒 | 2 tbsp | High smoke point preferred |
| Garlic Cloves 🧄 | 4 cloves | Minced for aroma |
| Soy Sauce 🥢 | 3 tbsp | Low-sodium if preferred |
| Sesame Oil 🫒 | 1 tsp | Toasted for depth |
| Korean Red Pepper Flakes 🌶️ | 1 tbsp | Gochugaru, adjust to taste |
| Scallions 🧅 | 4 whole | Thinly sliced for garnish |
| Carrots 🥕 | 1 whole | Julienned for texture |
| Zucchini 🥒 | 1 whole | Diced into small pieces |
| Mushrooms 🍄 | ½ lb | Shiitake or button, sliced |
| Eggs 🥚 | 4 whole | Optional for topping |
| Salt 🧂 | 1 tsp | Kosher or sea salt |
| Black Pepper 🌶️ | ½ tsp | Freshly ground preferred |
| Sesame Seeds 🌿 | 1 tbsp | Toasted for garnish |
| Water 💧 | 2 ½ cups | For cooking rice |
The rice is everything here. Short-grain white rice (like Calrose or sushi rice) is non-negotiable—it’s the starch that creates that crispy bottom. You’ll find it at any Asian market or the international aisle. The gochugaru (Korean red pepper flakes) adds subtle heat—H Mart or Korean grocery stores carry it, or grab it online. Don’t skip the rinse—removes excess starch for better texture (worth the extra minute).
No gochugaru? Crushed red pepper flakes at half the amount work in a pinch. Swap zucchini for spinach or bell peppers—just keep the pieces small. Vegetable oil can be avocado or canola if that’s what you’ve got. The eggs on top are optional but add a rich finish. For extra umami, a dash of fish sauce (if you eat it) takes this to another level.
The crispy crust holds best if eaten fresh, but leftovers keep 3-4 days in the fridge. Reheat in a skillet with a lid to revive the texture. Gochugaru stays fresh for 6 months in a cool, dark place. Always rinse rice before storing to prevent bugs.
Why You’ll Love This Recipe
- One Pot Wonder: I love that I just toss rice, garlic, and soy sauce in the pot and let the heat do the work.
- Crispy Bottom Magic: That golden, garlic-kissed crust with the soft rice above? It’s the reason I make this weekly.
- Feeds My Crowd: Between us, it’s my go-to for family dinners—everyone gets seconds of that sesame-oil-drizzled goodness.
- Budget Stretch: Short-grain rice and pantry staples keep my wallet happy while filling bellies for days.
Step-by-Step Instructions for Korean Stone Pot Rice
Here’s the method I use to achieve that signature crispy crust and nutty flavor in every pot.
Step 1: Prepare and Rinse the Rice
Measure out the 2 cups Short-Grain White Rice and rinse it under cold water in a fine-mesh strainer until the water runs completely clear. I find this step removes excess starch and prevents gummy rice, which is essential for that perfect texture.
Once rinsed, let the rice drain for 5 minutes, then transfer it to your stone pot or heavy-bottomed pot. Add the 2.5 cups Water and let it soak for 30 minutes. This soaking time allows the grains to absorb moisture evenly, resulting in more uniform cooking.
Step 2: Cook the Rice on the Stovetop
After soaking, place the pot over medium-high heat and bring to a boil. Once boiling, reduce the heat to low, cover with a tight-fitting lid, and let it simmer for 15 minutes. Don’t peek during this time—steam escaping will disrupt the cooking process.
While the rice cooks, prepare the vegetables: julienne the Carrots, dice the Zucchini, and slice the 0.5 lb Mushrooms. You’ll use these later for topping. The rice is ready for the next step when most of the water has been absorbed and small craters appear on the surface.
Step 3: Create the Crispy Crust (Nurungji)
This is the crucial step for that coveted crispy bottom. Once the rice has cooked for 15 minutes, increase the heat to medium and continue cooking uncovered for an additional 5-7 minutes. Listen for a faint crackling sound—that’s the rice forming a golden, crispy crust at the bottom of the pot.
Drizzle the 2 tbsp Vegetable Oil around the edges of the pot to encourage even browning. You’ll know it’s ready when the edges of the rice look golden brown and you can smell a nutty aroma. Be careful not to burn it—this step requires your full attention.
Step 4: Add Aromatics and Finish Cooking
Reduce the heat to low again, then add the minced 4 cloves Garlic Cloves, 1 tsp Salt, and 0.5 tsp Black Pepper to the pot. Stir gently to distribute the garlic without disturbing the crispy bottom too much.
Cover the pot and let it steam for another 5 minutes. This final step allows the flavors to meld together while keeping the rice moist. Turn off the heat and let it sit covered for 5 minutes to finish the cooking process.
Step 5: Top and Serve
Carefully transfer the rice to serving bowls, making sure to scrape up some of that crispy crust for each portion. Top with the prepared vegetables—Carrots, Zucchini, and Mushrooms—then drizzle with 3 tbsp Soy Sauce, 1 tsp Sesame Oil, and a sprinkle of 1 tbsp Korean Red Pepper Flakes for a little heat.
Garnish with thinly sliced 4 whole Scallions and 1 tbsp Sesame Seeds for added texture and visual appeal. For an extra touch, fry the 4 whole Eggs sunny-side up and place one on top of each serving. The runny yolk pairs perfectly with the crispy rice and savory toppings.
Pro Tips For Making Korean Stone Pot Rice
- Preheat the Stone Pot: Place your empty stone pot in the oven at 400°F for 10 minutes before adding anything—this guarantees that crispy bottom layer everyone fights over.
- Rinse the Rice Well: Wash your short-grain rice 3-4 times until the water runs nearly clear, or you’ll end up with gummy, starchy rice instead of fluffy individual grains.
- Skip the Overcrowding: Leave at least an inch of space at the top of the pot—rice expands more than you think, and overfilling means a sad, mushy mess.
- Toast the Garlic: Sauté your minced garlic in vegetable oil for just 30 seconds until fragrant, not brown—burnt garlic turns bitter and ruins the whole dish.
Perfect Pairings for korean stone pot rice
Side Dish Harmony
I love serving this with kimchi—its tangy spice cuts through the rice’s richness. A small bowl of doenjang jjigae (fermented soybean stew) adds hearty depth. Both are Korean staples that complement the meal perfectly. 🌶️
Protein Partners
Bulgogi beef is my go-to topping, marinated in soy, sugar, and garlic. For seafood lovers, spicy grilled shrimp adds a zesty kick. Even simple fried eggs work beautifully, as mentioned earlier.
Fresh Contrasts
A crisp cucumber salad with rice vinegar and sesame seeds refreshes the palate. Or try pickled radish for a bright, crunchy bite. These light sides balance the dish’s warmth and texture.
Beverage Pairings
An ice-cold Korean lager like Hite or OB cleanses the palate between bites. For non-alcoholic options, barley tea (boricha) or sikhye (sweet rice drink) are traditional choices. 🍺
Condiment Essentials
Always have extra ssamjang (spicy dipping sauce) on hand. A drizzle of toasted sesame oil and a sprinkle of sesame seeds before serving elevate the flavors. These small touches make a big difference.
Dessert Follow-Up
End with bungeoppang (fish-shaped pastry) or patbingsu (shaved ice dessert). Their sweetness provides a satisfying contrast to the savory meal. A perfect way to finish the experience.
Nutrition Facts
Frequently Asked Questions
What kind of rice works best?
Only short-grain white rice delivers the sticky texture and crispy bottom. Brands like Calrose or sushi rice are perfect. Avoid long-grain varieties as they won’t create the signature crust.
How do I get the crispy bottom right?
Cook on medium-high heat uncovered for 5-7 minutes after initial simmering. Listen for crackling sounds and watch for golden edges. Patience is key—don’t stir during this stage!
Can I use a regular pot instead of stone?
A heavy cast iron or thick-bottomed pot works as a substitute. The stone pot’s heat retention is ideal, but these alternatives can still produce a decent crust.
Why did my rice burn instead of crisp?
This happens with heat that’s too high or uneven oil distribution. Keep the temperature at medium and drizzle 2 tbsp oil around the edges to prevent burning.

- Mujadara Rice and Lentils Recipe: Earthy Spiced Lentils With Caramelized Onions - November 1, 2026
- Naija Fried Rice Recipe: Street-Style Spice With Veggie Crunch - November 1, 2026
- Mushy Rice Recipe: Fluffy Grains Transformed in Minutes - November 1, 2026