
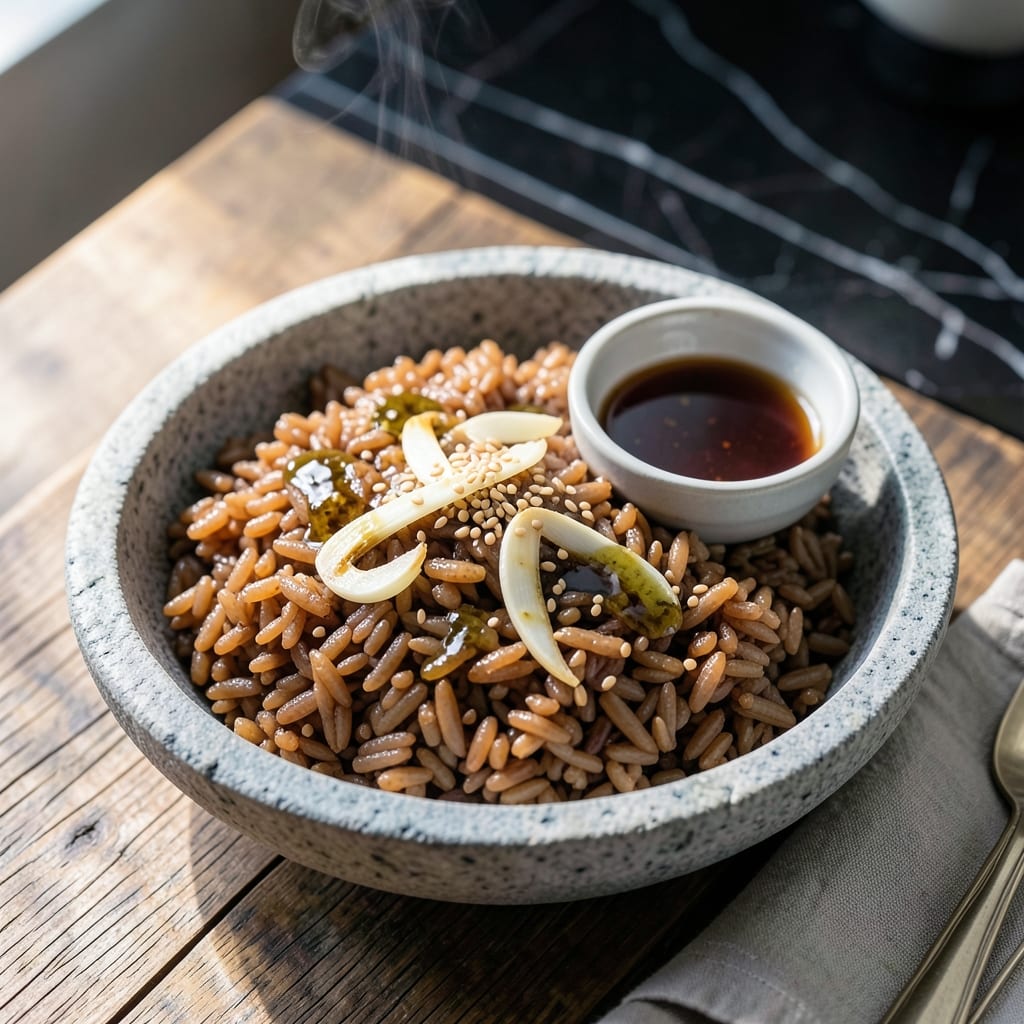
Brown rice takes on new dimension when cooked with Korean techniques, delivering a nutty depth that pairs perfectly with bold flavors. This method transforms the grain into something far more interesting than a simple side dish.
The secret lies in toasting the rice before cooking and using a blend of traditional seasonings. I’ve refined this approach to ensure each grain stays distinct yet absorbs maximum flavor. The result is a dish that stands on its own or complements any Korean meal.
What emerges is chewy, aromatic rice with subtle earthy notes that balance well with spicy or fermented accompaniments. The texture remains consistent throughout, without becoming mushy or dry.
This technique works with any brown rice variety and requires no special equipment. The process takes about 45 minutes from start to finish, with most of that time being hands-off cooking.
Ingredients for Korean Brown Rice
Transform simple brown rice into a fragrant, nutty dish with these Korean pantry essentials.
| Ingredient | Amount | Notes |
|---|---|---|
| Short-Grain Brown Rice 🌾 | 2 cups | Rinsed until water runs clear |
| Water 💧 | 4 ½ cups | Filtered or spring water preferred |
| Sesame Oil 🫒 | 1 tbsp | Toasted for depth of flavor |
| Soy Sauce 🍶 | 2 tbsp | Low-sodium or tamari for gluten-free |
| Rice Vinegar 🍯 | 1 tbsp | Unseasoned variety recommended |
| Garlic Cloves 🧄 | 3 cloves | Minced finely for even distribution |
| Fresh Ginger 🌿 | 1 tbsp | Grated or minced fresh |
| Gochugaru 🌶️ | 1 tsp | Korean red pepper flakes, adjust to taste |
| Sesame Seeds 🌰 | 1 tbsp | Toasted for garnish |
| Scallions 🧅 | 3 whole | Thinly sliced for serving |
| Vegetable Broth 🥕 | ½ cup | Low-sodium preferred for control |
| Salt 🧂 | ½ tsp | Kosher or sea salt for best texture |
The rice quality matters most here. Short-grain brown rice from Lundberg or Koshihikari brands delivers the perfect chewy texture. Look for bags labeled ‘new crop’ for freshest flavor. Toasting the grains before cooking is non-negotiable—this step unlocks the nutty depth mentioned. I source my gochugaru from H Mart or Asian grocery stores for authentic heat and color.
No gochugaru? Substitute cayenne at half the amount (it’s hotter, so adjust carefully). Fresh ginger is ideal, but ground ginger at one-quarter the quantity works in a pinch. For gluten-free, tamari replaces soy sauce seamlessly. The sesame oil must be toasted—regular sesame oil lacks the depth. If avoiding oil, a splash of toasted sesame seeds crushed into a paste can mimic the flavor.
Cooked rice keeps in the fridge for 4-5 days in an airtight container. Freeze for up to 3 months—portion into single servings for convenience. Reheat with a splash of water to restore moisture. The toasted sesame seeds and scallions are best added fresh, so store them separately until serving.
Why You’ll Love This Recipe
- Set and Forget: I just dump the ingredients in the rice cooker and walk away—no stirring, no fuss, just perfect brown rice every time.
- Nutty Umami Bomb: The sesame oil and soy sauce hit that sweet spot between earthy and savory, with a little rice vinegar brightness to balance it.
- Meal Prep Hero: I make a big batch Sunday night and it pairs with everything from kimchi to grilled chicken all week long.
- Budget Stretcher: A two-dollar bag of short-grain brown rice feeds my family for days, and the flavor punch makes it taste way more expensive.
Step-by-Step Instructions for Korean Brown Rice
Master this technique to achieve perfectly cooked grains with authentic Korean seasoning.
Step 1: Rinse and Soak the Short-Grain Brown Rice
Place the 2 cups Short-Grain Brown Rice in a fine-mesh strainer and rinse under cold water until the water runs completely clear. I find this takes about 3-4 minutes of continuous rinsing with frequent swirling.
Transfer the rinsed rice to a bowl and cover with fresh water. Let it soak for 30 minutes. This step removes excess starch and ensures even cooking. The grains should appear plump and slightly translucent when ready to cook.
Step 2: Cook the Rice with Aromatics
Drain the soaked rice and transfer it to a heavy pot with a tight-fitting lid. Add the 4.5 cups Water, 0.5 cup Vegetable Broth, 1 tbsp Sesame Oil, 2 tbsp Soy Sauce, 1 tbsp Rice Vinegar, 3 cloves Garlic Cloves, 1 tbsp Fresh Ginger, 1 tsp Gochugaru, and 0.5 tsp Salt.
Bring to a boil over high heat, then immediately reduce to low heat, cover, and simmer for 45 minutes. You’ll see steam escaping from the lid and hear a gentle bubbling sound when it’s cooking properly.
Step 3: Rest and Steam the Rice
After 45 minutes, turn off the heat and let the rice rest, covered, for an additional 15 minutes. This resting period allows the grains to steam in their own moisture and absorb any remaining liquid.
Resist the temptation to peek during this time. The steam trapped inside continues cooking the rice and prevents a gummy texture. You’ll know it’s ready when you can fluff the grains with a fork and they separate easily.
Step 4: Fluff and Garnish for Serving
Gently fluff the cooked rice with a fork to separate the grains and release excess steam. The rice should be tender but still have a slight chew, with a nutty aroma from the brown rice and sesame oil.
Transfer to a serving bowl and garnish with 1 tbsp Sesame Seeds and 3 whole Scallions for a fresh finish. The sesame seeds add a toasty crunch while the scallions provide a bright contrast to the rich, savory rice.
Pro Tips For Making Korean Brown Rice
- Soak the Rice: Cover short-grain brown rice with water for at least 30 minutes before cooking—I learned this the hard way after too many chewy batches.
- Use More Water: Brown rice needs about 1.5 times more water than white rice, so don’t skimp or you’ll end up with undercooked grains.
- Toast Before Boiling: Heat the drained rice in the pot for 2 minutes with a drizzle of sesame oil to bring out its nutty flavor before adding liquid.
- Rest After Cooking: Let the rice sit covered for 10 minutes off the heat—this guarantees it steams evenly and absorbs any remaining moisture.
Serving Suggestions for This Recipe
Bowl Presentation
Serve this dish in a shallow wooden bowl to highlight its rustic appeal. The natural grain of the wood complements the earthy tones of the brown rice beautifully. I love using my hand-carved Korean rice bowls for an authentic touch. 💛
Protein Pairings
Top with grilled bulgogi beef or spicy tofu for a complete meal. The savory proteins balance the nutty rice perfectly. For vegetarians, mushroom bulgogi adds a meaty texture without overpowering the dish.
Kimchi Side
Always serve with fresh kimchi on the side. Its tangy crunch cuts through the richness of the rice. I recommend Napa cabbage kimchi for its mild heat and bright color contrast.
Soup Complement
Pair with a light doenjang jjigae (soybean paste stew) or miso soup. The warm broth complements the chewy rice texture. These soups also help stretch the meal for larger gatherings.
Garnish Options
Beyond sesame seeds and scallions, try adding furikake for extra umami or pickled radish for a pop of color. A drizzle of toasted sesame oil just before serving enhances the aroma. 🌟
Family Style
For group meals, present the rice in a large stone pot at the table. The residual heat keeps it warm throughout the meal. I find this encourages sharing and creates a cozy, communal dining experience.
Nutrition Facts
Frequently Asked Questions
Why toast the rice before cooking?
Toasting enhances the nutty flavor and aroma of brown rice. This step takes just 2-3 minutes in a dry pot before adding liquids, unlocking deeper taste. It’s a game-changer for texture too.
Can I use white rice instead?
Yes, but reduce water to 3.5 cups and cook time to 20 minutes. The flavor will be milder, as white rice lacks the chewy texture and depth of brown rice.
What if my rice turns out mushy?
This usually means too much water or lifting the lid during cooking. Stick to 4.5 cups liquid and avoid peeking for best results. Resting 15 minutes after cooking also helps.
How do I adjust the spice level?
Start with ½ tsp gochugaru for mild heat, or omit it entirely for no spice. For extra kick, add up to 1.5 tsp. Taste the cooking liquid before adding rice to gauge heat.

- Mujadara Rice and Lentils Recipe: Earthy Spiced Lentils With Caramelized Onions - November 1, 2026
- Naija Fried Rice Recipe: Street-Style Spice With Veggie Crunch - November 1, 2026
- Mushy Rice Recipe: Fluffy Grains Transformed in Minutes - November 1, 2026