
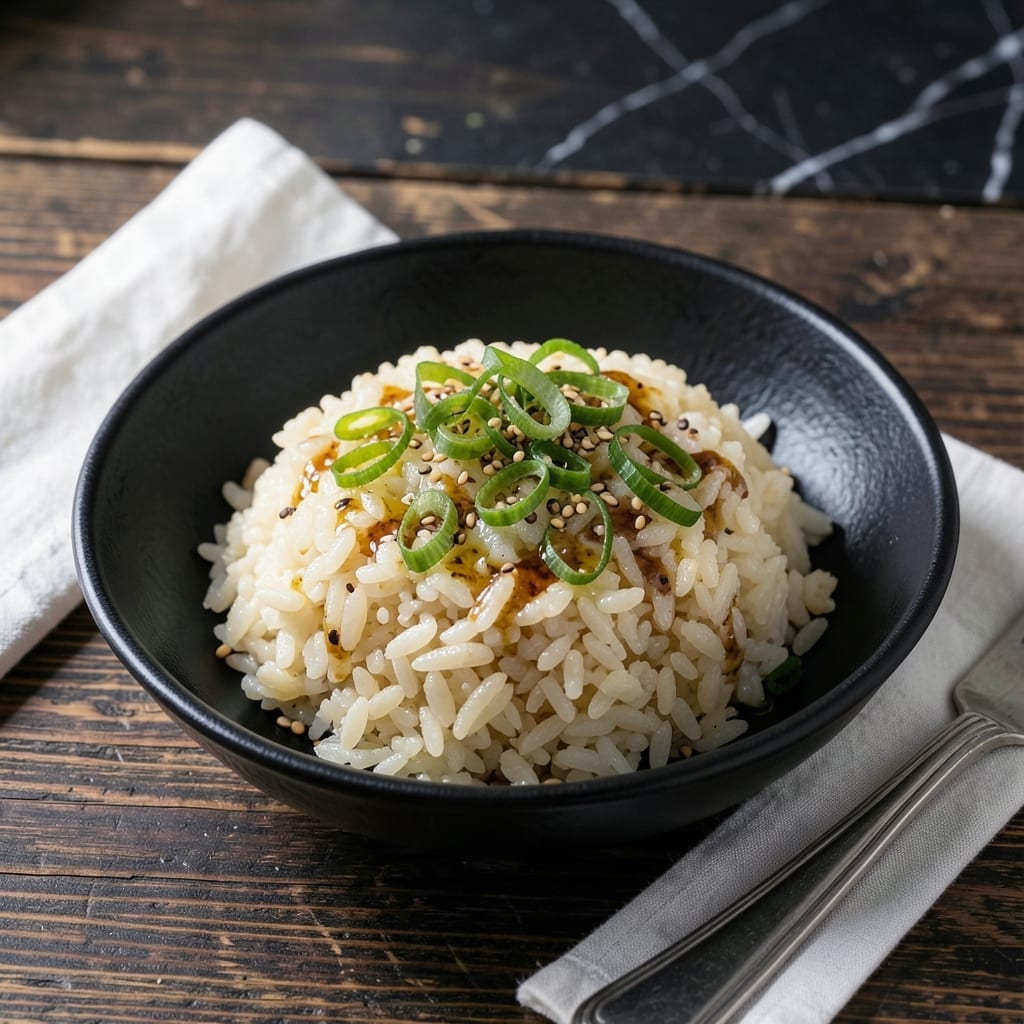
This Korean-style sushi rice delivers the perfect balance of chewy texture and sweet vinegar gloss that makes every bite irresistible. The secret lies in the precise ratio of rice to seasoning, creating a base that’s sticky yet distinct.
I’ve refined this method to ensure consistent results, whether you’re making kimbap or serving it as a side. The vinegar mixture adds just the right amount of tang and sweetness without overpowering the rice’s natural flavor.
The process is straightforward but requires attention to detail. Rinsing the rice properly and using the correct water ratio are crucial for achieving that signature tender yet firm consistency.
This versatile rice pairs beautifully with grilled meats, vegetables, or as the foundation for your favorite Korean rolls. The glossy finish makes it as appealing to the eye as it is to the palate.
Ingredients for Korean Sushi Rice
Nine simple ingredients create that signature chewy, glossy Korean sushi rice everyone loves.
| Ingredient | Amount | Notes |
|---|---|---|
| Short-Grain White Rice 🍚 | 2 cups | Sushi rice variety preferred |
| Water 💧 | 2 ½ cups | For rinsing and cooking |
| Rice Vinegar 🍶 | ½ cup | Seasoned variety preferred |
| Granulated Sugar 🍬 | 3 tbsp | Dissolved in vinegar mixture |
| Kosher Salt 🧂 | 1 ½ tsp | Diamond Crystal preferred |
| Toasted Sesame Oil 🫒 | 1 tbsp | For finishing gloss |
| Sesame Seeds 🌰 | 1 tbsp | Toasted, for garnish |
| White Sugar 🍬 | 1 tbsp | Optional, for extra sweetness |
| Rice Wine Vinegar 🍶 | 2 tbsp | Alternative to rice vinegar |
The rice is non-negotiable here. Short-grain Japanese or Korean sushi rice gives you that sticky, chewy texture—jasmine or basmati won’t cut it. I grab mine from H Mart or the Asian aisle at Whole Foods. Look for brands like Nishiki or Kokuho Rose. The vinegar matters too—seasoned rice vinegar already has sugar and salt, but plain works if that’s what you’ve got (adjust sweetness to taste).
No rice vinegar? Apple cider vinegar plus a pinch of sugar in a pinch. Out of sesame oil? Skip it—it’s a finish, not essential. The sugar can be swapped for mirin or honey (use 2 tbsp per 3 tbsp sugar). If you’re making kimbap, toasted sesame seeds add that nutty crunch. The salt should be kosher—table salt is too harsh and hard to measure right.
Uncooked rice keeps indefinitely in a sealed container (just check for bugs). Cooked rice stays fresh for 2-3 days in the fridge, but it’s best used the day it’s made. Freeze portions for up to 1 month—thaw in the fridge overnight before using.
Why You’ll Love This Recipe
- One Pot Magic: I just dump everything in my rice cooker and let it do the work—no stirring, no fuss.
- Sweet-Tangy Balance: The rice vinegar and sugar mix hits that perfect sticky-sweet note every time.
- Kimbabwe Meal Prep: I make a big batch Sunday and it stays fresh all week for quick lunches.
- Budget Stretcher: A pound of short-grain rice and a few pantry staples feed my family for days.
Step-by-Step Instructions for Korean Sushi Rice
This method delivers that signature chewy texture and glossy finish you expect from the best versions.
Step 1: Rinse and Cook the Rice
Place the 2 cups Short-Grain White Rice in a fine-mesh strainer and rinse under cold water, swirling with your hand. The water should run clear after 4-5 rinses. This removes excess starch that would make the rice gummy rather than sticky.
Add the drained rice to your rice cooker with the 2.5 cups Water. Cook according to your rice cooker’s standard setting. When done, let it steam for an additional 10 minutes with the lid closed—this ensures even moisture distribution.
Step 2: Prepare the Seasoning Mixture
In a small saucepan, combine the 0.5 cup Rice Vinegar, 3 tbsp Granulated Sugar, and 1.5 tsp Kosher Salt. Heat over medium-low heat just until the sugar and salt dissolve completely, about 2-3 minutes. Don’t let it boil.
For extra sweetness, stir in the 1 tbsp White Sugar until dissolved. If using 2 tbsp Rice Wine Vinegar as an alternative, simply swap it for an equal amount of rice vinegar in this mixture. Remove from heat and let cool slightly.
Step 3: Fold in the Seasoning
Transfer the warm cooked rice to a large wooden bowl or glass dish. Using a rice paddle or silicone spatula, gently fold in the vinegar mixture in a cutting motion. Be thorough but delicate—you want to coat every grain without mashing the rice.
A wooden bowl helps absorb excess moisture, but a glass dish works fine too. The rice should look glossy and slightly sticky, with no dry patches. This folding process is what gives the rice its characteristic texture and sheen.
Step 4: Add the Finishing Touches
Drizzle the 1 tbsp Toasted Sesame Oil over the rice and fold gently to distribute. The oil adds a subtle nutty aroma and extra gloss. You’ll notice the rice becomes even more fragrant at this stage.
Finally, sprinkle the 1 tbsp Sesame Seeds over the top and fold once more. The seeds add texture and visual appeal. Let the rice sit at room temperature for 10 minutes to allow the flavors to meld before serving.
Pro Tips For Making Korean Sushi Rice
- Rinse the Rice: Wash the short-grain rice in 3-4 changes of cold water until it runs nearly clear—I learned this the hard way after ending up with gummy rice that had a starchy aftertaste.
- Use Rice Vinegar Right: Heat the rice vinegar, sugar, and salt together just until dissolved, then cool before folding into the rice; this keeps the grains from turning mushy.
- Skip the Overmixing: Fold the seasoning gently with a cutting motion instead of stirring—after ruining a batch by overworking it, I now treat the rice like a delicate soufflé.
- Rest Before Serving: Let the seasoned rice sit covered for 10 minutes before using; sounds weird, but it works—the grains absorb the flavors and hold their shape better when rolled.
Make-Ahead Tips for Leftovers
Prep Ahead Strategy
You can rinse the 2 cups Short-Grain White Rice up to 12 hours in advance and store it soaked in cold water in the fridge. This actually improves texture by starting the hydration process early. Just drain and cook as usual when ready. 💡
Cooking in Batches
Make a double or triple batch for the week—cooked rice keeps beautifully. I use my Zojirushi rice cooker which has a keep-warm function that maintains perfect texture for 4-6 hours after cooking.
Fridge Storage
Store cooled rice in airtight containers for up to 3 days. Press plastic wrap directly on the surface to prevent drying. The flavors intensify overnight as the seasoning absorbs deeper into each grain.
Freezing for Later
Portion cooked, seasoned rice into freezer bags, pressing flat to save space. Freeze for up to 1 month. Thaw overnight in the fridge, then microwave with a damp paper towel for 1-2 minutes to restore moisture.
Reheating Tips
For best texture, reheat in a skillet with 1 tbsp water over medium-low heat for 3-4 minutes, stirring constantly. This revives the stickiness better than a microwave. Add a drizzle of toasted sesame oil to refresh the gloss. ❄️
Make-Ahead Seasoning
Mix the vinegar, sugar, and salt seasoning up to 1 week ahead and store in the fridge. This saves time on busy days. Just warm slightly before folding into freshly cooked rice to help it incorporate smoothly.
Nutrition Facts
Frequently Asked Questions
Can I use regular vinegar instead of rice vinegar?
Yes, but adjust the sweetness. Use apple cider vinegar with an extra 1 tbsp sugar per 0.5 cup. The flavor will be slightly sharper but still works well.
Why do I need to rinse the rice?
Rinsing removes excess starch that would make the rice gummy instead of sticky. Stop when the water runs clear, usually after 4-5 rinses. This step is crucial for the right texture.
Can I make this in a pot instead of a rice cooker?
Use a heavy pot with a tight lid. Combine rice and water, bring to a boil, then reduce to low heat for 15 minutes. Let it steam off-heat for 10 minutes.
How do I fix rice that’s too dry?
Sprinkle 1-2 tbsp water over the rice and fold gently. Let it sit covered for 5 minutes to absorb. Avoid adding too much liquid at once.

- Mujadara Rice and Lentils Recipe: Earthy Spiced Lentils With Caramelized Onions - November 1, 2026
- Naija Fried Rice Recipe: Street-Style Spice With Veggie Crunch - November 1, 2026
- Mushy Rice Recipe: Fluffy Grains Transformed in Minutes - November 1, 2026