
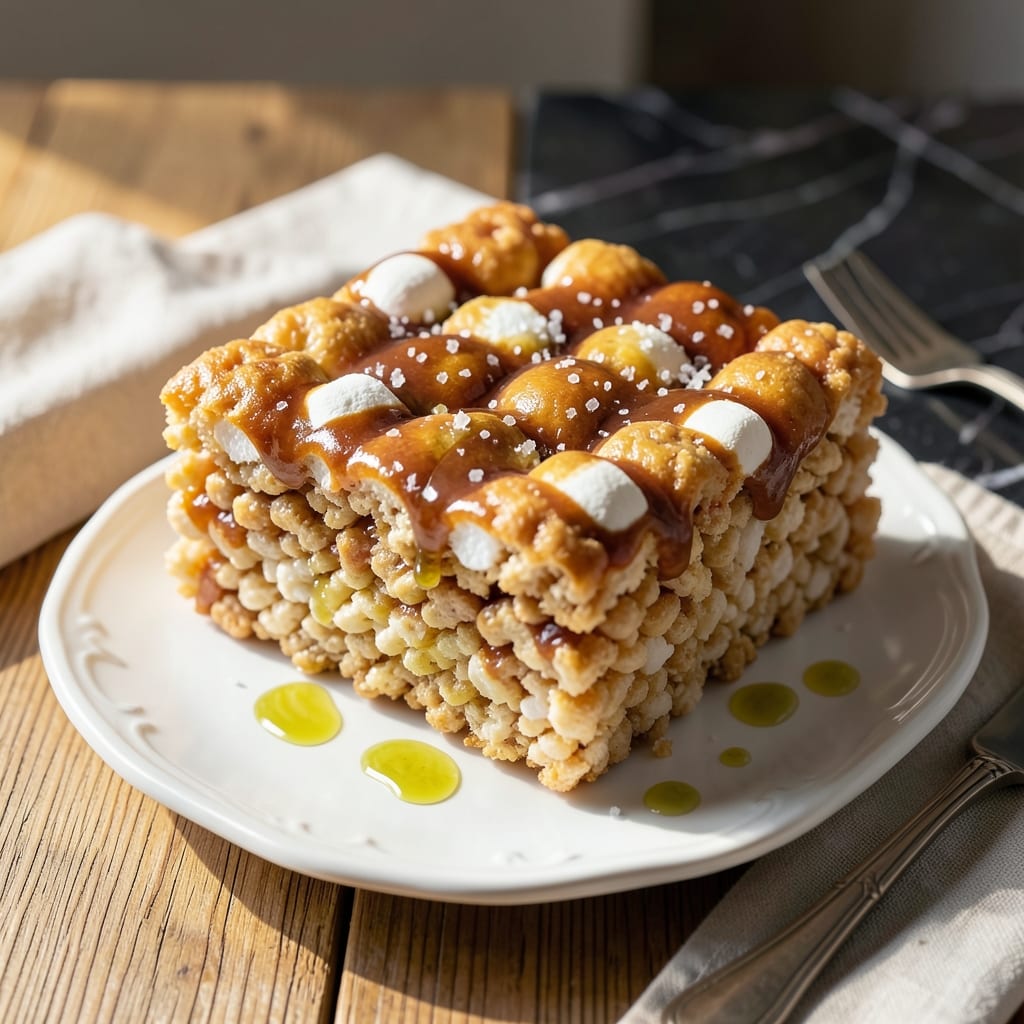
This recipe delivers perfectly gooey Rice Krispie treats that hold their shape while staying irresistibly soft inside. I developed this large-batch version after years of making small, inconsistent pans that never satisfied a crowd.
The secret is precise butter-to-marshmallow ratios and proper melting technique. Many recipes underestimate how much marshmallow is needed to achieve that signature stretchy texture without becoming rock-hard when set.
You’ll end up with a full sheet pan of treats with crispy edges, chewy centers, and that nostalgic snap of cereal in every bite. The marshmallows melt into a glossy blanket that binds the cereal without overwhelming it.
Ideal for parties, bake sales, or when you need enough to share. Here’s how to make them right every time.
Ingredients for Large Rice Krispie Treat
Six simple ingredients, one massive batch of nostalgic, crowd-pleasing perfection.
| Ingredient | Amount | Notes |
|---|---|---|
| Rice Krispies Cereal 🥣 | 12 cups | Crisp rice cereal, name brand preferred |
| Mini Marshmallows ⚪ | 20 oz | About 10 cups, fresh for best melt |
| Unsalted Butter 🧈 | 1 cup | 2 sticks, for binding |
| Vanilla Extract 🌿 | 2 tsp | Pure extract for depth |
| Fine Sea Salt 🧂 | 1 tsp | Balances sweetness perfectly |
| Light Corn Syrup 💧 | ¼ cup | Optional for extra chewiness |
The marshmallows are non-negotiable here. Jet-Puffed or Kraft brands melt the smoothest—avoid the off-brands that turn grainy. Mini marshmallows dissolve faster and more evenly than large ones, which means fewer hot spots in your pan. For the cereal, Kellogg’s Rice Krispies have the right texture (trust me, generics don’t snap the same). Butter quality matters less here since it’s just a binder, so store brand is totally fine.
No mini marshmallows? Large ones work in a pinch—just give them extra time to melt completely. Want to swap the cereal? Crispix or Corn Flakes give a different texture but still work. Skip the corn syrup if you want, but it adds that classic sticky chew. For a richer flavor, brown the butter slightly before melting (worth the extra minute).
These keep at room temperature in an airtight container for up to 3 days—if they last that long. For longer storage, wrap individual treats in plastic and freeze for 6 weeks. Pro tip: press them into the pan with buttered hands to avoid sticking.
Why You’ll Love This Recipe
- One Bowl Wonder: I melt the butter, toss in the marshmallows, and stir in the cereal—no fancy equipment, just a spatula and a big bowl.
- Buttery Vanilla Magic: The vanilla and salt make the buttery marshmallow flavor pop in a way that’ll have you sneaking seconds before they’re even set.
- Feeds a Crowd: I make this for every potluck, birthday, or lazy Sunday—one batch fills a 9×13 pan and disappears fast.
- Pantry Staples Only: Rice Krispies, marshmallows, butter—things I always have on hand. Honestly, this might be the cheapest treat I make that still feels special.
Step-by-Step Instructions for Large Rice Krispie Treats
This method guarantees that perfect balance of crisp edges and gooey centers every time.
Step 1: Melt the Butter and Prepare the Base
In a large, heavy-bottomed pot, melt the 1 cup Unsalted Butter over low heat. I always use a light-colored pot here—it helps you monitor the butter’s color and prevent burning.
Once the butter is fully melted and just starting to foam, stir in the 0.25 cup Light Corn Syrup. The corn syrup adds that extra chewiness we’re after. Let this mixture bubble gently for 1-2 minutes—you’re not looking for browning, just ensuring everything is fully combined and hot.
This low and slow start prevents scorching and ensures all your Rice Krispies Cereal will get evenly coated later. Trust me, burnt butter will ruin the whole batch, so keep that heat gentle.
Step 2: Incorporate Marshmallows for Optimal Melt
Add all 20 oz Mini Marshmallows at once. I know it seems like a lot, but mini marshmallows melt faster and more evenly than regular ones. Stir constantly with a silicone spatula, scraping the bottom of the pot to prevent hot spots.
After about 3-4 minutes, the marshmallows will begin to collapse. Keep stirring until the mixture is completely smooth with no lumps—this usually takes 5-6 minutes total. The mixture should look glossy and pull away slightly from the sides of the pot.
Here’s the thing—if your marshmallows aren’t fresh, they might take longer to melt or leave stubborn bits. Fresh marshmallows make all the difference in achieving that perfect silky texture.
Step 3: Flavor and Combine with Cereal
Remove the pot from heat and immediately stir in the 2 tsp Vanilla Extract and 1 tsp Fine Sea Salt. The vanilla adds depth that cuts through the sweetness, while the salt enhances all the flavors.
Working quickly (the mixture will start to set as it cools), add all 12 cups Rice Krispies Cereal at once. Use a folding motion to combine everything evenly—press down gently as you stir to ensure every piece of cereal gets coated.
You’ll notice the cereal will start to make that signature snap, crackle, pop sound as it hits the hot marshmallow mixture. That’s your audio cue that you’re doing it right.
Step 4: Press and Set for Perfect Texture
Transfer the mixture to a well-greased 9×13-inch baking dish (or two if you prefer thinner treats). I like to use a piece of parchment paper lightly coated with cooking spray on top to press down—this prevents sticking to your hands or utensils.
Press the mixture evenly into the pan with firm, consistent pressure. Don’t over-compact it—you want the treats to hold together but still have some airiness. Use the edges of the parchment to help smooth the top into an even layer.
Let the treats cool at room temperature for 1-2 hours until completely set. You’ll know they’re ready when the top is firm to the touch and the edges have pulled slightly away from the pan. Resist the urge to cut too soon—this resting time is crucial for clean squares.
Step 5: Cut and Serve
Once fully set, use a sharp knife to cut into 24 equal squares. For clean cuts, dip your knife in hot water and wipe it between each slice. This prevents the marshmallow from sticking and dragging.
The treats should have a glossy sheen on the cut edges and hold their shape perfectly. Each square will have that ideal combination of crisp edges where the marshmallow caramelized slightly against the pan, with a gooey center that’s still slightly tacky to the touch.
Real talk: these are best enjoyed the same day, but they’ll keep in an airtight container for up to 3 days if you can wait that long.
Pro Tips For Making Large Rice Krispie Treat
- Melt Butter Slowly: Use low heat when melting the butter for your marshmallow mixture—high heat can cause the sugar in the marshmallows to caramelize too quickly, making the treats harder to shape.
- Use Fresh Marshmallows: Mini marshmallows can dry out over time, so check the bag’s freshness date; stale ones won’t melt as smoothly and can leave your treats grainy.
- Press While Warm: Start pressing the mixture into the pan immediately after combining—waiting even 2-3 minutes makes it harder to spread evenly without crushing the cereal.
- Butter Your Hands: Lightly coat your hands with butter before pressing the mixture—this keeps it from sticking and makes the process way less messy.
Common Mistakes When Making This Recipe
Under-Melting Marshmallows
Many people rush the marshmallow melting process, leading to lumpy treats. The marshmallows need 5-6 minutes of constant stirring over low heat to fully dissolve. I’ve ruined batches by cranking the heat—patience is key for that silky texture. 🔥
Skipping the Butter
Some try to reduce fat by cutting the 1 cup Unsalted Butter, but this is a mistake. The butter coats the cereal and prevents sogginess. Without it, your treats will be dry and crumbly. Stick to the full amount for the best results.
Over-Packing the Pan
Pressing too hard while packing the mixture into the 9×13-inch baking dish makes dense, rock-hard treats. Use firm but gentle pressure to keep them airy. I use buttered hands or a parchment paper press for even distribution.
Using Stale Cereal
Old Rice Krispies Cereal loses its snap, making your treats less crispy. Always check the freshness date and store cereal in an airtight container. Fresh cereal ensures that signature crackle in every bite. ✨
Cutting Too Soon
Slicing before the treats are fully set leads to messy, uneven squares. Let them cool for 1-2 hours until firm to the touch. I wait until the edges pull away from the pan for clean cuts.
Ignoring the Corn Syrup
The ¼ cup Light Corn Syrup isn’t just optional—it adds chewiness. Skipping it results in treats that are too firm. If you must omit it, add 1 extra cup of marshmallows for similar texture.
Nutrition Facts
Frequently Asked Questions
How do I store these for maximum freshness?
Keep them in an airtight container at room temperature for up to 3 days. For longer storage, wrap individual squares in plastic and freeze for up to 6 weeks.
Can I use regular marshmallows instead of mini?
Yes, but they’ll take longer to melt. Give them 7-8 minutes of constant stirring over low heat to avoid lumps. Mini marshmallows dissolve faster and more evenly.
What size pan should I use for this batch?
A 9×13-inch baking dish works perfectly for this recipe. For thinner treats, divide the mixture between two pans. Press gently to avoid dense squares.
Why did my treats turn out hard?
Over-packing the mixture or using stale cereal can cause this. Press firmly but gently, and always check the cereal’s freshness date.

- Peri Peri Rice Recipe: Spicy Portuguese One-Pot Harmony - November 6, 2026
- Mexican Flavoured Rice Recipe: Authentic Spice-Infused One-Pot Meal - November 6, 2026
- Lao Gan Ma Fried Rice Recipe: Spicy Wok-Tossed Perfection - November 6, 2026