
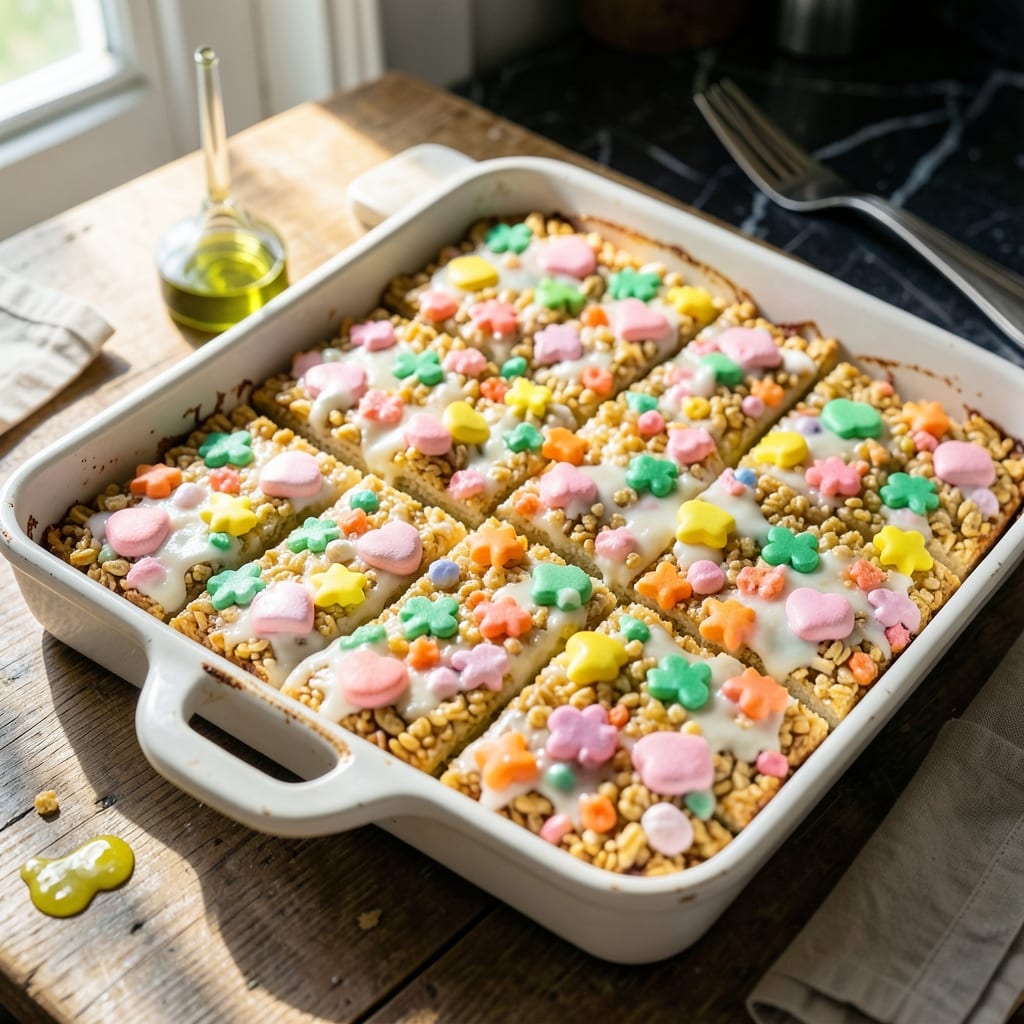
There’s something irresistibly fun about transforming a childhood cereal into a nostalgic treat that’s even better than the original. This version takes the classic Rice Krispie base and elevates it with the colorful charm of Lucky Charms for a playful twist.
The secret lies in the balance between melty marshmallows and crispy cereal, ensuring every bite delivers that signature crispy texture. I’ve tested this method repeatedly to guarantee the marshmallows stay gooey without making the treats too dense.
What you get is a batch of vibrant, marshmallow-studded squares with just the right amount of crunch. The Lucky Charms add bursts of color and a hint of sweetness that makes these treats impossible to resist.
Perfect for parties, snack time, or whenever you need a little magic in your day. Here’s how to make them right.
Ingredients for Lucky Charm Rice Crispy Treats
A colorful twist on a classic with two cereals and plenty of gooey marshmallows.
| Ingredient | Amount | Notes |
|---|---|---|
| Lucky Charms Cereal 🥣 | 6 cups | Marshmallows included for color |
| Rice Krispies Cereal 🥣 | 6 cups | Plain, not coated variety |
| Mini Marshmallows 🍬 | 10 cups | Fresh for best melt |
| Unsalted Butter 🧈 | ½ cup | For melting with marshmallows |
| Vanilla Extract 🌿 | 1 tsp | Pure extract preferred |
| Salt 🧂 | ¼ tsp | Fine grain sea salt |
| Vegetable Oil 🫒 | 1 tsp | For greasing pan |
| Powdered Sugar 🍚 | ¼ cup | Optional for dusting |
The cereal is key here. Lucky Charms and Rice Krispies balance color and crunch—check the box dates for freshness. I grab mine from Target or Walmart (their store brands work fine). For marshmallows, Jet-Puffed or Kraft are reliable. The butter should be unsalted so you control the salt content. Always use a light-colored pan for even melting (dark pans can burn the marshmallow mixture).
Out of mini marshmallows? Regular marshmallows cut into quarters work in a pinch. No Rice Krispies? Corn Chex or plain Cheerios substitute well. Skip the vanilla if you must, but it adds depth. For a vegan version, use Dandies marshmallows and Earth Balance butter. The salt is optional but enhances all the flavors—don’t skip it unless you’re watching sodium.
These keep 3-4 days at room temperature in an airtight container. For longer storage, wrap individually and freeze for up to 2 months. Press gently when shaping—too much pressure makes them dense. Let them cool completely before cutting for clean squares.
Why You’ll Love This Recipe
- One Pot Wonder: I melt the butter and marshmallows in a single saucepan, then stir in the cereals—no extra bowls, no fuss.
- Marshmallow Magic: That first bite with the toasted marshmallow gooeyness and the crunch of Lucky Charms? Ridiculously good.
- Party Hit: Between us, I’ve brought these to three potlucks this month and come home with an empty tray each time.
- Budget Friendly: A box of cereal and a bag of mini marshmallows feed a crowd for under ten bucks.
Step-by-Step Instructions for Lucky Charm Rice Crispy Treats
Here’s my foolproof method for creating these colorful, crispy treats with perfect texture every time.
Step 1: Prepare Your Pan and Measure Cereals
Lightly grease a 9×13-inch baking pan with the 1 tsp Vegetable Oil, making sure to coat the bottom and sides evenly. This prevents sticking and makes cutting easier later. I like to use a paper towel to spread it thinly and uniformly.
In a large bowl, combine the 6 cups Lucky Charms Cereal and 6 cups Rice Krispies Cereal. The Lucky Charms add those iconic marshmallow bits and rainbow colors, while the Rice Krispies provide that classic crispy texture we all love.
Step 2: Melt Butter and Marshmallows with Flavorings
In a large pot, melt the 0.5 cup Unsalted Butter over low heat. Once melted, add the 10 cups Mini Marshmallows and stir constantly with a silicone spatula. The marshmallows will begin to soften and melt within 3-4 minutes.
As soon as the mixture is about 75% melted, add the 1 tsp Vanilla Extract and 0.25 tsp Salt. The vanilla enhances the sweetness, while the salt balances the flavors. Continue stirring until the mixture is completely smooth and no marshmallow lumps remain—this should take another 1-2 minutes.
Step 3: Combine Cereal and Marshmallow Mixture
Immediately pour the melted marshmallow mixture over the cereal in the large bowl. Using the same spatula, fold everything together gently but thoroughly. You want every piece of cereal coated with the marshmallow mixture, but avoid crushing the cereal—this preserves the crispy texture.
Work quickly here, as the mixture will begin to set as it cools. I find it helpful to use a second spatula to press down and ensure even distribution. The mixture should look glossy and uniform when properly combined.
Step 4: Press into Pan and Cool
Transfer the mixture to your prepared pan. Using the spatula or lightly greased hands, press it down firmly and evenly into all corners. For extra crispy edges, press slightly harder around the perimeter of the pan.
Let the treats cool at room temperature for at least 30 minutes. This allows them to set properly so they hold their shape when cut. If you’re impatient (I get it), you can refrigerate for 15 minutes, but room temperature cooling yields the best texture.
Step 5: Cut and Finish with Optional Dusting
Once completely cool, use a sharp knife to cut into 16 equal squares. For clean cuts, I run the knife under hot water between each slice. This prevents sticking and gives you those perfect edges.
If desired, lightly dust the treats with the 0.25 cup Powdered Sugar for a finishing touch. This adds a subtle sweetness and makes them look extra festive. Serve immediately or store in an airtight container for up to 3 days.
Pro Tips For Making Lucky Charm Rice Crispy Treats
- Melt Butter Slowly: Use low heat when melting the butter for your marshmallow mixture—high heat can cause the sugar in the marshmallows to burn, giving your treats a bitter taste.
- Sort the Marshmallows: Pick out the extra colorful Lucky Charms marshmallows if you want a more uniform look, or leave them in for bursts of flavor—I learned this the hard way when my first batch looked like a rainbow explosion.
- Press While Warm: Press the cereal mixture into the pan while it’s still warm and sticky, about 2-3 minutes after mixing, or it’ll harden too fast and crumble when you try to shape it.
- Add Vanilla Last: Stir in the vanilla extract after removing the marshmallow mixture from heat—adding it too early can cause the alcohol to evaporate, leaving your treats tasting flat.
Best Sauces and Condiments for This Recipe
Chocolate Drizzle
Melt 1 cup chocolate chips with 1 tbsp coconut oil in 30-second intervals in the microwave. Drizzle over cooled treats for a rich, indulgent addition. The coconut oil keeps the chocolate smooth and glossy. 💫
Caramel Sauce
Warm ½ cup store-bought caramel in the microwave for 20-30 seconds until pourable. Drizzle lightly over treats for a gooey, buttery contrast to the crispy cereal. I love using Smucker’s brand for consistent quality.
Vanilla Glaze
Mix 1 cup powdered sugar with 2 tbsp milk and ½ tsp vanilla extract until smooth. Drizzle over treats for a sweet, creamy finish. Adjust milk for desired consistency.
Peanut Butter Drizzle
Combine ½ cup creamy peanut butter with 2 tbsp honey and 1 tbsp milk, then microwave for 20 seconds. Stir well and drizzle for a nutty, sweet crunch. 🥜
White Chocolate Swirl
Melt 1 cup white chocolate chips and drizzle over treats. Sprinkle with rainbow sprinkles while still wet for extra color and fun. White chocolate adds a creamy sweetness that kids adore.
Fruit Compote
Simmer 1 cup frozen berries with 2 tbsp sugar until thickened. Cool slightly, then spoon over treats for a fresh, fruity contrast. Strawberry or raspberry compote pairs especially well.
Nutrition Facts
Frequently Asked Questions
Can I use regular marshmallows instead of mini?
Yes! Cut 10 cups of regular marshmallows into quarters for even melting. They’ll work just as well, though minis melt faster and more uniformly.
How do I keep the treats from getting hard?
Press lightly when shaping and store in an airtight container at room temperature. Over-pressing or refrigerating can make them dense and chewy.
Can I make these ahead of time?
Prepare up to 2 days in advance. For longer storage, freeze for up to 2 months—thaw at room temperature before serving.
What’s the best way to cut clean squares?
Use a sharp knife dipped in hot water between cuts. This prevents sticking and gives you perfect edges every time.

- Mujadara Rice and Lentils Recipe: Earthy Spiced Lentils With Caramelized Onions - November 1, 2026
- Naija Fried Rice Recipe: Street-Style Spice With Veggie Crunch - November 1, 2026
- Mushy Rice Recipe: Fluffy Grains Transformed in Minutes - November 1, 2026