
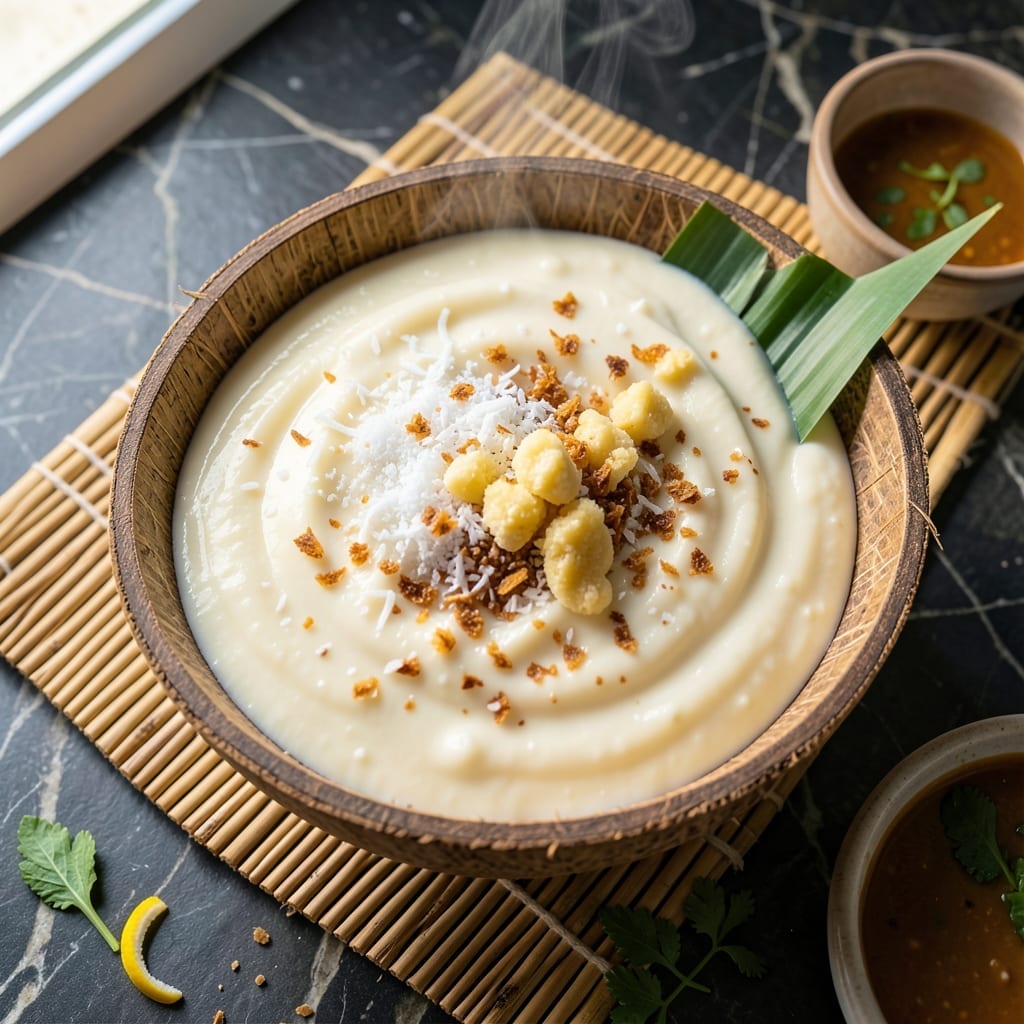
This traditional Filipino dessert delivers a creamy coconut custard that’s both rich and delicate. I’ve perfected this version using rice flour for a smooth, jelly-like texture that’s authentic to the classic recipe.
The key is slowly cooking the coconut milk mixture until it thickens just right. Pouring it into a greased pan and letting it set creates those signature square portions that everyone loves.
What you’ll get is a dessert that’s subtly sweet with a velvety coconut flavor. The rice flour base gives it that traditional consistency that’s firm enough to hold its shape yet soft enough to melt in your mouth.
Serve chilled for the best texture. This treat keeps well for days, making it perfect for gatherings.
Ingredients for Maja Blanca Rice Flour
Simple pantry staples create this velvety coconut custard everyone raves about.
| Ingredient | Amount | Notes |
|---|---|---|
| Rice Flour 🌾 | 1 cup | For authentic texture |
| Coconut Milk 🥥 | 2 cups | Full-fat for creaminess |
| Granulated Sugar 🍚 | ¾ cup | Adjust to taste preference |
| Water 💧 | 1 cup | For thinning mixture |
| Cornstarch 🌾 | 2 tbsp | Helps thicken custard |
| Vanilla Extract 🌿 | 1 tsp | Pure for best flavor |
| Salt 🧂 | ¼ tsp | Balances sweetness |
| Coconut Oil 🫒 | 1 tbsp | For greasing pan |
| Evaporated Milk 🥛 | 1 cup | Adds richness to custard |
| Lime Zest 🍈 | 1 tsp | Optional for brightness |
The coconut milk is non-negotiable here. Full-fat canned gives you that luxurious texture—light versions just don’t cut it. I grab Thai Kitchen or Native Forest brands when I’m at Whole Foods, but most grocery stores carry decent options. The rice flour is what sets this apart from other custards—Bob’s Red Mill is my go-to (the bag lasts forever in the pantry).
No rice flour? Cornstarch at double the amount works in a pinch, though the texture won’t be quite as authentic. Swap evaporated milk for whole milk or coconut cream if that’s what you’ve got. The sugar can be reduced a bit if you prefer less sweetness—just don’t go below half a cup. And if you’re feeling fancy, a splash of pandan extract adds a lovely floral note.
This sets beautifully in the fridge—cover with plastic wrap pressed right on the surface to prevent a skin from forming. Keeps for 5-7 days chilled, and honestly tastes even better after a day. Freeze for up to 3 months if you need to make ahead (thaw overnight in the fridge).
Why You’ll Love This Recipe
- One Bowl Wonder: I just dump rice flour, coconut milk, and sugar in a pot—no fancy steps, no mess.
- Coconut Cloud: That creamy coconut taste with the perfect wobble from the cornstarch? Pure comfort in every bite.
- Fiesta Ready: Potluck? Party? This sets in 2 hours and feeds a crowd without breaking the bank.
- Keeps Like a Dream: Honestly, it tastes even better the next day, and reheating takes 30 seconds in the microwave.
Step-by-Step Instructions for Creamy Coconut Custard Squares
Here’s how to make this luscious dessert with a smooth texture that melts in your mouth.
Step 1: Mix the Dry Ingredients
In a medium bowl, whisk together the 1 cup Rice Flour, 2 tbsp Cornstarch, 0.75 cup Granulated Sugar, and 0.25 tsp Salt. I like to sift the rice flour first to prevent lumps, which ensures a silky finish.
This combination of rice flour and cornstarch is what gives the custard its signature velvety texture. The sugar adds sweetness, while the salt balances it out perfectly. Stir until everything is evenly distributed and no streaks remain.
Step 2: Heat the Liquid Base
In a saucepan, combine the 2 cups Coconut Milk, 1 cup Evaporated Milk, and 1 cup Water. Heat over medium heat until the mixture just begins to simmer—you’ll see tiny bubbles forming around the edges.
I use full-fat coconut milk here for the richest flavor, and the evaporated milk adds a creamy depth you can’t skip. Keep an eye on it; you don’t want it to boil over. As soon as it’s hot, remove it from the heat and let it cool slightly for 2 minutes.
Step 3: Combine and Thicken the Mixture
Slowly pour the warm liquid mixture into the dry ingredients while whisking constantly. This prevents clumping and ensures a smooth batter. Once fully combined, add the 1 tsp Vanilla Extract and 1 tsp Lime Zest for brightness.
Return the mixture to the saucepan and cook over medium-low heat, stirring continuously with a wooden spoon. In about 8-10 minutes, it will thicken to the consistency of pudding. You’ll know it’s ready when it coats the back of the spoon and leaves a clear path when you run your finger through it.
Step 4: Pour and Set in the Pan
Grease an 8×8-inch baking pan with the 1 tbsp Coconut Oil, making sure to coat the bottom and sides evenly. Pour the thickened custard into the pan and smooth the top with a spatula.
Let it cool at room temperature for 30 minutes, then refrigerate for at least 2 hours (or overnight) until fully set. This chilling time is crucial—it transforms the mixture into firm, sliceable squares. Resist the urge to cut into it too soon!
Once set, slice into squares and serve chilled. The texture should be creamy and jiggly, with a subtle coconut aroma in every bite.
Pro Tips For Making Maja Blanca Rice Flour
- Stir Constantly: I learned this the hard way—once the rice flour hits the coconut milk mixture, keep stirring on medium-low heat until it thickens, or you’ll end up with lumpy maja blanca.
- Use Full-Fat Coconut Milk: Skip the light version; full-fat coconut milk gives the creamy texture that makes this dessert worth the effort.
- Dissolve Cornstarch First: Mix the cornstarch with a little cold water before adding it to the pot to prevent clumps from forming in your finished dish.
- Add Sugar Slowly: Sprinkle the granulated sugar gradually while stirring to guarantee it dissolves completely and avoids that grainy bite.
Essential Equipment for Great maja blanca rice flour
Mixing Bowls
I always start with a medium stainless steel mixing bowl for combining dry ingredients. It’s durable, easy to clean, and won’t react with acidic components. Look for one with a pour spout—it makes transferring the custard mixture cleaner.
Saucepan Selection
A heavy-bottomed 2-quart saucepan prevents scorching when heating the coconut milk base. I swear by All-Clad for even heat distribution. Avoid nonstick pans here since the wooden spoon can scratch the surface.
Whisking Tool
A balloon whisk is essential for breaking up lumps in the rice flour. I use a 10-inch whisk from OXO—it reaches all corners of the saucepan. The fine wires help create a silky batter. 🥥
Baking Pan
An 8×8-inch glass baking dish works perfectly for setting the custard. I prefer glass because you can see the edges to check doneness. Pyrex is my trusted brand—it handles temperature changes well.
Spray Bottle
For greasing the pan, a coconut oil spray gives even coverage. I use Chosen Foods brand. Alternatively, melt 1 tbsp coconut oil and brush it on with a pastry brush.
Wooden Spoon
A flat-edged wooden spoon is ideal for stirring the thickening custard. It scrapes the bottom effectively without scratching. I keep a dedicated spoon just for custards and puddings. 💛
Nutrition Facts
Frequently Asked Questions
Can I use cornstarch instead of rice flour?
Yes, but double the amount. Cornstarch works in a pinch though the texture won’t be as authentic. The rice flour gives that traditional velvety finish everyone loves.
How long does it take to set?
Refrigerate for at least 2 hours, or overnight for best results. This chilling time transforms the mixture into firm, sliceable squares. Don’t rush it!
Why did my custard turn out lumpy?
Lumps usually mean the rice flour wasn’t fully whisked into the liquid. Always sift the flour first and whisk constantly while combining. Cooking over medium-low heat helps too.
Can I make this dairy-free?
Just replace the evaporated milk with an additional 1 cup coconut milk. The result will be just as creamy and delicious.

- Lump Rice Recipe Sri Lanka: Traditional Island-Style Texture - November 4, 2026
- Laos Sticky Rice Recipe: Traditional Steamed Perfection - November 4, 2026
- Magic Rice Recipe: One-Pot Aromatic Wonder - November 4, 2026