
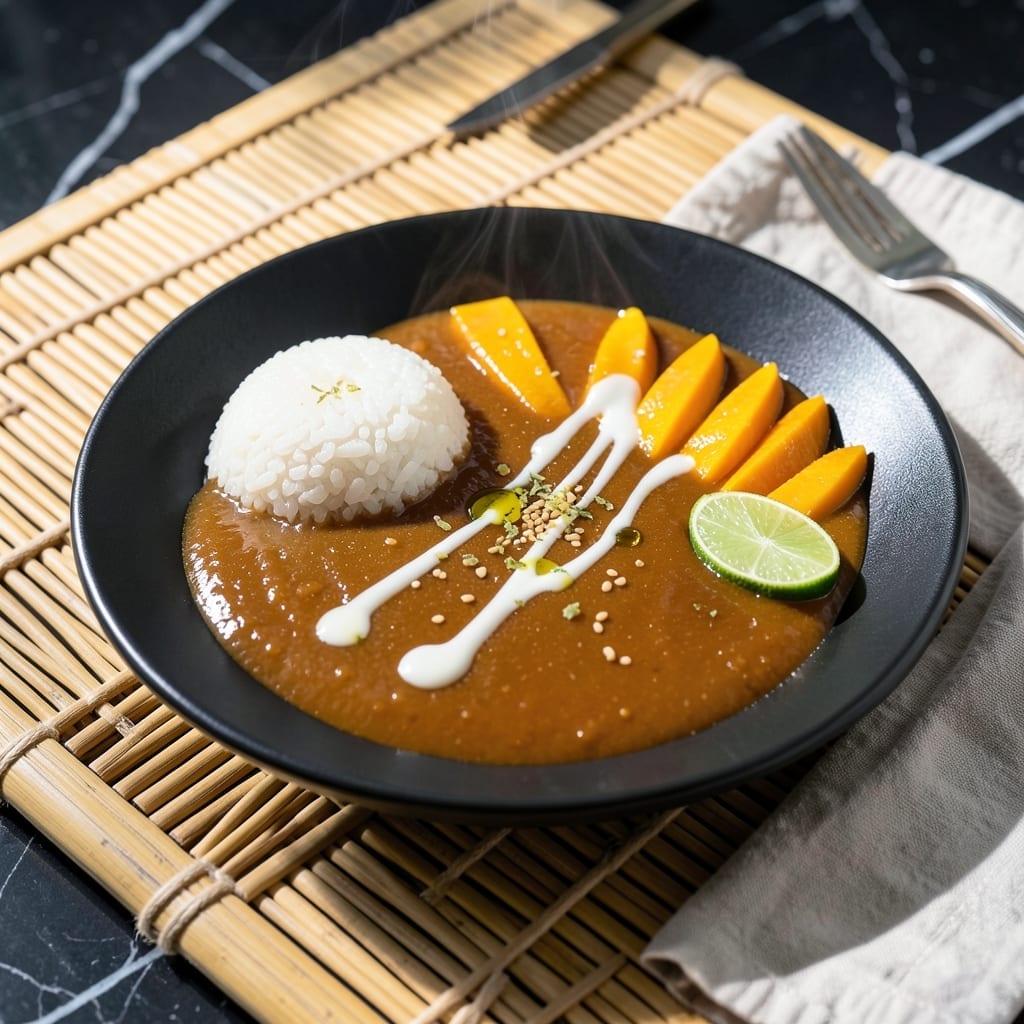
This syrup transforms mango sticky rice from delicious to extraordinary with its thick, glossy consistency and concentrated sweetness. I developed this version to achieve the perfect balance between floral sweetness and subtle tropical flavor.
The key is reducing the ingredients just enough to create a drizzle-worthy texture that clings beautifully to each bite of rice. Unlike thinner sauces, this version stays put, ensuring every forkful delivers maximum flavor impact.
What you get is a versatile glaze that’s not just for sticky rice—try it over ice cream, yogurt, or fresh fruit. The process takes 15 minutes and requires no special equipment, just patience and attention to detail.
Make a batch and store it in the fridge for up to two weeks. You’ll find yourself reaching for it often.
Ingredients for Mango Sticky Rice Syrup
Nine simple ingredients create a glossy, tropical glaze you’ll want on everything.
| Ingredient | Amount | Notes |
|---|---|---|
| Ripe Mango Puree 🥭 | 1 ½ cups | Fresh or high-quality frozen |
| Granulated Coconut Sugar 🥥 | ¾ cup | Or substitute light brown sugar |
| Coconut Milk 🥥 | ½ cup | Full-fat canned for richness |
| Pure Maple Syrup 🍁 | ¼ cup | Grade A dark for depth |
| Fresh Lime Juice 🍈 | 2 tbsp | Key for balancing sweetness |
| Vanilla Extract 🌿 | 1 tsp | Pure extract, not imitation |
| Sea Salt 🧂 | ¼ tsp | Fine grain for even distribution |
| Cornstarch 🌾 | 1 tsp | For thickening the glaze |
| Water 💧 | ¼ cup | To adjust consistency |
The mango is the soul here. Farmers market ripe mangoes yield the most vibrant puree, but frozen works in a pinch (just thaw and drain first). For the coconut milk, Thai Kitchen or Native Forest brands are my go-tos—skip the carton stuff. Coconut sugar adds a caramel depth you won’t get from white sugar, but light brown sugar is a solid backup (the molasses mimics the flavor).
No fresh mango? High-quality mango nectar (like Kern’s) works at a 1:1 ratio. Out of coconut milk? Heavy cream (for non-vegan) or coconut cream will thicken it up. The cornstarch is for that perfect drizzle—arrowroot powder at the same amount works too. If you’re skipping the vanilla, add a pinch of cinnamon for warmth instead.
This keeps beautifully in the fridge for 2 weeks—the flavor deepens over time. Freeze in ice cube trays for 3 months if you want longer storage. Always give it a good stir before using, as the coconut milk may separate (totally normal).
Why You’ll Love This Recipe
- One Pot Wonder: I just dump everything in a saucepan—mango puree, coconut sugar, the works—and let it simmer while I prep the rice.
- Tropical Explosion: The lime juice cuts through the sweetness of the coconut milk and mango, so every bite is bright and balanced.
- Dessert or Breakfast: I’ve drizzled this over pancakes, stirred it into oatmeal, even used it as a glaze for grilled chicken.
- Stores for Days: Honestly, it keeps in the fridge for a week, so I make a double batch and use it whenever I need a quick flavor boost.
Step-by-Step Instructions for Mango Sticky Rice Syrup
This method ensures a perfectly balanced, glossy glaze that clings beautifully to your favorite desserts.
Step 1: Combine the Base Ingredients
In a medium saucepan, combine the 1.5 cups Ripe Mango Puree, 0.75 cup Granulated Coconut Sugar, 0.5 cup Coconut Milk, and 0.25 cup Pure Maple Syrup. I like to use a whisk to break up any clumps in the puree and ensure everything blends smoothly before heating.
Place the saucepan over medium heat and stir gently as the mixture warms. You’ll notice the coconut sugar beginning to dissolve within 2-3 minutes. This step transforms your liquid ingredients into a cohesive base with a vibrant, golden-orange hue.
Step 2: Introduce the Bright and Aromatic Elements
Once the sugar fully dissolves, stir in the 2 tbsp Fresh Lime Juice, 1 tsp Vanilla Extract, and 0.25 tsp Sea Salt. The lime juice will brighten the flavors immediately, while the vanilla adds depth and warmth.
Let this simmer for 3-4 minutes until small bubbles form around the edges of the pan. Here’s the thing—this gentle simmer helps marry all the flavors, but you don’t want a rolling boil, which can cause the sugars to caramelize too quickly and create a bitter edge.
Step 3: Create the Slurry and Thicken the Syrup
In a small bowl, whisk together the 1 tsp Cornstarch and 0.25 cup Water until smooth. Slowly pour this slurry into the simmering mango mixture while stirring constantly. The cornstarch acts as a stabilizer, preventing separation and ensuring a velvety texture.
Continue to cook for 5-7 minutes, stirring frequently, until the syrup thickens enough to coat the back of a spoon. You’ll see it transform from a thin liquid into a luscious, glossy glaze that ribbons off your whisk.
Step 4: Cool and Check Consistency
Remove the saucepan from heat and let the syrup cool for 10 minutes. As it cools, it will thicken further. I’ve found that this resting period is crucial—it allows the cornstarch to fully activate and the flavors to meld into that perfect balance of sweet, tangy, and tropical.
Once cooled, give it a final stir. The syrup should be thick but still pourable. If it’s too thick, whisk in a splash of warm water to reach your desired consistency. This glaze will store in the refrigerator for up to 2 weeks, ready to elevate any dessert.
Pro Tips For Making Mango Sticky Rice Syrup
- Simmer Low and Slow: Keep the heat at a gentle simmer—too high and the coconut milk can curdle. I learned this the hard way after ruining a batch by cranking the heat to rush it.
- Strain the Mango: Push the ripe mango puree through a fine-mesh sieve to remove fibers. Sounds fussy, but it makes the syrup silky smooth instead of stringy.
- Skip the Boil: Never let the mixture reach a full boil once the coconut milk goes in—it’ll separate. A low, steady heat is the only way to keep it creamy.
- Add Lime Last: Stir in the fresh lime juice after removing the syrup from heat. Adding it earlier can make the coconut milk clump, and nobody wants lumpy syrup.
Essential Equipment for This Dish
Saucepan Selection
I always reach for my 2-quart stainless steel saucepan with a heavy bottom—it distributes heat evenly, preventing hot spots that could scorch your syrup. Brands like All-Clad or Cuisinart are excellent investments that last decades.
Whisk Matters
A flat-bottomed stainless steel whisk is my tool of choice for stirring the syrup as it thickens. It scrapes the bottom effectively while keeping the mixture smooth. Look for one with a comfortable handle since you’ll be stirring frequently.
Measuring Tools
Precise measurements are key for this syrup. I use clear glass measuring cups for the liquids and stainless steel measuring spoons for the smaller quantities. OXO makes great options with easy-to-read markings.
Heat Control
A reliable gas or induction cooktop gives you the best temperature control for this recipe. If using electric, opt for one with a simmer setting to maintain that gentle heat needed to prevent burning. 🔥
Cooling Setup
Have a wire cooling rack ready to place your saucepan on after cooking. This allows air circulation underneath, speeding up the cooling process. I also keep a heatproof silicone spatula nearby for final stirring.
Storage Containers
For storing your finished syrup, 8-ounce glass jars with airtight lids work perfectly. I prefer wide-mouth jars for easy pouring. Ball Mason jars are my go-to—they’re durable and dishwasher safe. ✨
Nutrition Facts
Frequently Asked Questions
Can I use fresh mango instead of puree?
Blend 2 ripe mangoes (peeled and pitted) until smooth for the perfect puree. Strain if you prefer a silky texture without fibers.
Why does my syrup turn out too thin?
This usually means it needs more cooking time. Simmer 2-3 minutes longer after adding the slurry, stirring constantly. The cornstarch needs heat to activate fully.
Can I make this without coconut milk?
Yes! Substitute with heavy cream for richness or coconut cream for a dairy-free option. The flavor will be slightly different but still delicious.
How do I fix syrup that’s too thick?
Whisk in warm water 1 tablespoon at a time until it reaches your desired consistency. Heat gently while stirring to blend smoothly.

- Peri Peri Rice Recipe: Spicy Portuguese One-Pot Harmony - November 6, 2026
- Mexican Flavoured Rice Recipe: Authentic Spice-Infused One-Pot Meal - November 6, 2026
- Lao Gan Ma Fried Rice Recipe: Spicy Wok-Tossed Perfection - November 6, 2026