
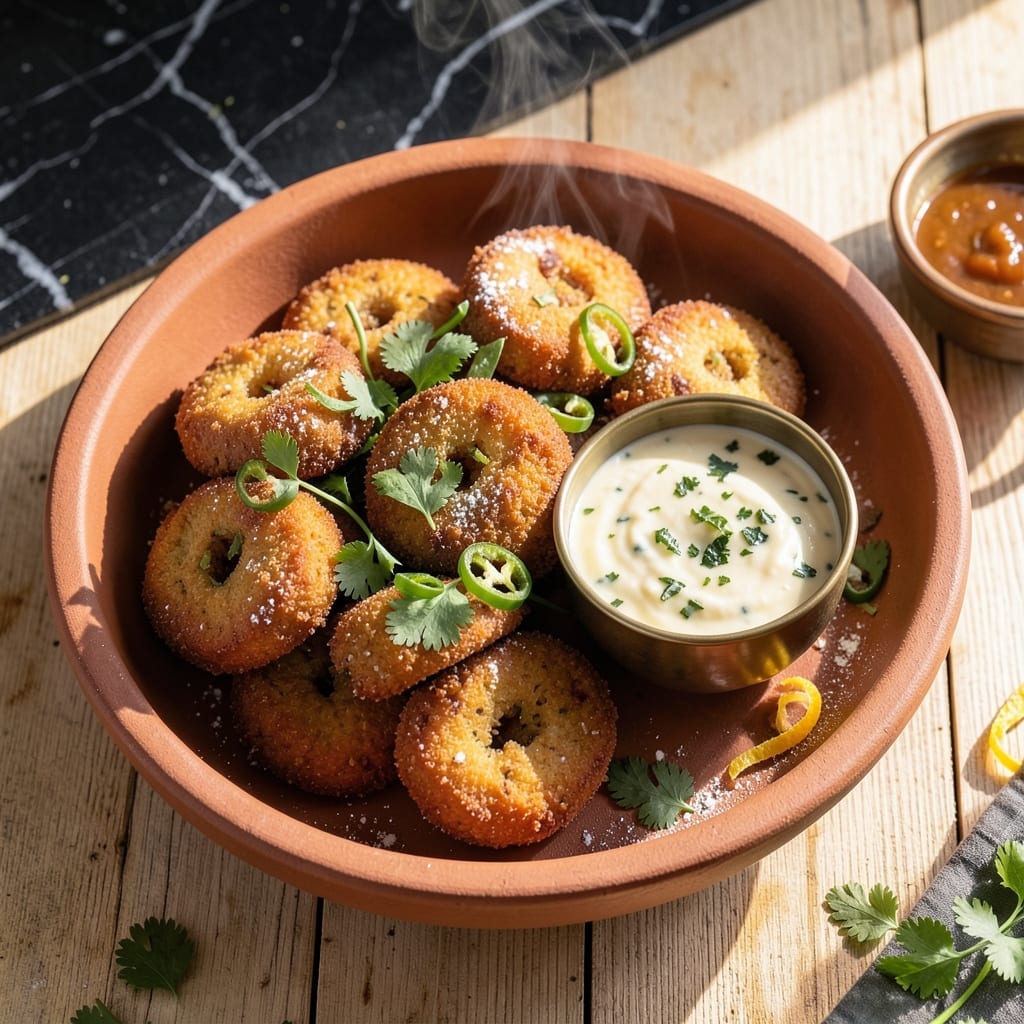
This rice flour adaptation of medu vada delivers the same crispy texture and authentic South Indian flavor you love, with a twist that makes it more accessible.
I developed this version after realizing many home cooks struggle to find traditional urad dal. The rice flour base creates that signature golden crust while maintaining the light, airy interior that makes these lentil donuts irresistible.
What you get is perfectly shaped vadas with a shatteringly crispy exterior and soft, fluffy center. The fermentation step ensures that authentic tangy flavor that defines this classic dish.
Serve hot with coconut chutney or sambar for the complete experience. Here’s how to make them at home.
Ingredients for Medu Vada Recipe with Rice Flour
Simple pantry staples and a few special touches create those irresistible crispy lentil donuts.
| Ingredient | Amount | Notes |
|---|---|---|
| Rice Flour 🌾 | 2 cups | Fine, white rice flour preferred |
| Chana Dal 🥜 | ½ cup | Soaked for 4 hours |
| Urad Dal Flour 🌱 | ¼ cup | Optional for authenticity |
| Cumin Seeds 🌿 | 1 tsp | Whole, not ground |
| Black Peppercorns 🌶️ | 1 tsp | Coarsely crushed |
| Green Chili 🌶️ | 2 whole | Finely chopped, seeds removed |
| Fresh Ginger 🌿 | 1 tbsp | Grated or minced |
| Fresh Curry Leaves 🍃 | 10 pieces | Loosely packed |
| Asafoetida 🧂 | ¼ tsp | Hing, for tempering |
| Salt 🧂 | 1 ½ tsp | Adjust to taste |
| Water 💧 | ¾ cup | As needed for batter |
| Sunflower Oil 🫒 | 3 cups | For deep frying |
| Fresh Cilantro 🌿 | ¼ cup | Chopped, for garnish |
The rice flour is the key here—Bob’s Red Mill has a fine white variety that works perfectly. For the chana dal, Indian grocery stores or Patel Brothers will have the best selection. Look for bright, uniform lentils without any moisture. The urad dal flour adds authenticity but can be skipped if unavailable (just add an extra 1/4 cup rice flour). Fresh curry leaves are a must—find them in the freezer section at Indian markets.
No curry leaves? Dried curry leaf powder works at half the amount. Can’t find asafoetida? A pinch of garlic powder plus onion powder gets you close. For extra crunch, add 1/4 cup semolina (sooji) to the batter. The green chili can be swapped for serrano peppers if that’s what you have. The ginger and cumin are non-negotiable for that authentic flavor profile.
The batter needs to rest for at least 2 hours (overnight is ideal) to develop the tang. Store leftover vadas in an airtight container for up to 2 days—reheat in the oven to maintain crispiness. The oil can be reused once if filtered and cooled completely.
Why You’ll Love This Recipe
- No Soaking Needed: I skip the overnight prep entirely—rice flour and urad dal flour mix up in minutes, not hours.
- Crispy Perfection: That golden crust with fluffy insides, spiked with cumin and black pepper, makes every bite irresistible.
- Breakfast or Snack: I fry a batch on Sunday and they’re just as good with coconut chutney at 7 AM or with evening tea.
- Pantry Friendly: No last-minute grocery runs—just a handful of staples I always have on hand, and it’s budget-kind too.
Step-by-Step Instructions for Medu Vada With Rice Flour
Here’s how to create that perfect crispy texture and authentic flavor every single time.
Step 1: Soak and Prepare the Lentils
Begin by draining the 0.5 cup Chana Dal after its 4-hour soak. Transfer it to a food processor along with the 0.25 cup Urad Dal Flour. Pulse until the mixture resembles coarse sand—this texture ensures the vada holds its shape while frying.
I’ve found that over-processing creates a sticky batter that absorbs too much sunflower oil during frying. Stop when the dal is broken down but still has some grit. You’ll notice the mixture starts to clump slightly—that’s your cue to stop.
Step 2: Create the Flavorful Batter
In a large mixing bowl, combine the processed dal mixture with all 2 cups Rice Flour. Add the 1 tsp Cumin Seeds, 1 tsp Black Peppercorns, 2 whole Green Chili (finely chopped), 1 tbsp Fresh Ginger (grated), 10 pieces Fresh Curry Leaves, and 0.25 tsp Asafoetida.
Gradually add up to 0.75 cup Water—start with ½ cup and mix with your hands. The batter should be thick and slightly sticky but not runny. You’re aiming for a consistency that holds its shape when molded. Season with all 1.5 tsp Salt, adjusting to taste as you go.
Step 3: Shape and Heat the Oil
Wet your hands with a little water to prevent sticking, then take a golf-ball sized portion of batter. Flatten it into a disc with a hole in the center—this classic donut shape ensures even cooking. I like to make the hole slightly larger than you think; it expands during frying.
Heat all 3 cups Sunflower Oil in a deep pan over medium heat until it reaches 350°F. To test without a thermometer, drop a small piece of batter into the oil—it should rise immediately and sizzle vigorously. If it sinks or bubbles weakly, the oil isn’t hot enough yet.
Step 4: Fry to Golden Perfection
Carefully slide 3-4 shaped vadas into the hot oil at a time—overcrowding lowers the oil temperature. Fry for 3-4 minutes per side until they turn a deep, golden brown and develop a crispy exterior. You’ll see the vadas puff slightly as they cook.
Use a slotted spoon to turn them occasionally for even browning. The key is maintaining that 350°F oil temperature throughout. If the oil starts smoking, reduce the heat slightly. Drain the fried vadas on paper towels to remove excess oil.
Step 5: Garnish and Serve Immediately
While the vadas are still hot, sprinkle them with the 0.25 cup Fresh Cilantro (chopped). This adds a fresh contrast to the rich, crispy texture. Serve immediately—they’re best when hot and crispy straight from the fryer.
Real talk: if they sit too long, they’ll lose that perfect crunch. I like to serve them with coconut chutney or sambar for dipping. The contrast of the crispy exterior with the soft, flavorful interior is what makes these so special.
Pro Tips For Making Medu Vada Recipe With Rice Flour
- Soak the dals: Soak chana dal and urad dal flour in water for at least 4-5 hours—I learned this the hard way after my first batch turned out dry and crumbly.
- Whip the batter: Beat the batter vigorously for 5-10 minutes until fluffy; sounds tedious, but it actually changes the outcome, giving vadas that signature light, airy texture.
- Hot oil test: Drop a pinch of batter into the oil before frying—if it sizzles and rises immediately, the temperature is right. Resist the urge to fry in lukewarm oil.
- Rest the batter: Let the batter sit for 15-20 minutes after mixing. My grandmother swore by this, and she was right: it makes the vadas hold their shape better when frying.
Perfect Pairings for medu vada recipe with rice flour
Chutney Companions
Coconut chutney is the classic pairing—its cool, creamy texture balances the vada’s crispiness perfectly. I blend 1 cup grated coconut with ½ cup yogurt, 2 green chilies, and a pinch of salt for my go-to version. 🥥
Sambar Pairing
For a traditional South Indian meal, serve with vegetable sambar. The tangy lentil stew cuts through the fried richness beautifully. I love the contrast of textures and flavors—crispy meets hearty.
Fresh Salads
A simple cucumber-onion salad with lemon juice and salt adds a refreshing crunch. Or try a carrot-beet slaw with 1 tbsp lime juice and ½ tsp chaat masala for a vibrant side.
Beverage Pairings
Hot chai with cardamom and ginger complements the spices in the vada. For something lighter, try coconut water or a cooling lassi. I prefer my chai with ½ tsp fresh ginger for extra zing. ☕
Dipping Sauces
Mint-coriander chutney adds a bright, herbaceous note. Blend 1 cup cilantro, ½ cup mint leaves, 1 green chili, and 1 tbsp lemon juice for a quick version.
Breakfast Twist
Serve with idli and dosa for a full South Indian breakfast spread. The combination of textures and flavors makes for an exciting meal that feels special without demanding extra effort.
Nutrition Facts
Frequently Asked Questions
Can I use store-bought rice flour?
Yes, fine white rice flour works perfectly. Look for brands like Bob’s Red Mill for consistent results. Avoid coarse varieties as they won’t create the right texture.
Why did my vadas turn out dense?
This usually happens if the batter is too wet or not rested properly. Let the batter rest for at least 2 hours to develop the right consistency and tangy flavor.
How do I shape them perfectly?
Wet your hands to prevent sticking, then flatten each portion into a disc with a hole in the center. Make the hole slightly larger than you think—it expands during frying.
Can I make them in advance?
Fry and store in an airtight container for up to 2 days. Reheat in the oven at 350°F for 5-7 minutes to restore crispiness.

- Peri Peri Rice Recipe: Spicy Portuguese One-Pot Harmony - November 6, 2026
- Mexican Flavoured Rice Recipe: Authentic Spice-Infused One-Pot Meal - November 6, 2026
- Lao Gan Ma Fried Rice Recipe: Spicy Wok-Tossed Perfection - November 6, 2026