
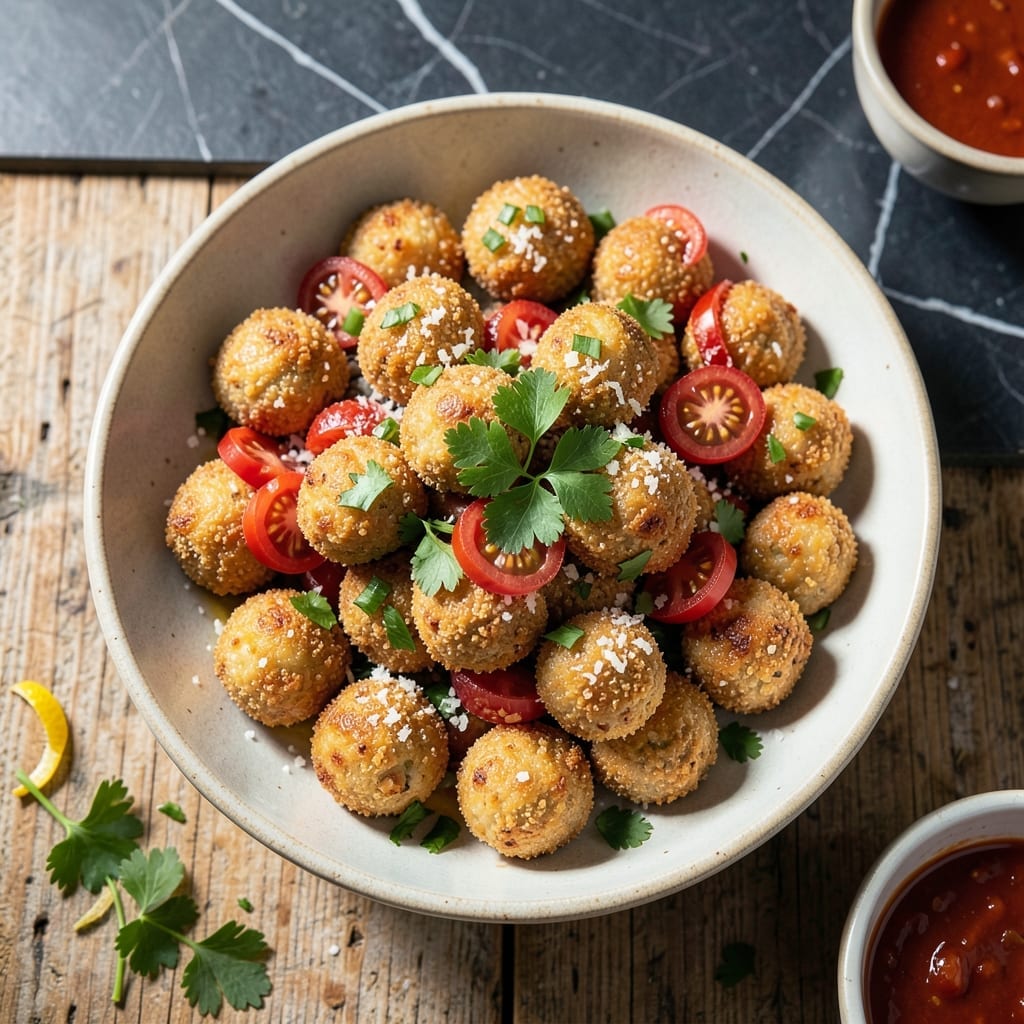
These bite-sized rice balls deliver a perfect contrast of textures—crispy golden exteriors giving way to soft, tender centers. I’ve refined this method over years to ensure consistent results every time.
The key lies in using day-old rice and chilling the mixture before shaping. This prevents sticking and helps maintain structure during frying. A simple breading process creates that irresistible crispy coating.
Each bite offers a satisfying crunch followed by warm, fluffy rice. Whether served as an appetizer or light main, these never fail to impress with their texture and versatility.
Optional fillings like cheese or herbs can elevate them further, but the classic version stands perfectly on its own.
Ingredients for Mini Rice Balls
Day-old rice and a simple breading create these texturally perfect bite-sized treats with minimal effort.
| Ingredient | Amount | Notes |
|---|---|---|
| Day-Old Cooked White Rice 🍚 | 3 cups | Short-grain preferred for stickiness |
| Large Eggs 🥚 | 2 whole | Beaten for binding mixture |
| All-Purpose Flour 🌾 | ½ cup | For initial breading coating |
| Panko Breadcrumbs 🍞 | 1 ½ cups | For crispy outer layer |
| Parmesan Cheese 🧀 | ½ cup | Freshly grated from wedge |
| Garlic Powder 🧄 | 1 tsp | For seasoning breadcrumb mix |
| Onion Powder 🧅 | 1 tsp | For seasoning breadcrumb mix |
| Dried Oregano 🍃 | 1 tsp | For herb flavor in coating |
| Salt 🧂 | 1 tsp | Diamond Crystal kosher preferred |
| Black Pepper 🌶️ | ½ tsp | Freshly ground preferred |
| Neutral Oil 🫒 | 2 cups | For frying, high smoke point |
| Mozzarella Cheese 🧀 | 4 oz | Optional filling, cubed small |
| Fresh Parsley 🌿 | ¼ cup | Chopped, for garnish if desired |
The rice quality is paramount here. Short-grain Japanese rice like Koshihikari or Arborio provides the necessary stickiness—avoid long-grain varieties as they crumble. Day-old rice (refrigerated overnight) is non-negotiable; freshly cooked rice contains too much moisture. I source mine from Asian markets where turnover is high and quality consistent. For the breadcrumbs, panko is essential for that signature crispiness.
No panko available? Crushed saltine crackers work in a pinch. For a gluten-free version, use crushed cornflakes or gluten-free breadcrumbs. The Parmesan can be substituted with Pecorino Romano for sharper flavor. If adding fillings, ensure they’re cut small enough to distribute evenly. Low-moisture mozzarella prevents oozing during frying. The eggs can be replaced with a cornstarch slurry for binding if needed.
Chilled mixture holds shape best—refrigerate 30 minutes minimum. Fried rice balls keep 2-3 days in fridge (reheat in air fryer). For freezing, cool completely first, then store in single layer before bagging. Will freeze well for 1 month.
Why You’ll Love This Recipe
- No-Fuss Mixing: I just toss day-old rice with egg and flour, roll, coat in panko, and fry—no fancy steps.
- Crispy Cheesy Bite: That parmesan in the panko gives a salty crunch with a soft, warm center.
- Party or Snack: I serve them as appetizers or pack for lunchboxes—they’re always a hit.
- Budget Stretcher: Honestly, it’s a great way to use up leftover rice without wasting a grain.
Step-by-Step Instructions for Mini Rice Balls
Achieve that perfect crispy exterior and soft interior with this precise method every time.
Step 1: Prepare the Rice Base and Filling
Begin by transferring the 3 cups Day-Old Cooked White Rice to a large bowl. The rice must be cold and firm—this is crucial for maintaining structure when shaping. Break up any large clumps with your hands or a fork to ensure even texture.
If using the optional filling, cut the 4 oz Mozzarella Cheese into ¼-inch cubes. Keep these chilled until ready to use. Cold cheese prevents premature melting during the shaping process, which could compromise the integrity of your rice balls.
Step 2: Create the Breading Station
Set up three shallow dishes for breading. In the first, beat the 2 whole Large Eggs until fully homogeneous. In the second, place the 0.5 cup All-Purpose Flour. For the third, combine the 1.5 cups Panko Breadcrumbs, 0.5 cup Parmesan Cheese, 1 tsp Garlic Powder, 1 tsp Onion Powder, 1 tsp Dried Oregano, 1 tsp Salt, and 0.5 tsp Black Pepper. Mix thoroughly until all components are evenly distributed.
The Panko’s coarse texture is what delivers that promised crispy exterior. The Parmesan adds depth of flavor and helps the breading adhere to the rice surface during frying.
Step 3: Shape and Bread the Rice Balls
With damp hands (to prevent sticking), form the rice into 1.5-inch balls. If using the mozzarella, press a few cheese cubes into the center of each ball, then enclose completely with more rice, ensuring no cheese is visible at the surface.
Roll each ball first in the flour, shaking off excess, then through the beaten eggs, allowing any excess to drip off. Finally, roll in the Panko mixture, pressing gently to ensure full coverage. The triple breading creates layers that crisp at different rates, contributing to the perfect texture.
Step 4: Fry to Golden Perfection
Heat the 2 cups Neutral Oil in a deep, heavy-bottomed pot to 350°F. Use a thermometer for precision—this temperature ensures even cooking without burning the exterior before the interior warms through.
Fry the rice balls in batches, being careful not to overcrowd the pot, for 4-5 minutes or until they reach a deep golden brown color. Turn them occasionally with a slotted spoon to ensure even browning on all sides. The oil temperature will drop when you add the balls, so allow it to return to 350°F between batches.
Step 5: Drain and Serve Immediately
Transfer the fried rice balls to a paper towel-lined plate to drain excess oil. The paper towels absorb surface oil while preserving the crispy texture. Let them rest for 2-3 minutes—just long enough for the cheese inside to become deliciously gooey.
Garnish with the 0.25 cup Fresh Parsley if desired, and serve immediately while hot. The contrast between the crispy exterior, soft rice, and melted cheese center is at its peak right after frying. This is when they deliver on the promise of being perfectly crispy outside with a soft interior.
Pro Tips For Making Mini Rice Balls
- Chill the Rice: Use day-old, cold rice straight from the fridge—it’s drier and sticks together better than fresh. I learned this the hard way after my first batch turned to mush.
- Grate the Parmesan: Freshly grate the Parmesan instead of using pre-shredded; the anti-caking agents in bagged cheese make the coating clump. Sounds fussy, but it actually changes the texture.
- Skip the Overmixing: Gently fold the egg and flour into the rice just until combined—overworking it makes the balls dense. After a few gummy batches, I finally figured out less is more.
- Double Coat for Crunch: Roll the balls in flour, dip in egg, then coat in panko mixed with Parmesan twice for extra crunch. Yes, it takes an extra minute, but the crunch is worth it.
Pro Cooking Tips for This Recipe
Rice Selection
I always use short-grain Japanese rice like Koshihikari or Arborio for the perfect sticky texture. Long-grain varieties simply won’t hold together. The rice must be cooked and chilled for at least 12 hours to achieve the right firmness for shaping.
Breading Efficiency
Set up your breading station in this exact order: flour, beaten eggs, then panko mixture. Keep one hand for wet ingredients and one for dry to minimize mess. I use shallow glass dishes for easy cleanup. The eggs should be beaten until completely homogeneous for even coating.
Perfect Shaping
Wet your hands slightly before shaping each ball to prevent sticking. Aim for 1.5-inch diameter balls—any larger and they won’t cook through properly. If adding cheese, ensure it’s completely enclosed to prevent leakage during frying. 💡
Frying Precision
Maintain oil temperature at exactly 350°F using a candy thermometer. Fry in small batches to avoid temperature drops. Turn frequently for even browning. The balls are done when they reach a deep golden brown color, usually after 4-5 minutes.
Resting Time
After frying, rest the balls on paper towels for 2-3 minutes. This allows the cheese to melt completely while maintaining crispiness. Serve immediately for the best texture contrast. I find they’re best enjoyed fresh out of the oil.
Oil Management
Use a high-smoke-point oil like peanut or vegetable oil. For home frying, a Dutch oven works perfectly. Never fill the pot more than halfway with oil to prevent dangerous overflows. 🔥
Nutrition Facts
Frequently Asked Questions
Can I use freshly cooked rice?
No, freshly cooked rice is too moist and sticky. Day-old rice works best because it’s firmer and holds shape during frying. Spread hot rice on a tray to cool quickly if you’re in a hurry.
What’s the best oil for frying?
Use a neutral oil with a high smoke point like vegetable, canola, or peanut oil. Avoid olive oil as it can burn at 350°F. Fill the pot no more than halfway to prevent overflows.
How do I keep them crispy after frying?
Drain on paper towels and serve immediately. To keep warm for a short time, place on a wire rack in a 200°F oven. Avoid stacking them, as this creates steam and makes them soggy.
Can I bake these instead of frying?
Yes, but the texture will be different. Bake at 400°F for 15-20 minutes, turning halfway. They won’t be as crispy as fried, but spraying with oil before baking helps.

- Peri Peri Rice Recipe: Spicy Portuguese One-Pot Harmony - November 6, 2026
- Mexican Flavoured Rice Recipe: Authentic Spice-Infused One-Pot Meal - November 6, 2026
- Lao Gan Ma Fried Rice Recipe: Spicy Wok-Tossed Perfection - November 6, 2026