
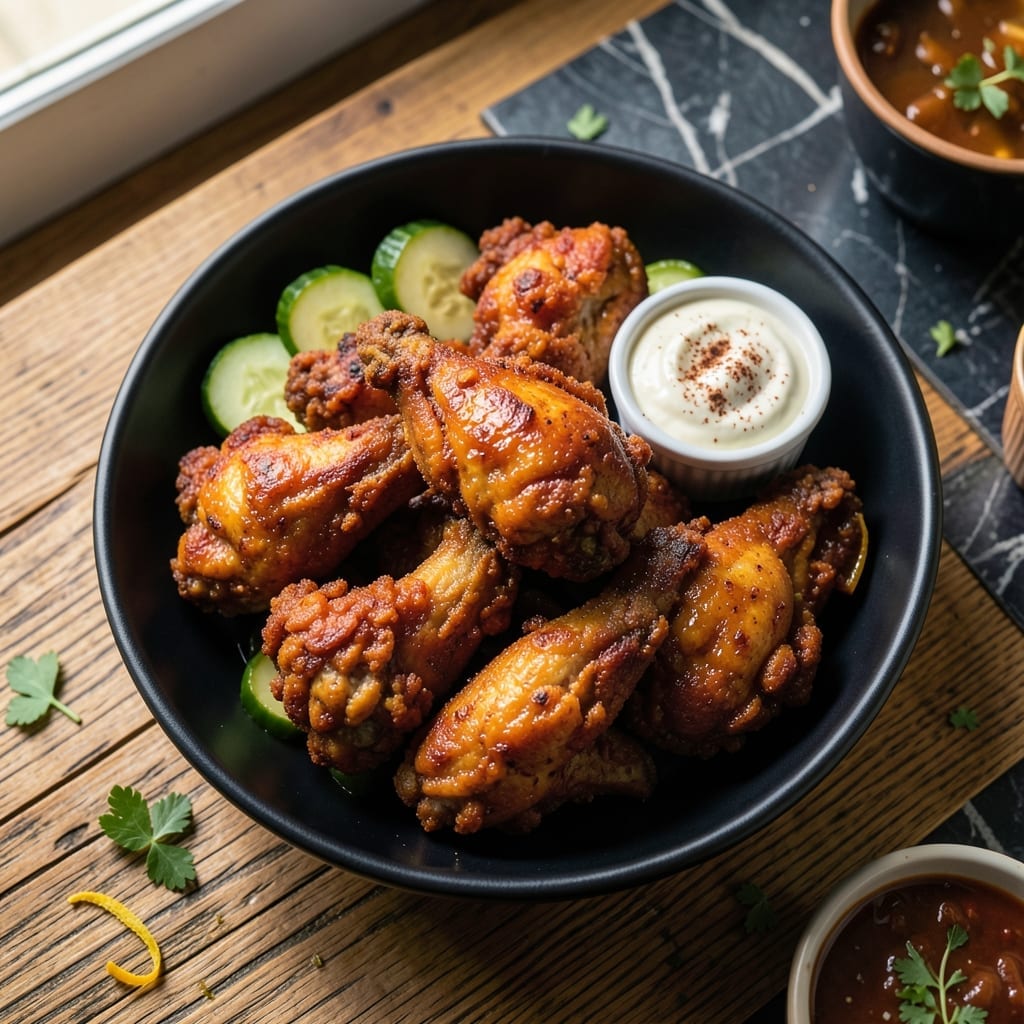
Nashville hot chicken delivers a perfect balance of crispy texture and fiery flavor that defines this Southern classic. The double-frying technique creates an incredibly crispy crust that holds up to the signature spicy oil drizzle.
What sets this dish apart is the careful layering of heat—first in the seasoned flour coating, then in the final hot oil baste. The result is chicken that’s spicy through and through, not just on the surface.
Each bite offers that signature Nashville heat followed by the satisfying crunch of perfectly fried chicken. The spice level is adjustable, making it suitable for both heat seekers and those preferring milder flavor.
This recipe stays true to tradition while being achievable in any home kitchen. The secret lies in the resting period between frying steps.
Ingredients for Nashville Chicken
Traditional Southern ingredients create that signature crispy, fiery Nashville experience in your own kitchen.
| Ingredient | Amount | Notes |
|---|---|---|
| Chicken Thighs 🍗 | 4 lb | Boneless, skin-on, cut into pieces |
| Buttermilk 🥛 | 2 cups | Full-fat for best flavor |
| All-Purpose Flour 🌾 | 3 cups | Divided for dredging |
| Cornstarch 🌾 | ½ cup | For extra crispiness |
| Cayenne Pepper 🌶️ | 2 tbsp | Adjust for heat preference |
| Brown Sugar 🍚 | 2 tbsp | Light or dark variety |
| Paprika 🌶️ | 1 tbsp | Smoked or sweet variety |
| Garlic Powder 🧄 | 1 tbsp | Freshly ground preferred |
| Onion Powder 🧅 | 1 tbsp | Fine grain preferred |
| Salt 🧂 | 1 tbsp | Diamond Crystal kosher |
| Black Pepper 🌶️ | 1 tsp | Freshly ground for best flavor |
| Lard or Vegetable Shortening 🫒 | 4 cups | For frying (traditional choice) |
| Hot Sauce 🌶️ | ¼ cup | Cayenne-based for heat |
| Unsalted Butter 🧈 | ½ cup | Melted for oil drizzle |
| Pickle Slices 🥒 | 1 cup | For serving, optional |
The chicken is non-negotiable here. Thighs with skin-on deliver the crispiest crust and juiciest meat—breasts dry out too fast. Buttermilk should be full-fat for the best marinade. For authentic flavor, lard is traditional for frying, but vegetable shortening works if you prefer. Most Southern grocery stores carry lard in the baking aisle, or Publix and Winn-Dixie are reliable sources.
Need to dial back the heat? Reduce cayenne to 1 tbsp and skip the hot sauce in the drizzle. No buttermilk? Whole milk with 1 tbsp vinegar per cup works in a pinch. The cornstarch can be swapped for arrowroot powder at the same ratio. For extra crunch, add crushed cornflakes to the flour dredge. The paprika is more for color than heat—don’t skip it.
The fried chicken is best eaten fresh but keeps 2-3 days in the fridge. Reheat in a 375°F oven for 10-15 minutes to restore crispiness. The hot oil drizzle can be stored in a jar for up to 1 week—just reheat gently before using. Never microwave the drizzle; it’ll separate.
Why You’ll Love This Recipe
- One Bowl Wonder: I just toss the chicken in buttermilk, then the flour mix—no fancy prep, no extra dishes.
- That Cayenne Kick: The cayenne in the crust gives it that signature Nashville heat that lingers just right.
- Feeds a Hungry Crowd: I’ve served this at game nights and weeknight dinners—always disappears fast.
- Leftovers? Even Better: Honestly, the spice mellows overnight, making the next-day sandwiches my favorite.
Step-by-Step Instructions for Nashville Chicken
Master the technique for crispy, fiery chicken with that signature spicy oil finish.
Step 1: Marinate the Chicken in Spiced Buttermilk
Place the 4 lb chicken thighs in a large bowl and pour over the 2 cups buttermilk. Add the 0.25 cup hot sauce, then whisk in the 1 tbsp salt, 1 tbsp garlic powder, and 1 tbsp onion powder until fully dissolved. The buttermilk tenderizes the meat while the spices begin building flavor depth.
Cover and refrigerate for at least 4 hours, preferably overnight. This extended marinating time is crucial—the acids in the buttermilk break down proteins for maximum tenderness, while the spices penetrate deeply. You’ll notice the chicken turns slightly opaque when it’s ready to be coated.
Step 2: Prepare the Spiced Dredging Flour
In a large shallow dish, combine the 3 cups all-purpose flour, 0.5 cup cornstarch, 2 tbsp cayenne pepper, 2 tbsp brown sugar, 1 tbsp paprika, and 1 tsp black pepper. Whisk thoroughly until the mixture is uniform in color and texture. The cornstarch creates an ultra-crispy crust, while the brown sugar caramelizes during frying.
The mixture should have a distinct reddish hue from the paprika and cayenne. I always sift the flour first to prevent lumps in the dredge. This step ensures every piece gets an even, generous coating that will create that characteristic craggy, spicy crust Nashville chicken is known for.
Step 3: Fry the Chicken to Golden Perfection
Heat the 4 cups lard or vegetable shortening in a deep cast-iron skillet or Dutch oven to 350°F. While the oil heats, remove the chicken from the buttermilk mixture, allowing excess to drip off, then dredge each piece thoroughly in the spiced flour. Press the flour mixture into the meat to ensure it adheres completely.
Fry the chicken in batches to avoid crowding the pan, which would lower the oil temperature. Cook for 12-15 minutes, turning occasionally, until the coating is deep golden brown and the internal temperature reaches 165°F. The crust should be thick and crackly—this is where the magic happens.
Step 4: Create and Apply the Spicy Oil Drizzle
As the chicken fries, melt the 0.5 cup unsalted butter in a small saucepan over low heat. Stir in ¼ cup of the hot frying oil (carefully—it will sizzle) along with 1 tsp of the reserved spiced dredging flour. This creates an infused oil that carries the heat and flavor directly into every bite.
When the chicken comes out of the fryer, place it on a wire rack and immediately drizzle the hot spiced butter mixture evenly over all pieces. The sizzling sound and aroma will be intense—this is the defining characteristic of authentic Nashville chicken. Let it rest for 5 minutes before serving to allow the oil to soak into the crust slightly.
Step 5: Serve with Traditional Accompaniments
Transfer the chicken to a serving platter and arrange the 1 cup pickle slices alongside. The cool, tangy pickles provide the perfect contrast to the fiery heat of the chicken. Serve immediately while the crust is still at its crispiest and the spicy oil drizzle is fresh.
The exterior should have a deep red-orange color from the cayenne and paprika, with visible cracks in the crust where the spiced oil has pooled. Each piece should be moist inside with a crust that audibly crunches when bitten. The heat builds gradually, so have cold beverages ready.
Pro Tips For Making Nashville Chicken
- Double-Dredge the Chicken: After the buttermilk soak, dredge the thighs in flour, dip back in buttermilk, then dredge again—this builds the craggy, spicy crust Nashville hot chicken is known for. I learned this the hard way after my first batch had barely any coating.
- Rest the Coated Chicken: Let the dredged thighs sit on a wire rack for 10-15 minutes before frying. This helps the coating adhere and prevents it from sliding off into the oil—my grandmother swore by this, and she was right.
- Fry in Batches: Resist the urge to crowd the pan, even if it means waiting. Overcrowding drops the oil temp, leading to greasy, soggy chicken instead of that crispy, golden finish. After burning three batches, I finally figured this out.
- Boost the Spice: Mix 1-2 tablespoons of cayenne into the flour dredge, then dust the fried chicken with more cayenne mixed with a little oil after cooking. Sounds weird, but it works for that signature Nashville heat.
Storing and Reheating nashville chicken
Refrigerator Storage
Let your chicken cool completely before storing—I use glass containers with tight lids. It keeps in the fridge for 2-3 days without losing too much crispiness. The spicy oil drizzle will mellow slightly over time. ❄️
Freezer Storage
Freeze pieces on a baking sheet first, then transfer to freezer bags with parchment between layers. This prevents sticking and maintains texture. It’ll keep well for up to 1 month, though the crust softens slightly after thawing.
Oven Reheating
Preheat your oven to 375°F and place chicken on a wire rack over a baking sheet. Reheat for 10-15 minutes until the internal temperature hits 165°F. This method restores crispiness better than any other. 🔥
Air Fryer Option
For a quicker method, preheat your air fryer to 375°F and reheat in batches for 5-6 minutes. The hot air circulation helps revive the crust’s crunch without drying out the meat.
Drizzle Reheating
Store leftover spicy oil drizzle in a sealed jar at room temperature for up to 1 week. Gently reheat in a saucepan over low heat before drizzling over freshly reheated chicken.
Avoid the Microwave
Microwaving turns the crust soggy and unevenly heats the chicken. If you’re in a rush, use the air fryer instead—it’s faster than the oven but still delivers great texture.
Nutrition Facts
Frequently Asked Questions
Can I use chicken breasts instead?
Skin-on, boneless thighs are ideal for juiciness and crispiness. Breasts tend to dry out during frying. If using breasts, reduce cooking time to 10-12 minutes and monitor internal temperature closely.
Why does the recipe call for lard?
Lard is traditional for its high smoke point and rich flavor. Vegetable shortening works as a substitute. Avoid olive oil—its low smoke point will burn at 350°F.
Can I make it less spicy?
Reduce cayenne to 1 tbsp and skip hot sauce in the drizzle. The buttermilk marinade also helps mellow the heat. For milder flavor, serve with extra pickles and bread.
What’s the best way to keep it crispy?
Place fried chicken on a wire rack, not paper towels. This prevents steam from softening the crust. Reheat in a 375°F oven for 10-15 minutes to restore crunch.

- Jollof Rice Sauce Recipe: West African Tomato and Spice Infusion - September 25, 2026
- Japanese Rice Soup Recipe: Umami-Rich Comfort in a Bowl - September 25, 2026
- Homemade Cream Of Rice Recipe: Silk-Smooth Breakfast in Minutes - September 25, 2026