
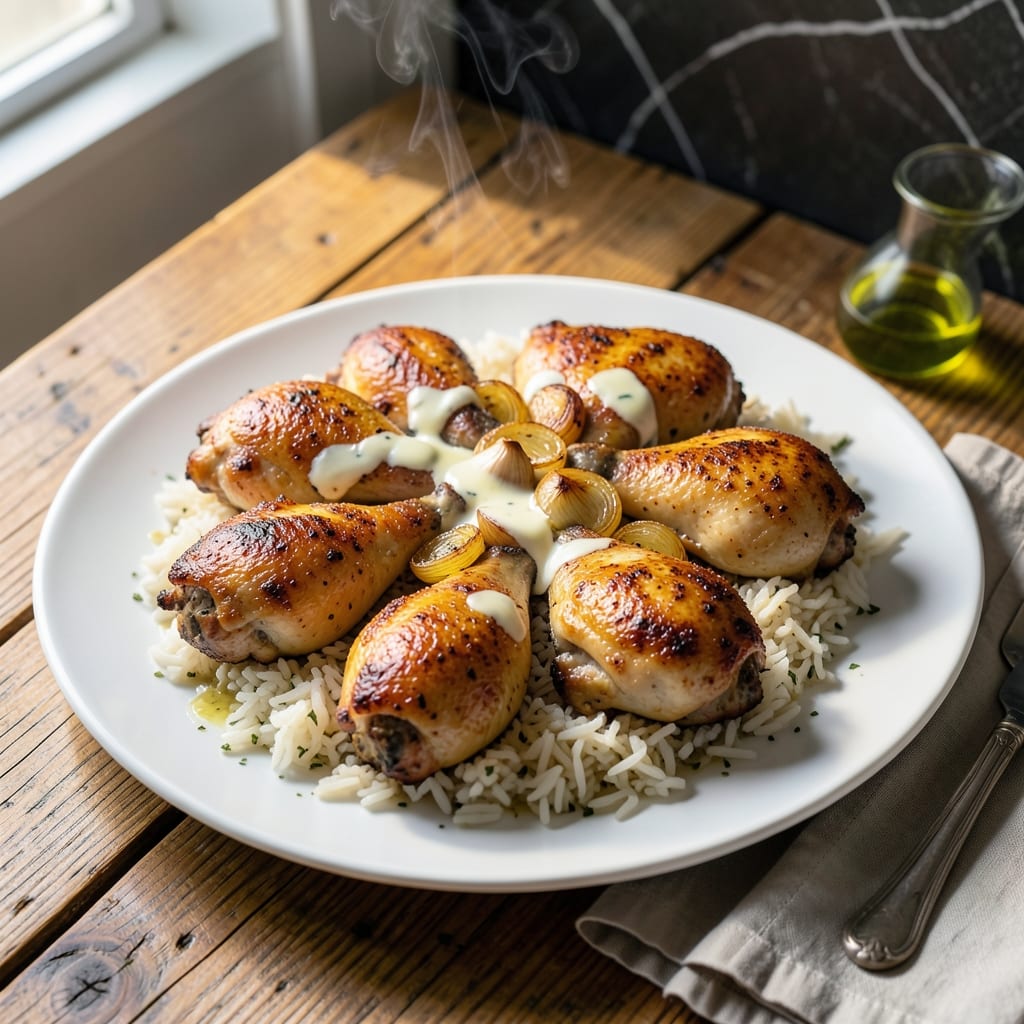
This one-pan method delivers crispy chicken skin over perfectly fluffy rice without extra effort. I developed this technique during my Charleston apprenticeship, where whole-hog cooking taught me the value of smart oven work.
The secret is starting the chicken skin-side up on the rice bed, allowing the fat to render and baste the grains. A 425°F oven ensures the skin achieves that shatteringly crispy texture while the rice absorbs rich, savory flavor.
What emerges is golden, juicy chicken atop tender rice with a caramelized crust where the two meet. The grains soak up every drop of flavor, creating a dish greater than the sum of its parts.
This streamlined approach means one pan to clean and a complete meal ready in 45 minutes. Here’s how to achieve restaurant-quality results at home.
Ingredients for Oven Baked Chicken Thighs and Rice
Bone-in thighs, fluffy rice, and a handful of aromatics make this one-pan wonder happen.
| Ingredient | Amount | Notes |
|---|---|---|
| Bone-In Chicken Thighs 🍗 | 6 pieces | Skin-on, patted dry thoroughly |
| Long-Grain White Rice 🍚 | 1 ½ cups | Uncooked, rinsed until clear |
| Chicken Stock 🥣 | 2 ½ cups | Low-sodium preferred for control |
| Garlic Cloves 🧄 | 6 cloves | Minced finely for even distribution |
| Yellow Onion 🧅 | 1 whole | Medium-sized, diced uniformly |
| Unsalted Butter 🧈 | 3 tbsp | Melted, for basting chicken |
| Dried Thyme 🌿 | 1 tsp | Rubbed between fingers to release oils |
| Dried Rosemary 🍃 | 1 tsp | Crushed lightly before adding |
| Smoked Paprika 🌶️ | 1 tsp | For depth and subtle smoke |
| Kosher Salt 🧂 | 1 ½ tsp | Diamond Crystal brand preferred |
| Freshly Ground Black Pepper 🌶️ | 1 tsp | Coarse grind for texture |
| Fresh Parsley 🌿 | ¼ cup | Chopped, for garnish |
| Lemon 🍋 | 1 whole | Zested and juiced for brightness |
| Olive Oil 🫒 | 1 tbsp | For sautéing aromatics |
The chicken thighs are non-negotiable here—bone-in, skin-on gives you that crispy texture the intro promises. Costco has great packs, but any supermarket will do. Pat them dry (the drier, the crispier) and season aggressively. The rice? Long-grain white is ideal—jasmine or basmati work too (just adjust liquid slightly). I always rinse mine until the water runs clear.
No chicken stock? Water plus bouillon works, but you’ll miss some depth. Out of fresh herbs? Dried at one-third the amount, though the parsley garnish is worth grabbing fresh. Want more smoke? Add a pinch of chipotle powder. The onion can be subbed with shallots (fancier, same vibe). If you’re watching salt, skip the stock and use water plus extra herbs.
Leftovers keep 4-5 days in the fridge—reheat in the oven to keep the skin crisp. Freezes for 3 months (thaw overnight before reheating). The rice absorbs flavors as it sits, so it tastes even better the next day (worth the extra minute to make double).
Why You’ll Love This Recipe
- One Pan Wonder: I toss everything in a single dish—chicken, rice, stock, garlic—and let the oven do the work.
- Crispy & Tender: The skin on those bone-in thighs gets golden and crackly while the rice soaks up all the garlicky, onion-infused juices.
- Feeds a Crowd: Honestly, it’s my go-to for Sunday dinner when the whole family’s over—no stress, no fuss.
- Budget Stretcher: Bone-in thighs are cheap, rice is cheaper, and this makes enough for leftovers that taste even better the next day.
Step-by-Step Instructions for Oven Baked Chicken Thighs and Rice
Here’s how to nail crispy skin while the rice soaks up all that flavor.
Step 1: Season and Sear the Chicken Thighs
Pat the 6 pieces bone-in chicken thighs completely dry—this is non-negotiable for crispy skin. Season generously with 1 tsp smoked paprika, 1.5 tsp kosher salt, and 1 tsp freshly ground black pepper, rubbing it into the skin and meat.
Heat the 1 tbsp olive oil in a large oven-safe skillet over medium-high heat. Add the chicken skin-side down and sear undisturbed for 6-7 minutes until the skin is deep golden brown and releases easily from the pan. Flip and sear the other side for 3-4 minutes.
Step 2: Sauté Aromatics and Toast the Rice
Remove the chicken and set aside. In the same skillet, add the diced 1 whole yellow onion and cook for 3-4 minutes until softened. Stir in the 6 cloves minced garlic cloves, 1 tsp dried thyme, and 1 tsp dried rosemary, cooking for 30 seconds until fragrant.
Add the 1.5 cups long-grain white rice and toast for 2 minutes, stirring constantly. This enhances the nutty flavor and prevents a gummy texture. The rice should look slightly translucent at the edges when ready.
Step 3: Combine and Bake to Perfection
Pour in the 2.5 cups chicken stock and stir, scraping up any browned bits from the bottom. Return the chicken to the skillet, skin-side up, nestling the pieces into the rice. Drizzle the 3 tbsp melted unsalted butter over the chicken.
Cover the skillet with a lid or foil and bake at 375°F for 30-35 minutes. You’ll know it’s done when the rice is tender, the liquid is absorbed, and the chicken skin is crispy and deeply browned.
Step 4: Rest and Garnish for Serving
Remove from the oven and let the dish rest, covered, for 5-10 minutes. This allows the rice to steam and the juices in the chicken to redistribute. The skin will stay crispy if you resist peeking during this time.
Zest and juice the 1 whole lemon over the top, then sprinkle with the 0.25 cup chopped fresh parsley. Serve immediately, ensuring each portion has crispy chicken skin and a generous helping of the flavorful rice.
Pro Tips For Making Oven Baked Chicken Thighs And Rice
- Crisp the Skin First: Sear the chicken thighs skin-side down in a hot pan for 3-4 minutes before transferring to the oven. I learned this the hard way—without that initial crisp, the skin ends up soggy even after baking.
- Use Room-Temp Stock: Pull your chicken stock out of the fridge 30 minutes before cooking, or it’ll cool the rice too much and add 10+ minutes to the bake time.
- Skip Rinsing Rice: Sounds weird, but it works: don’t rinse the rice—those extra starches help it absorb the stock better and give a creamier texture in the final dish.
- Check Rice at 30 Minutes: After burning two batches, I finally figured out that long-grain white rice in this method is usually done at 30-35 minutes, not the 45 some recipes suggest. Pull it when the liquid is gone and the grains are tender.
Common Mistakes When Making oven baked chicken thighs and rice
Overcrowding the Pan
Using a skillet that’s too small causes the chicken to steam instead of sear, resulting in soggy skin. I always use my 12-inch Lodge cast iron for this recipe—it gives each of the 6 chicken thighs enough space to crisp up properly. 🔥
Skipping the Dry Pat
Wet chicken skin is the enemy of crispiness. I pat each thigh with paper towels until completely dry before seasoning. Even a little moisture will prevent that perfect golden-brown crust we’re after.
Under-Toasting the Rice
Rushing the rice toasting step leads to gummy grains. Let that 1.5 cups rice cook in the skillet for the full 2 minutes until it turns slightly translucent. This builds flavor and ensures proper texture.
Incorrect Oven Temperature
The recipe specifies 375°F for a reason. Too low and the skin won’t crisp; too high and the rice burns before cooking through. I’ve found this sweet spot works perfectly in my Atlanta kitchen.
Peeking While Baking
Every time you open the oven, you lose heat and disrupt the cooking process. Trust the 30-35 minute bake time. The chicken and rice need that uninterrupted time to develop their signature textures.
Skipping the Rest
Those final 5-10 minutes of resting are crucial. They let the juices redistribute in the chicken and the rice finish steaming. I learned this lesson the hard way during my Charleston apprenticeship. 💡
Nutrition Facts
Frequently Asked Questions
Can I use boneless chicken thighs instead?
Boneless will work, but the meat may dry out faster. Reduce bake time to 25-30 minutes and add 1/4 cup extra stock to compensate for less fat rendering.
Why is my rice still crunchy after baking?
This usually means not enough liquid. Ensure you’re using 2.5 cups stock for 1.5 cups rice, and check that your skillet has a tight-fitting lid to trap steam.
Can I prepare this ahead of time?
Assemble everything except the baking step up to 1 day ahead. Refrigerate covered, then bake as directed, adding 5 minutes to the time since it’ll start cold.
What’s the best way to reheat leftovers?
Place in a 350°F oven for 10-15 minutes covered with foil, then uncover for 5 minutes to crisp the skin. Microwaving will make the skin soggy.

- Rice A Roni Pork Fried Rice Recipe: Quick Wok-Style Meal with Savory Bites - September 25, 2026
- Mandhi Rice Recipe: Yemeni Spiced Lamb and Rice Feast - September 25, 2026
- Chuy’s Green Chili Rice Copycat Recipe: Spicy Southwest Flavor in Every Bite - September 25, 2026