
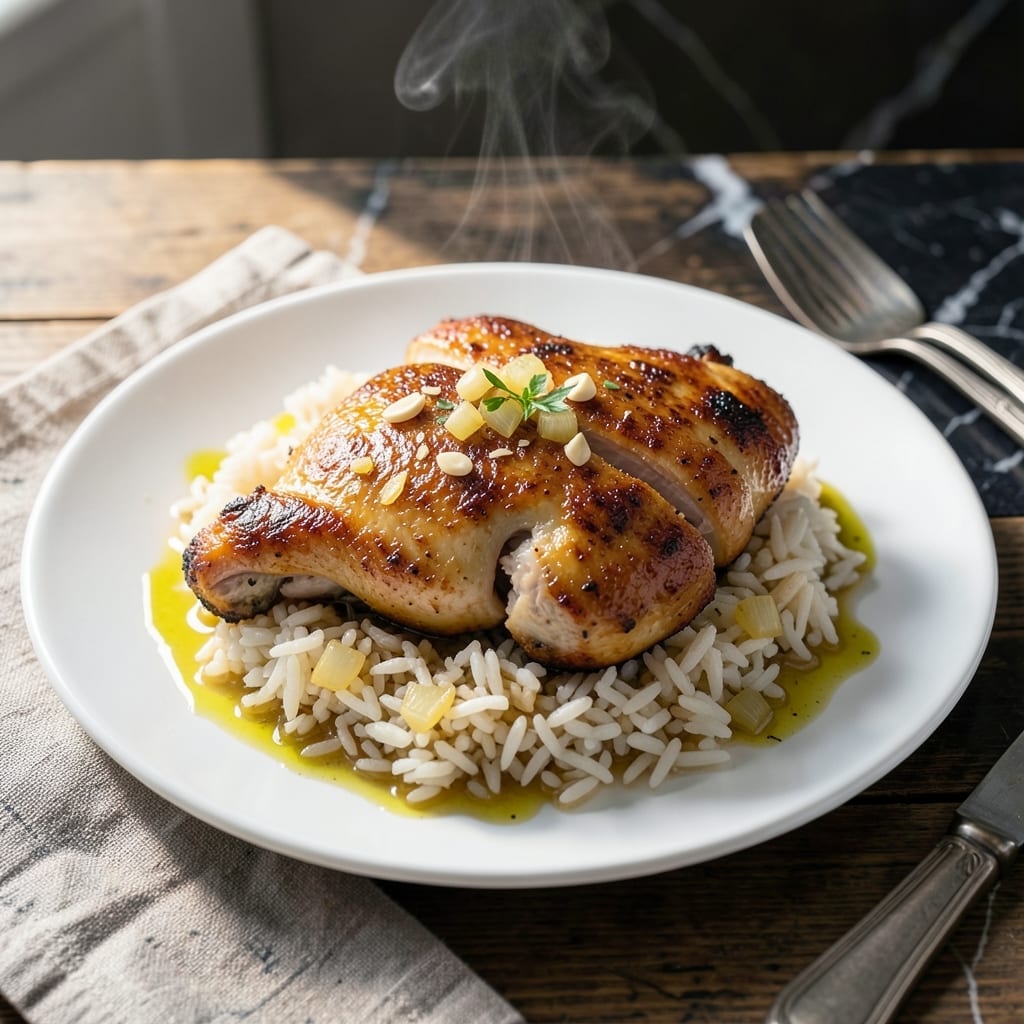
This one-pan dish delivers golden-crusted chicken atop perfectly fluffy rice without the fuss. I developed this method while working at The Smoky Pig, where efficiency and flavor always go hand in hand.
The technique is simple: sear the chicken first to build a crispy exterior, then cook it directly over the rice. This allows the juices to infuse every grain while keeping the meat tender and moist.
What you get is a complete meal with minimal cleanup—juicy chicken with a golden crust, and rice that absorbs all the savory, caramelized bits from the pan. It’s a crowd-pleaser that never fails to impress.
Serve straight from the skillet for a rustic presentation. The contrast of textures makes every bite satisfying.
Ingredients for Pan Fried Chicken and Rice
Simple ingredients, one pan, and a golden-crusted masterpiece ready to serve.
| Ingredient | Amount | Notes |
|---|---|---|
| Chicken Thighs 🍗 | 1 ½ lb | Boneless, skin-on for crispiness |
| Long-Grain White Rice 🍚 | 1 ½ cups | Uncooked, rinsed until clear |
| Chicken Broth 🥣 | 2 ½ cups | Low-sodium preferred |
| Olive Oil 🫒 | 3 tbsp | Divided for searing and cooking |
| Garlic Cloves 🧄 | 4 cloves | Minced for depth of flavor |
| Yellow Onion 🧅 | 1 whole | Medium, finely diced |
| Salt 🧂 | 1 ½ tsp | Kosher or sea salt preferred |
| Black Pepper 🌶️ | 1 tsp | Freshly ground for best results |
| Paprika 🌶️ | 1 tsp | Sweet or smoked variety |
| Dried Thyme 🌿 | ½ tsp | Crushed between fingers |
| Bay Leaf 🍃 | 1 whole | Removed before serving |
| Fresh Parsley 🌿 | ¼ cup | Chopped, for garnish |
| Lemon 🍋 | 1 whole | Zested and juiced for brightness |
The chicken thighs are non-negotiable for this dish. Skin-on, bone-in gives you that crispy exterior and juicy interior, though boneless works if that’s what you’ve got. I always grab mine from Whole Foods—their organic selection has great marbling. Look for pieces that are similar in size so they cook evenly. The rice should be long-grain (jasmine or basmati work too) and rinsed well to prevent gummy texture.
No chicken thighs? Breasts work in a pinch but tend to dry out—pound them thin and reduce cooking time. Swap the broth for water plus a bouillon cube if needed, though broth adds depth. Fresh herbs can replace dried at three times the amount. The paprika is mostly for color, but smoked adds a nice touch. If you’re missing lemon, a splash of vinegar at the end brightens things up.
Store raw chicken in the coldest part of your fridge and use within 2 days. Cooked leftovers keep 4 days refrigerated or 3 months frozen. Reheat gently in a skillet with a splash of broth to revive the crust.
Why You’ll Love This Recipe
- One Pan Meal: I love that everything cooks together—chicken, rice, and garlic—so I’m not stuck washing a sink full of dishes.
- Garlic-Infused Bite: The olive oil and garlic cloves give the chicken thighs a rich, savory depth that makes the rice taste incredible.
- Feeds the Fam: It’s my go-to for busy nights—filling, satisfying, and even the picky eaters clean their plates.
- Budget Stretcher: Chicken thighs and rice are cheap, and this makes enough for leftovers that taste even better the next day.
Step-by-Step Instructions for Pan Fried Chicken and Rice
Master this method for crispy chicken atop perfectly cooked rice with minimal effort.
Step 1: Season and Sear the Chicken Thighs
Pat the 1.5 lb Chicken Thighs dry with paper towels. Season both sides evenly with 1 tsp Paprika, 1 tsp Black Pepper, and 1 tsp Salt. Press the seasoning into the skin to ensure it adheres during cooking.
Heat 2 tbsp Olive Oil in a large, deep skillet over medium-high heat until shimmering. Add the chicken thighs skin-side down and sear undisturbed for 6-7 minutes until the skin is deep golden brown and crisp. Flip and cook for another 5 minutes until the chicken is cooked through and reaches an internal temperature of 165°F.
Remove the chicken from the skillet and set aside on a plate. The skin should be crisp enough to resist tearing when moved. Leave the rendered fat in the pan—it will add rich flavor to the rice.
Step 2: Sauté Aromatics and Toast the Rice
In the same skillet with the reserved fat, reduce the heat to medium. Add the finely diced Yellow Onion and cook for 3-4 minutes until softened and just beginning to turn translucent.
Add the 4 cloves minced Garlic Cloves and cook for 30 seconds until fragrant. Stir in the 1.5 cups Long-Grain White Rice, 0.5 tsp Dried Thyme, and the remaining 0.5 tsp Salt. Toast the rice for 2 minutes, stirring frequently, until the grains appear slightly opaque and the edges look lightly golden.
This step enhances the nutty flavor of the rice and prevents it from becoming mushy during cooking.
Step 3: Cook the Rice with Broth and Bay Leaf
Pour in the 2.5 cups Chicken Broth and add the 1 whole Bay Leaf. Stir to combine, scraping up any browned bits from the bottom of the skillet. These bits, known as fond, will dissolve into the liquid, adding depth to the rice.
Increase the heat to high and bring the mixture to a boil. Once boiling, reduce the heat to low, cover the skillet, and let the rice simmer for 15-18 minutes. Resist the urge to stir during this time—this allows the rice to cook evenly and develop a fluffy texture.
Check that the liquid has been absorbed and the rice is tender. If it’s still firm, add a splash of water and cook for another 2-3 minutes.
Step 4: Combine and Finish with Fresh Flavors
Once the rice is cooked, remove the Bay Leaf and discard it. Nestle the seared chicken thighs skin-side up into the rice. Cover the skillet and let everything warm together over low heat for 3-4 minutes.
While the chicken reheats, zest the Lemon and chop the 0.25 cup Fresh Parsley. Sprinkle the zest over the dish and squeeze 1 tbsp Lemon juice evenly across the chicken and rice. Garnish with the chopped parsley and the remaining 1 tbsp Olive Oil drizzled over the top.
Serve immediately, ensuring each portion has a crispy chicken thigh and a generous helping of the flavorful rice.
Pro Tips For Making Pan Fried Chicken And Rice
- Crisp the Skin First: Sear the chicken thighs skin-side down in hot olive oil for 6-7 minutes until deep golden brown—I learned this the hard way after pulling it too early and ending up with flabby skin.
- Toast the Rice: After removing the chicken, toss the rice in the same pan with the garlic for 1-2 minutes until just nutty. This builds flavor way beyond just dumping raw rice into broth.
- Skip Cold Broth: Always use warm chicken broth when adding it to the rice. Cold broth drops the pan temperature too fast and turns your rice to mush.
- Rest Before Serving: Let the finished dish sit covered for 5 minutes off the heat. The rice absorbs the last of the liquid and the chicken reabsorbs its juices—my grandmother swore by this, and she was right.
Pro Cooking Tips for Perfect Results
Perfect Searing Technique
Dry the chicken thoroughly with paper towels—this is non-negotiable for that golden crust we’re after. I learned this at The Smoky Pig: moisture is the enemy of crispy skin. Press your seasonings into the skin so they adhere during cooking.
Pan Temperature Control
Heat your 2 tbsp Olive Oil until it shimmers but doesn’t smoke. Too cool and your chicken will steam; too hot and it’ll burn. I use my vintage Lodge cast iron for even heat distribution. The chicken should sizzle when it hits the pan.
Don’t Crowd the Pan
Leave space between pieces so they sear, not steam. If your skillet isn’t big enough, cook in batches. I learned this the hard way during my first BBQ championship—overcrowding ruins the crust. 🔥
Rice Toasting Secret
After sautéing the aromatics, toast your 1.5 cups Long-Grain White Rice for 2 minutes. This step, called “pilaf method,” enhances the nutty flavor. The grains should turn slightly opaque at the edges.
Liquid Ratio Mastery
Use a 1:1.5 rice-to-liquid ratio (here 2.5 cups Chicken Broth). Bring to a boil, then immediately reduce to a simmer. Never stir while cooking—this releases starch and makes gummy rice.
Resting Time
Let the chicken rest on the rice for 3-4 minutes before serving. This allows the juices to redistribute. I always garnish with lemon zest last—it brightens all the rich flavors. 💡
Nutrition Facts
Frequently Asked Questions
Can I use chicken breasts instead of thighs?
Yes, but they dry out faster. Pound to even thickness and reduce searing time to 4-5 minutes per side. Keep an eye on internal temperature to avoid overcooking.
What if my rice turns out mushy?
This usually means too much liquid or stirring during cooking. Use exactly 2.5 cups Chicken Broth and avoid stirring after adding liquid. Toasting rice first helps prevent this.
How do I get extra crispy chicken skin?
Pat the skin very dry, use medium-high heat, and don’t move the chicken for 6-7 minutes during initial searing. Press seasonings into the skin for better adhesion.
Can I make this ahead of time?
Cook rice separately and store chicken uncooked. Reheat chicken in a skillet before combining with warm rice. Leftovers keep 4 days refrigerated.

- Jollof Rice Sauce Recipe: West African Tomato and Spice Infusion - September 25, 2026
- Japanese Rice Soup Recipe: Umami-Rich Comfort in a Bowl - September 25, 2026
- Homemade Cream Of Rice Recipe: Silk-Smooth Breakfast in Minutes - September 25, 2026