
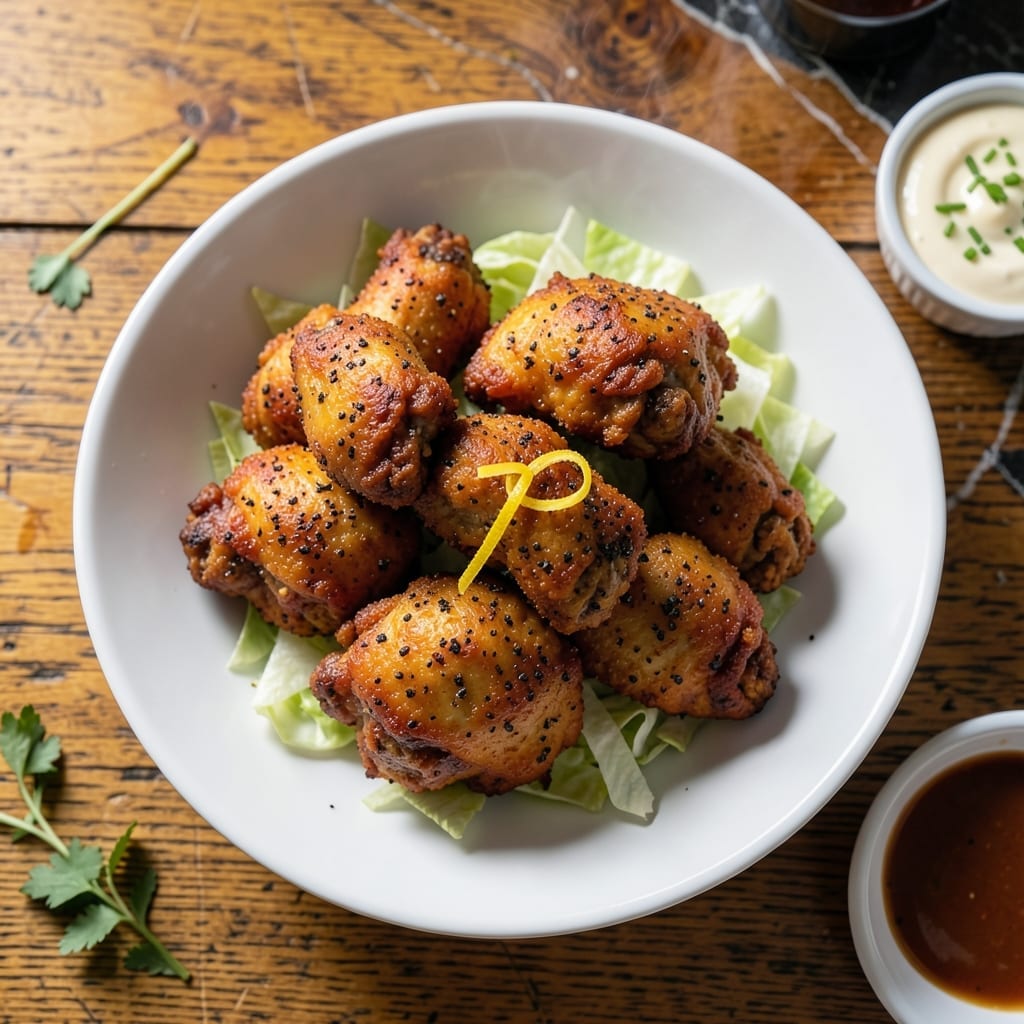
This pepper fried chicken delivers a crispy, spicy coating that packs serious heat with every bite.
I developed this recipe after testing countless seasoning blends to find the perfect balance of black pepper and other spices. The double-dredging method ensures an extra thick, shatteringly crispy crust that stays put through frying.
The secret is maintaining the oil at 350°F during cooking, which guarantees even browning without burning the pepper seasoning. Each piece emerges golden and crackling with flavor.
Serve hot with cooling sides like coleslaw or mashed potatoes to balance the kick. This method never fails to impress.
Ingredients for Pepper Fried Chicken
Pantry staples and bold spices create this fiery, ultra-crispy fried chicken with a serious kick.
| Ingredient | Amount | Notes |
|---|---|---|
| Chicken Thighs 🍗 | 2 lb | Boneless, skinless, patted dry |
| Buttermilk 🥛 | 2 cups | Full-fat for best results |
| All-Purpose Flour 🌾 | 2 cups | Divided for double-dredging |
| Coarse Black Pepper 🌶️ | ¼ cup | Freshly ground preferred |
| Kosher Salt 🧂 | 1 tbsp | Diamond Crystal brand recommended |
| Paprika 🌶️ | 2 tbsp | Sweet or smoked variety |
| Garlic Powder 🧄 | 1 tbsp | Not garlic salt |
| Onion Powder 🧅 | 1 tbsp | Fresh ground preferred |
| Cayenne Pepper 🔥 | 1 tsp | Adjust for heat preference |
| Vegetable Oil 🫒 | 4 cups | For frying, high smoke point |
| Large Eggs 🥚 | 2 whole | For binding dredge |
| Hot Sauce 🌶️ | 2 tbsp | Added to buttermilk marinade |
| Baking Powder 🧂 | 1 tsp | For extra crispiness |
The black pepper is non-negotiable here—coarse grind for texture. Diamond Crystal kosher salt gives the cleanest seasoning without bitterness. For the chicken, thighs stay juicier than breasts through frying, and boneless makes eating easier. Vegetable oil is ideal for its neutral flavor and high smoke point. Most grocery stores carry everything needed, but buttermilk can be made with milk and vinegar in a pinch.
No buttermilk? Whole milk with 1 tbsp vinegar per cup works. Want less heat? Reduce cayenne to 1/4 tsp. For gluten-free, swap all-purpose flour for rice flour or cornstarch. The paprika can be omitted but adds color. If using smoked paprika, expect a deeper, barbecue-like flavor. Eggs can be replaced with aquafaba for binding if needed.
Marinate chicken in buttermilk for up to 24 hours for maximum tenderness. Leftovers keep in the fridge for 3-4 days but lose crispiness—reheat in a 400°F oven for 10 minutes to revive. Oil can be reused once if strained and stored properly.
Why You’ll Love This Recipe
- One Pan Meal: So easy. Just coat, fry, and serve—no fancy equipment, just a skillet and those simple ingredients.
- Peppery Crunch: That coarse black pepper in the flour gives it a bold, aromatic bite that’s ridiculously good with every juicy bite of thigh.
- Feeds the Crew: I make a big batch on Sunday and we snack on leftovers for days—cold, hot, in sandwiches, you name it.
- Budget Friendly: Chicken thighs stay cheap, and a little buttermilk goes a long way for maximum flavor without breaking the bank.
Step-by-Step Instructions for Pepper Fried Chicken
Master the technique for achieving an ultra-crispy coating with bold black pepper flavor and consistent results.
Step 1: Marinate the Chicken in Buttermilk
In a large bowl, whisk together the 2 cups buttermilk and 2 tablespoons hot sauce until fully combined. The acidity in the buttermilk tenderizes the meat while the hot sauce adds a subtle tang that balances the heat from the spices.
Add the 2 lb chicken thighs to the buttermilk mixture, ensuring each piece is fully submerged. Cover and refrigerate for at least 4 hours, or ideally overnight. This extended marination time allows the flavors to penetrate deeply and guarantees maximum juiciness in the finished dish.
Step 2: Prepare the Seasoned Flour Dredge
In a shallow dish, combine 2 cups all-purpose flour, 1/4 cup coarse black pepper, 1 tablespoon kosher salt, 2 tablespoons paprika, 1 tablespoon garlic powder, 1 tablespoon onion powder, 1 teaspoon cayenne pepper, and 1 teaspoon baking powder. Whisk thoroughly to distribute the spices evenly.
The baking powder creates tiny air pockets in the coating, which contributes to that signature crunch. I always use freshly ground black pepper for the most robust flavor. This blend delivers a powerful kick with layers of smoky, spicy, and savory notes in every bite.
Step 3: Double-Dredge for Maximum Crisp
Remove the chicken from the buttermilk, allowing excess to drip off. Dredge each piece in the seasoned flour, pressing firmly to adhere. For the double-dredge that ensures an extra-thick, craggy crust, dip the floured chicken back into the buttermilk, then dredge in the flour mixture a second time.
Place the coated chicken on a wire rack set over a baking sheet. This setup prevents the coating from becoming soggy by allowing air circulation on all sides. Let the chicken rest for 10-15 minutes before frying—this helps the coating set and adhere better during cooking.
Step 4: Fry to Golden Perfection
In a deep, heavy-bottomed pot or Dutch oven, heat the 4 cups vegetable oil to 350°F. Use a deep-fry thermometer to monitor the temperature accurately, as maintaining consistent heat is crucial for even cooking and preventing greasy results.
Working in batches to avoid crowding the pot, carefully lower the chicken into the hot oil. Fry for 12-15 minutes, turning occasionally, until the coating is deep golden brown and the internal temperature reaches 165°F. The coating should be crisp and audibly crunchy when tapped.
Step 5: Drain and Rest Before Serving
Transfer the fried chicken to a wire rack set over a paper towel-lined baking sheet. This method keeps the coating crisp by allowing air to circulate underneath rather than steaming on a plate. Avoid stacking the pieces, as this can trap steam and make the coating soggy.
Let the chicken rest for 5-10 minutes before serving. This brief rest allows the juices to redistribute throughout the meat, ensuring each bite is moist and flavorful. The coating should remain shatteringly crisp, with a visible crackle of black pepper speckled throughout.
Pro Tips For Making Pepper Fried Chicken
- Soak Overnight: Give the chicken thighs a full 12-hour buttermilk bath—any less and the meat won’t stay as juicy as it should, and the pepper won’t cling as well.
- Crush the Pepper: Use freshly cracked coarse black pepper, and give it a quick pulse in a spice grinder or mortar first—it’ll stick to the flour better and pack way more punch.
- Skip Cold Oil: I learned this the hard way—always let your oil hit 350°F before adding the chicken, or you’ll end up with greasy, sad fried chicken instead of crispy.
- Double-Dredge: Sounds like extra work, but dipping the buttermilk-soaked thighs back in the flour-pepper mix a second time guarantees that thick, craggy crust everyone loves.
Health Benefits of This pepper fried chicken
Protein Powerhouse
This dish delivers high-quality protein from chicken thighs, with each 4-ounce serving providing about 25 grams of complete protein. That’s essential for muscle repair and growth, especially after a workout. I notice my energy levels stay steady for hours after enjoying this meal. 💪
Iron and Zinc Boost
Chicken thighs are rich in heme iron and zinc, nutrients crucial for immune function and energy production. The black pepper in the seasoning actually enhances iron absorption, making this dish a smart choice for anyone needing a nutritional boost.
B Vitamin Complex
You’ll get a healthy dose of B vitamins, particularly B6 and B12, from the chicken. These support brain health and metabolism. The buttermilk marinade adds a bit of calcium and vitamin D, contributing to overall nutritional value.
Energy from Healthy Fats
Chicken thighs contain more healthy fats than breast meat, providing sustained energy. The vegetable oil used for frying adds a bit of vitamin E, an antioxidant that helps protect cells from damage. Just enjoy in moderation.
Spice Health Benefits
The black pepper and cayenne in this recipe contain piperine and capsaicin, compounds known for their anti-inflammatory and metabolism-boosting properties. These spices may also aid digestion and provide a natural energy lift. 🌶️
Balanced Meal Tip
To make this a more balanced meal, I often serve it with a side of steamed greens or a fresh salad. This adds fiber and vitamins that complement the protein and spices in the chicken, creating a well-rounded dish.
Nutrition Facts
Frequently Asked Questions
Can I use chicken breasts instead of thighs?
Yes, but thighs stay juicier through frying. If using breasts, reduce cooking time to 10-12 minutes to prevent dryness. The pepper coating works beautifully on either cut.
How do I keep the coating crispy?
Use a wire rack for draining, never paper towels. Reheat in a 400°F oven for 10 minutes if needed. Avoid stacking pieces, as trapped steam makes them soggy.
Can I make this gluten-free?
Swap all-purpose flour for rice flour or cornstarch. The texture will be slightly different but still crispy. Ensure all other ingredients are certified gluten-free.
Why is the oil temperature important?
Maintaining 350°F ensures even cooking and prevents greasy results. Too low, and the chicken absorbs oil; too high, and the coating burns before the meat cooks.

- Jollof Rice Sauce Recipe: West African Tomato and Spice Infusion - September 25, 2026
- Japanese Rice Soup Recipe: Umami-Rich Comfort in a Bowl - September 25, 2026
- Homemade Cream Of Rice Recipe: Silk-Smooth Breakfast in Minutes - September 25, 2026