
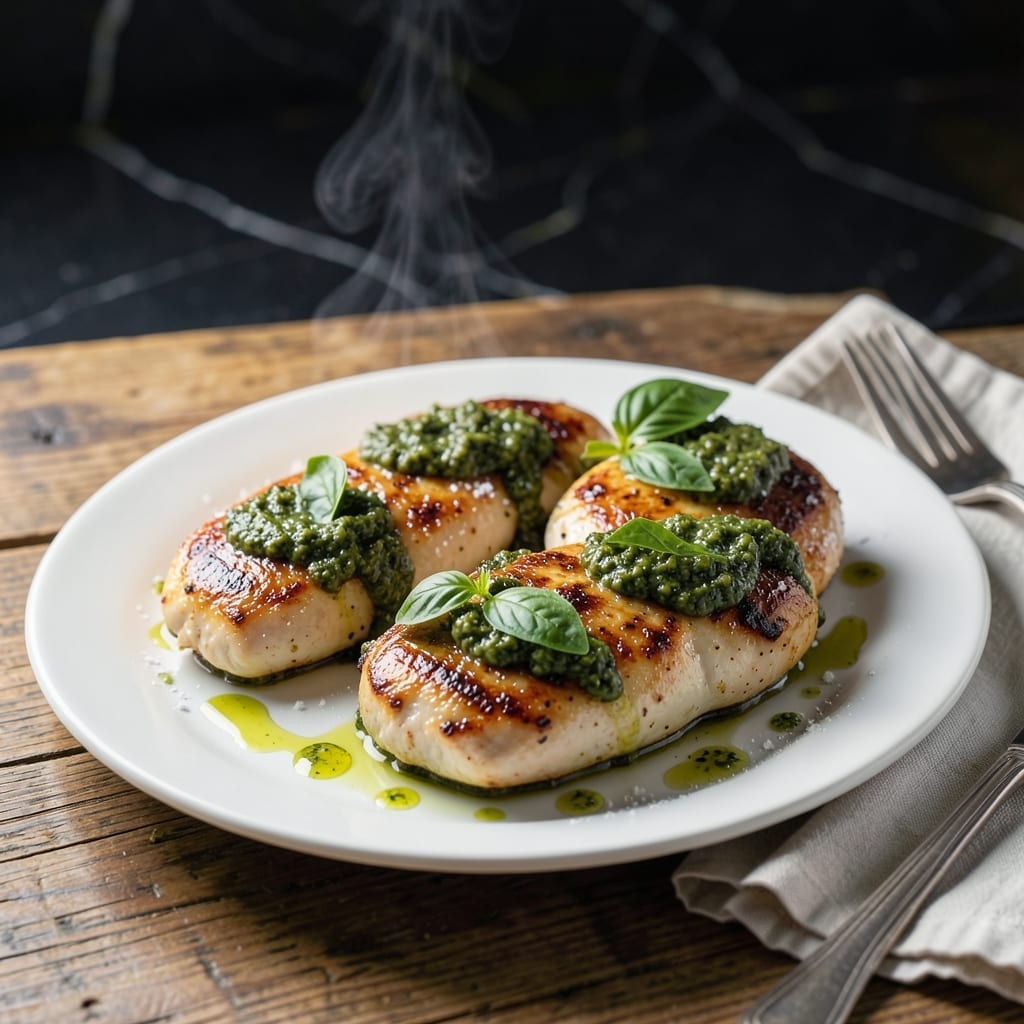
Achieving perfect herb-crusted chicken doesn’t require hours in the kitchen—just a hot oven and a smart approach. This method transforms simple ingredients into a dish with golden, crispy edges and juicy, flavorful meat inside.
The secret lies in coating the chicken with pesto before baking, which creates a fragrant, herbaceous crust while keeping the meat tender. A high oven temperature ensures the outside gets beautifully browned without drying out the inside.
In under 30 minutes, you’ll have restaurant-quality results that look as impressive as they taste. The pesto forms a delicious seal that locks in moisture, guaranteeing succulent chicken every time.
Serve with roasted vegetables or a fresh salad for a complete meal. This technique delivers consistent, perfect results with minimal effort.
Ingredients for Pesto Chicken Oven
Transform simple chicken into herb-crusted perfection with these fresh, flavorful ingredients.
| Ingredient | Amount | Notes |
|---|---|---|
| Boneless Skinless Chicken Breasts 🍗 | 1 ½ lb | Pounded to even thickness |
| Basil Pesto 🌿 | ¾ cup | Store-bought or homemade |
| Extra-Virgin Olive Oil 🫒 | 2 tbsp | Divided for coating and drizzling |
| All-Purpose Flour 🌾 | ¼ cup | For light dredging |
| Kosher Salt 🧂 | 1 tsp | Diamond Crystal preferred |
| Freshly Ground Black Pepper 🌶️ | ½ tsp | Coarse grind for texture |
| Garlic Cloves 🧄 | 3 cloves | Minced for additional flavor |
| Parmesan Cheese 🧀 | ½ cup | Freshly grated for topping |
| Fresh Basil Leaves 🌿 | ¼ cup | Loosely packed for garnish |
| Lemon 🍋 | 1 whole | Zested and juiced for brightness |
| Cherry Tomatoes 🍅 | 1 cup | Halved for roasting |
| Red Pepper Flakes 🌶️ | ¼ tsp | Optional for heat |
The chicken quality matters most here. Boneless, skinless breasts from Whole Foods or Costco offer consistent thickness and freshness. For the pesto, homemade delivers superior flavor, but high-quality jarred brands like Sacla or Barilla work well in a pinch. Pounding the chicken ensures even cooking and maximum crust coverage.
No pesto on hand? Blend fresh basil, olive oil, garlic, and pine nuts for a quick substitute. For a dairy-free version, nutritional yeast replaces Parmesan at a one-to-one ratio. The flour dredge can be swapped for cornstarch for gluten-free needs. Pre-minced garlic saves time but lacks the punch of fresh.
Store raw chicken in the coldest part of your fridge for up to 2 days. Prepped pesto keeps 5 days refrigerated with a thin oil layer on top. Leftovers reheat beautifully—expect flavors to intensify after 24 hours.
Why You’ll Love This Recipe
- One Pan Magic: I toss everything on a sheet pan and let the oven do the work—minimal cleanup, maximum flavor.
- Herb Lovers Dream: The basil pesto melts into the chicken, creating a rich, aromatic bite every time.
- Weeknight Hero: Here’s what sold me—it’s ready before the kids finish their homework, and it’s fancy enough for company.
- Budget Stretcher: Boneless chicken breasts go further with pesto’s bold taste, and leftovers reheat beautifully for lunch.
Step-by-Step Instructions for Pesto Chicken Oven Recipe
Achieve restaurant-quality results with this proven oven-baking technique for tender, flavorful chicken.
Step 1: Prep and Season the Chicken Breasts
Begin by pounding the 1.5 lb boneless skinless chicken breasts to an even ½-inch thickness using a meat mallet. This ensures uniform cooking throughout each piece. Place the pounded chicken on a clean work surface and pat it completely dry with paper towels—moisture prevents proper browning.
Season both sides generously with the 1 tsp kosher salt and 0.5 tsp freshly ground black pepper. Then lightly dredge each breast in the 0.25 cup all-purpose flour, shaking off any excess. This thin flour coating creates a light crust that helps the pesto adhere and promotes even browning.
Step 2: Create the Pesto Coating and Add Aromatics
In a small bowl, combine the 0.75 cup basil pesto with the minced 3 cloves garlic cloves and 0.25 tsp red pepper flakes. The garlic adds depth while the red pepper flakes provide a subtle heat that complements the pesto’s herbal notes. Stir until fully incorporated.
Place the seasoned chicken breasts on a rimmed baking sheet. Spread the pesto mixture evenly over the top of each breast, pressing gently to create a thick, even layer. Drizzle with 1 tbsp extra-virgin olive oil from the 2 tbsp total. This oil helps the pesto crisp slightly in the oven while keeping the meat moist.
Step 3: Arrange Accompaniments and Bake
Scatter the 1 cup halved cherry tomatoes around the chicken on the baking sheet. The tomatoes will roast alongside the chicken, absorbing the pesto’s flavors and creating a built-in side dish. Drizzle the tomatoes with the remaining 1 tbsp extra-virgin olive oil and sprinkle lightly with additional salt and pepper.
Preheat the oven to 400°F. Once at temperature, bake the chicken for 20-25 minutes until the internal temperature reaches 165°F and the pesto topping is golden brown and slightly crisp at the edges. The tomatoes should be blistered and tender.
Step 4: Finish with Fresh Elements and Rest
Remove the baking sheet from the oven. Immediately sprinkle the 0.5 cup parmesan cheese evenly over the chicken breasts. The residual heat will melt the cheese into the pesto crust, adding a rich, savory depth. Zest the 1 whole lemon over the dish and squeeze half the lemon’s juice across the chicken and tomatoes.
Let the chicken rest for 5 minutes before serving. This brief rest allows the juices to redistribute, ensuring each bite is tender and flavorful. Garnish with the 0.25 cup fresh basil leaves, torn or whole, for a burst of freshness that brightens the dish. Serve the chicken with the roasted tomatoes spooned over the top.
Pro Tips For Making Pesto Chicken Oven
- Pound the Chicken: Use a meat mallet or rolling pin to even out the chicken breasts to ½-inch thickness—this guarantees they cook through at the same rate and stay juicy.
- Dry Before Dredging: Pat the chicken completely dry with paper towels before the flour step; moisture is the enemy of a good crust, and I learned this the hard way after several gummy batches.
- Skip the Overcrowding: Give each piece at least an inch of space on the baking sheet, or they’ll steam instead of roast—your pesto won’t caramelize, and the texture suffers.
- Rest Before Slicing: Let the chicken rest 5-10 minutes under foil after baking; it keeps the juices locked in, and the pesto flavor settles into the meat instead of pooling on the cutting board.
Essential Equipment for pesto chicken oven
Baking Sheet Choice
I always use a half-sheet pan (18×13 inches) with a rim for this recipe. The rim catches any pesto drips, and the large surface area allows heat to circulate evenly around each chicken breast. Look for heavy-gauge aluminum—it resists warping at 400°F.
Meat Mallet Matters
A flat meat mallet helps pound chicken to an even ½-inch thickness for consistent cooking. I prefer the OXO Good Grips model with a textured face for grip. Place chicken between plastic wrap before pounding to prevent splatter.
Thermometer Importance
An instant-read thermometer is non-negotiable for perfect results. I use the ThermoWorks ThermoPop—it gives accurate readings in 3-4 seconds. Check the thickest part of each breast to ensure 165°F internal temperature. 🌡️
Parchment Paper Trick
Line your baking sheet with parchment paper for easy cleanup. The pesto can stick to bare metal, but parchment prevents this while allowing the chicken to brown. Cut a sheet to fit your pan exactly—overhang can burn in the oven.
Mixing Bowls
A medium glass or stainless steel bowl works perfectly for combining pesto with aromatics. I use Pyrex because it’s easy to clean and won’t absorb odors. The 3-cup size gives plenty of room for mixing without spills.
Citrus Tool
For the lemon zest, a microplane creates fine, fluffy strands that distribute evenly. The OXO Good Grips zester has a comfortable grip and sharp blades. Roll the lemon firmly against the blades for best results. 💛
Nutrition Facts
Frequently Asked Questions
What oven temperature works best?
Use 400°F for even cooking and perfect browning. This high heat ensures the pesto forms a crispy crust while keeping the chicken juicy inside.
Can I use chicken thighs instead?
Bone-in thighs need 5-7 extra minutes to reach 165°F. Boneless thighs cook in the same time as breasts but stay juicier.
Why rest the chicken after baking?
Resting for 5 minutes lets juices redistribute. Skipping this step causes dry meat as juices spill onto the cutting board.
How do I prevent the pesto from burning?
Press the pesto coating firmly onto the chicken and avoid any thick globs. If using a darker pan, check for doneness 2-3 minutes early.

- Jollof Rice Sauce Recipe: West African Tomato and Spice Infusion - September 25, 2026
- Japanese Rice Soup Recipe: Umami-Rich Comfort in a Bowl - September 25, 2026
- Homemade Cream Of Rice Recipe: Silk-Smooth Breakfast in Minutes - September 25, 2026