
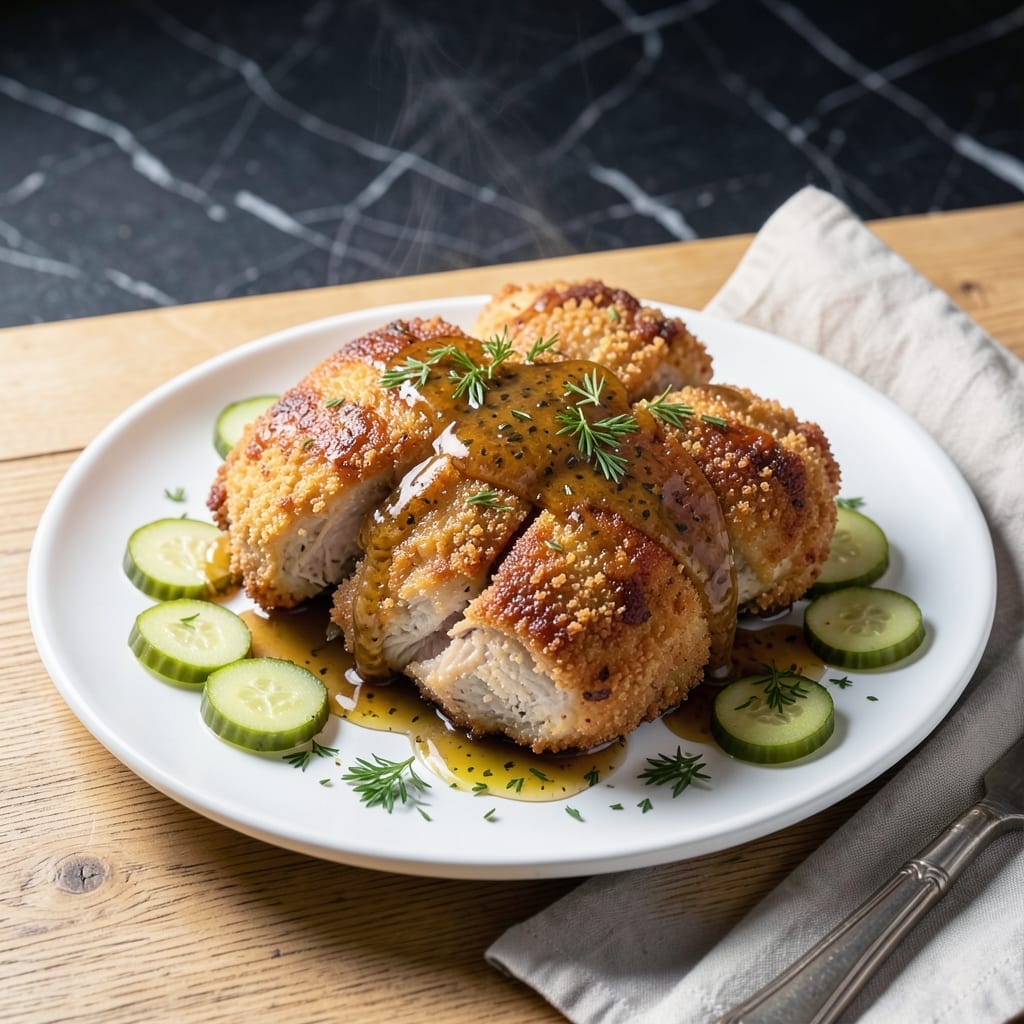
This recipe transforms ordinary chicken into an extraordinary dish with a simple yet brilliant technique. The pickle brine works magic, infusing the meat with tangy flavor and ensuring remarkable juiciness.
Marinating the chicken in pickle juice for just 4 hours creates a flavor profile that’s both bold and balanced. The acidity tenderizes the meat while adding that signature tangy crunch we all love.
The result is tender, flavorful chicken with a subtle pickle punch that pairs perfectly with the crispy coating. Baking at 400°F guarantees a golden finish every time.
Serve it hot for a meal that’s sure to impress, with minimal effort and maximum taste.
Ingredients for Pickle Chicken
Eleven ingredients transform simple chicken into a tangy, crispy masterpiece with minimal effort.
| Ingredient | Amount | Notes |
|---|---|---|
| Boneless Skinless Chicken Breasts 🍗 | 1 ½ lb | Pounded to even thickness |
| Dill Pickle Juice 🥒 | 1 ½ cups | From jarred dill pickles |
| All-Purpose Flour 🌾 | 1 cup | For dredging chicken |
| Large Eggs 🥚 | 2 whole | Beaten for breading |
| Panko Breadcrumbs 🍞 | 1 ½ cups | For crispy coating |
| Cornstarch 🌾 | ¼ cup | Ensures extra crispiness |
| Garlic Powder 🧄 | 1 tsp | For seasoning breading |
| Onion Powder 🧅 | 1 tsp | For seasoning breading |
| Paprika 🌶️ | 1 tsp | Sweet or smoked variety |
| Salt 🧂 | 1 tsp | Diamond Crystal kosher preferred |
| Black Pepper 🌶️ | ½ tsp | Freshly ground preferred |
| Vegetable Oil 🫒 | ½ cup | For baking crispiness |
| Dried Dill 🌿 | 1 tsp | Complements pickle flavor |
The pickle juice quality matters most here. Use juice from high-quality dill pickles—Claussen or Grillo’s are excellent choices with bold, tangy flavor. Avoid sweet pickle juice, as it will alter the flavor profile. The chicken breasts should be uniformly pounded to 1/2-inch thickness for even cooking. Most grocery stores carry suitable options in their refrigerated deli section.
No pickle juice on hand? Combine 1 cup water, 1/2 cup white vinegar, 1 tbsp salt, and 1 tbsp sugar for a quick substitute. Panko can be swapped with regular breadcrumbs, though the texture won’t be as crisp. The cornstarch is optional but highly recommended for maximum crunch. For a spicier version, add 1/2 tsp cayenne to the breading mixture.
The brined chicken keeps well in the refrigerator for up to 3 days before cooking. Once baked, it stays crispy for 2 days when stored in an airtight container. For best results, reheat in a 400°F oven for 10 minutes to restore crispiness.
Why You’ll Love This Recipe
- One Bowl Wonder: I just dump the flour, eggs, and panko in one bowl—no fancy prep, just bread and fry.
- Tangy Crunch: That dill pickle juice marinade gives the chicken a zingy kick, and the panko stays crispy even after reheating.
- Kid-Approved Dinner: My picky nephew gobbles this up, and it’s just as good in a sandwich the next day.
- Pantry Staples: I always have chicken, pickle juice, and breadcrumbs on hand, so this saves me from last-minute grocery runs.
Step-by-Step Instructions for Pickle Chicken
This method ensures maximum juiciness with a perfectly crisp coating every time.
Step 1: Brine the Chicken in Pickle Juice
Place the 1.5 lb boneless skinless chicken breasts in a large zip-top bag and pour in all 1.5 cups dill pickle juice. Squeeze out excess air and seal tightly. Refrigerate for 4-6 hours, flipping the bag halfway through to ensure even brining.
This acidic brine works double duty—it tenderizes the meat while infusing that signature tangy flavor throughout. The chicken will look slightly opaque when properly brined, indicating the pickle juice has fully penetrated the flesh.
Step 2: Prepare the Breading Station
Set up three shallow dishes. In the first, combine the 1 cup all-purpose flour, 0.25 cup cornstarch, 1 tsp garlic powder, 1 tsp onion powder, 1 tsp paprika, 1 tsp salt, and 0.5 tsp black pepper. In the second, beat the 2 whole large eggs with the 1 tsp dried dill. In the third, place all 1.5 cups panko breadcrumbs.
The cornstarch in the flour mixture creates micro-crispiness you won’t get with flour alone, while the dill in the egg wash amplifies the pickle flavor in every bite. This three-step process ensures complete coverage and maximum crunch.
Step 3: Bread and First Cook the Chicken
Remove the chicken from the brine and pat thoroughly dry with paper towels. Working with one piece at a time, dredge it in the flour mixture, shaking off excess, then dip in the egg mixture, letting excess drip off, and finally press into the panko breadcrumbs, ensuring full coverage.
Heat the 0.5 cup vegetable oil in a large skillet over medium-high heat until shimmering. Add the breaded chicken and cook for 3-4 minutes per side until golden brown and crispy. The coating should release easily from the pan when properly browned.
Step 4: Finish in the Oven for Even Cooking
Transfer the pan-seared chicken to a wire rack set over a baking sheet. Bake in a preheated 375°F oven for 10-12 minutes until the internal temperature reaches 165°F and the coating is uniformly crisp.
This two-stage cooking method guarantees the crust stays intact while ensuring the meat cooks through gently. The rack prevents steam from softening the breading on the underside, maintaining that desirable crunch all around.
Pro Tips For Making Pickle Chicken
- Brine the Chicken: Soak the chicken breasts in dill pickle juice for at least 30 minutes—this keeps them juicy and infuses that tangy flavor I was skeptical until I tried it.
- Double Dredge: After the first coat of flour and egg, repeat the process before adding panko for a crispier crust that actually holds up to frying.
- Skip Cold Chicken: Let the chicken sit at room temperature for 10-15 minutes before cooking—I learned this the hard way after my first few batches came out unevenly cooked.
- Press the Panko: Press the panko crumbs firmly into the chicken so they stick better during cooking, or you’ll lose half the coating in the pan.
Make-Ahead Tips for This Recipe
Pre-Brine Prep
I always start by prepping the chicken the night before. Pound the 1.5 lb boneless skinless chicken breasts to ½-inch thickness and place them in a zip-top bag with 1.5 cups dill pickle juice. This overnight brine (up to 8 hours) gives the most flavor penetration. 💡
Breading in Advance
You can mix the dry breading ingredients (1 cup flour, ¼ cup cornstarch, and spices) the day before. Store in an airtight container at room temperature. The panko breadcrumbs stay fresh in their original packaging until you’re ready to use them.
Partial Cook Method
For true make-ahead convenience, bread and pan-sear the chicken as directed, then stop. Refrigerate the seared pieces on a wire rack for up to 24 hours. Finish baking at 375°F for 12-15 minutes when ready to serve.
Freezing for Later
Breaded but uncooked chicken freezes beautifully. Arrange pieces on a baking sheet, freeze solid (2 hours), then transfer to a freezer bag. Cook from frozen—add 5-7 minutes to the baking time. No thawing needed!
Reheating Tips
To revive crispiness, place leftovers on a wire rack in a 400°F oven for 10 minutes. The microwave works in a pinch (30-second intervals), but the oven method preserves that crunch we love.
Pickle Juice Storage
Save any leftover pickle juice in the fridge for up to 1 week. I use it to quick-brine other proteins or add tang to salad dressings. Just give it a stir before using. 🥒
Nutrition Facts
Frequently Asked Questions
Can I use other pickle varieties?
Stick to dill pickle juice for best flavor. Bread and butter or sweet pickles will make the chicken taste unpleasantly sweet.
How do I know when it’s fully cooked?
Use a meat thermometer—it should read 165°F in the thickest part. The coating will be golden brown and crisp.
Can I bake it instead of pan-searing?
Yes, but crispiness suffers. Bake at 400°F for 20-25 minutes, flipping halfway. The oven-only method works in a pinch.
Why did my breading fall off?
Likely the chicken wasn’t dry after brining. Pat it thoroughly with paper towels before breading.

- Jollof Rice Sauce Recipe: West African Tomato and Spice Infusion - September 25, 2026
- Japanese Rice Soup Recipe: Umami-Rich Comfort in a Bowl - September 25, 2026
- Homemade Cream Of Rice Recipe: Silk-Smooth Breakfast in Minutes - September 25, 2026