
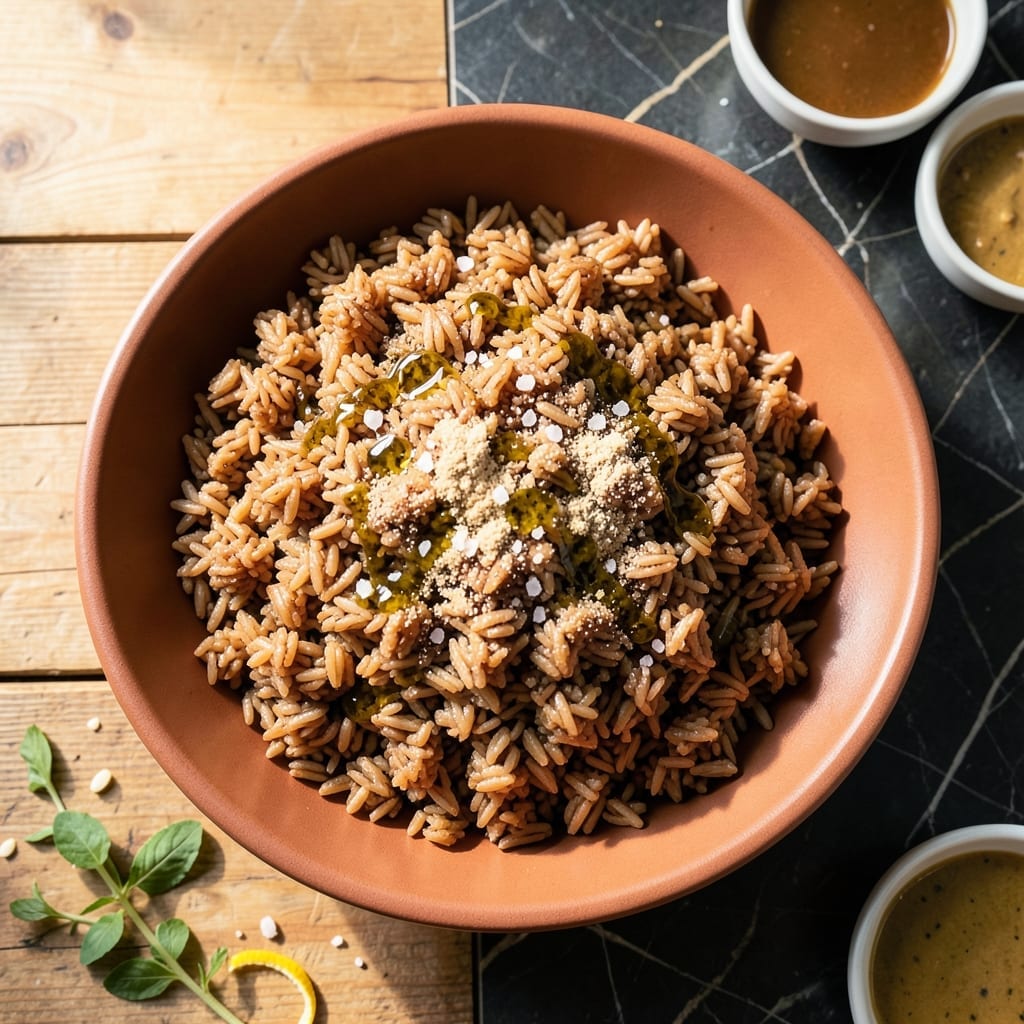
I developed this puffed brown rice method after realizing most recipes fail to achieve the light and crunchy texture that makes this dish special.
Brown rice is cooked until tender, then dried and quickly heated in a hot pan to create the signature puffed effect. This is a technique I tested multiple times before sharing.
The result is golden, airy grains with a satisfying crunch that works as a base or topping. It adds texture to salads, soups, or grain bowls.
This process transforms humble brown rice into something extraordinary with minimal effort and maximum reward.
Ingredients for Puffed Brown Rice
Transform humble brown rice with these simple ingredients for a light, crunchy texture.
| Ingredient | Amount | Notes |
|---|---|---|
| Brown Rice 🌾 | 2 cups | Long-grain variety preferred |
| Water 💧 | 4 cups | For cooking rice |
| Olive Oil 🫒 | 2 tbsp | Divided for cooking and toasting |
| Salt 🧂 | ½ tsp | Kosher or sea salt |
| Garlic Powder 🧄 | ½ tsp | Optional for flavor |
| Onion Powder 🧅 | ½ tsp | Optional for depth |
| Smoked Paprika 🌶️ | ¼ tsp | Adds subtle smokiness |
| Black Pepper 🌶️ | ¼ tsp | Freshly ground preferred |
| Lemon Zest 🍋 | 1 tsp | For brightness (optional) |
| Fresh Parsley 🌿 | 2 tbsp | Chopped, for garnish |
The rice choice is critical here. Long-grain brown rice provides the best puff when dried and toasted. Avoid instant or pre-cooked varieties—they won’t achieve the same texture. Trader Joe’s or bulk bins at natural food stores often carry high-quality options. Look for rice with intact grains and no added preservatives for optimal results.
Out of brown rice? White rice can work but requires less drying time—watch closely to prevent burning. For extra flavor, vegetable broth instead of water adds depth. The spices can be adjusted or omitted entirely; turmeric or cumin offer interesting variations. The olive oil is essential for crisping, but avocado oil is a neutral alternative.
Cooked rice keeps in the fridge for 3-4 days before drying. Once puffed, store in an airtight container at room temperature for up to 1 week. Re-crisp in a dry pan if needed. The dried rice can also be frozen for 1 month for longer storage.
Why You’ll Love This Recipe
- Five Ingredients: I love that this only needs brown rice, water, olive oil, salt, and garlic powder—nothing fussy.
- Addictive Crunch: The puffed texture with that garlic oil coating is ridiculously good.
- Meal Prep Hero: I make a big batch on Sunday and it stays crispy for days in the fridge.
- Pocket Change: A pound of brown rice costs pennies and makes enough for a week.
Step-by-Step Instructions for Puffed Brown Rice
This method transforms ordinary brown rice into a light, crispy texture with minimal effort.
Step 1: Cook the Brown Rice Until Tender
Combine the 2 cups Brown Rice and 4 cups Water in a medium saucepan with a tight-fitting lid. Add the 0.5 tsp Salt, 0.5 tsp Garlic Powder, and 0.5 tsp Onion Powder, then stir to dissolve the seasonings evenly.
Bring to a boil over high heat, then reduce to low, cover, and simmer for 40-45 minutes until the rice is tender and the water is fully absorbed. You’ll know it’s done when the grains are soft with no chalky center.
Once cooked, remove from heat and let it sit covered for 10 minutes. This allows the steam to finish cooking the rice and prevents it from becoming sticky.
Step 2: Season and Prep for Puffing
Transfer the cooked rice to a large mixing bowl and fluff it gently with a fork to separate the grains. Drizzle 1 tbsp Olive Oil over the rice and sprinkle with the 0.25 tsp Smoked Paprika and 0.25 tsp Black Pepper. Gently fold to distribute the seasonings evenly.
The rice should be slightly moist but not wet. If it appears too dry, add a splash of water and mix again. This step ensures every bite is infused with flavor before puffing.
Let the seasoned rice cool for 10 minutes at room temperature. Cooling helps the grains firm up slightly, which is essential for achieving that signature crispness later.
Step 3: Toast the Rice for Maximum Crunch
Heat the remaining 1 tbsp Olive Oil in a large, nonstick skillet over medium-high heat. Add the seasoned rice in a single, even layer, pressing down lightly with a spatula. Let it cook undisturbed for 5-7 minutes until the bottom becomes golden brown and crispy.
Stir the rice, breaking up any large clumps, and spread it out again. Press down once more and cook for another 5-7 minutes, stirring occasionally, until the rice is uniformly crispy and puffed. Watch closely—you want a deep golden color, not burnt.
The rice should sizzle gently in the pan. If it starts to pop excessively, reduce the heat slightly to avoid scorching. This controlled toasting is what gives the rice its light, airy texture.
Step 4: Finish and Garnish
Remove the puffed rice from the skillet and transfer it to a serving bowl. Sprinkle with the 1 tsp Lemon Zest and toss gently to incorporate. The zest adds a bright, citrusy note that balances the smoky and savory flavors.
Finally, garnish with the 2 tbsp Fresh Parsley for a pop of color and freshness. Serve immediately while the rice is still warm and at its crispiest. The texture is best enjoyed fresh, though leftovers can be revived in a dry skillet over medium heat.
Pro Tips For Making Puffed Brown Rice
- Pre-soak the rice: Soak brown rice in warm water for 30 minutes before cooking—it cuts the cooking time and helps the grains puff more evenly.
- Use high heat: Crank the burner to medium-high when toasting the rice in olive oil to get that nutty depth before adding water.
- Skip the stir: Resist the urge to stir while the rice is puffing—it can break the grains and turn them mushy instead of light and crisp.
- Dry it well: After draining cooked rice, spread it on a tray and let it air-dry 10 minutes so it puffs better when fried or baked.
Storing and Reheating This Dish
Room Temperature Storage
Once completely cooled, transfer your puffed rice to an airtight container. It stays crisp for up to 3 days at room temperature. I use glass jars with tight lids to maintain freshness. Keep it in a cool, dry cupboard away from direct sunlight. 💡
Refrigerator Storage
For longer storage, refrigerate in a sealed container for up to 1 week. The cold can make the rice slightly less crisp, but it revives beautifully. I always let it come to room temperature before reheating for best results.
Freezer Method
Spread cooled puffed rice on a baking sheet and freeze for 1 hour before transferring to freezer bags. This prevents clumping. It keeps for 1 month and maintains texture better than other grains. Squeeze out all air before sealing. ❄️
Reheating in Skillet
Heat a dry skillet over medium heat and add the rice in a single layer. Stir occasionally for 3-4 minutes until crisp. I find this method works best for restoring that fresh-puffed texture.
Oven Reheating
Preheat oven to 350°F and spread rice on a baking sheet. Heat for 5-7 minutes, stirring halfway. This works well for larger batches. Watch closely to prevent over-browning. 🔥
Microwave Revival
Place rice on a microwave-safe plate and heat in 20-second bursts at 50% power. Stir between bursts to ensure even heating. It won’t be as crisp as other methods but works in a pinch.
Nutrition Facts
Frequently Asked Questions
Can I use pre-cooked rice for this?
Yes, but use day-old rice that’s been refrigerated overnight. Freshly cooked rice contains too much moisture and won’t crisp properly.
Why isn’t my rice puffing up?
It needs to be completely dry before toasting. Spread cooked rice on a baking sheet and dry in a 200°F oven for 1 hour if it’s still moist.
Can I add other seasonings?
Try 1/2 tsp cumin or 1/2 tsp turmeric for different flavor profiles. Add spices to the rice after cooking but before toasting.
How do I prevent burning?
Keep the heat at medium-high and stir frequently. If it starts popping excessively, reduce heat slightly and stir constantly.

- Jollof Rice Sauce Recipe: West African Tomato and Spice Infusion - September 25, 2026
- Japanese Rice Soup Recipe: Umami-Rich Comfort in a Bowl - September 25, 2026
- Homemade Cream Of Rice Recipe: Silk-Smooth Breakfast in Minutes - September 25, 2026