
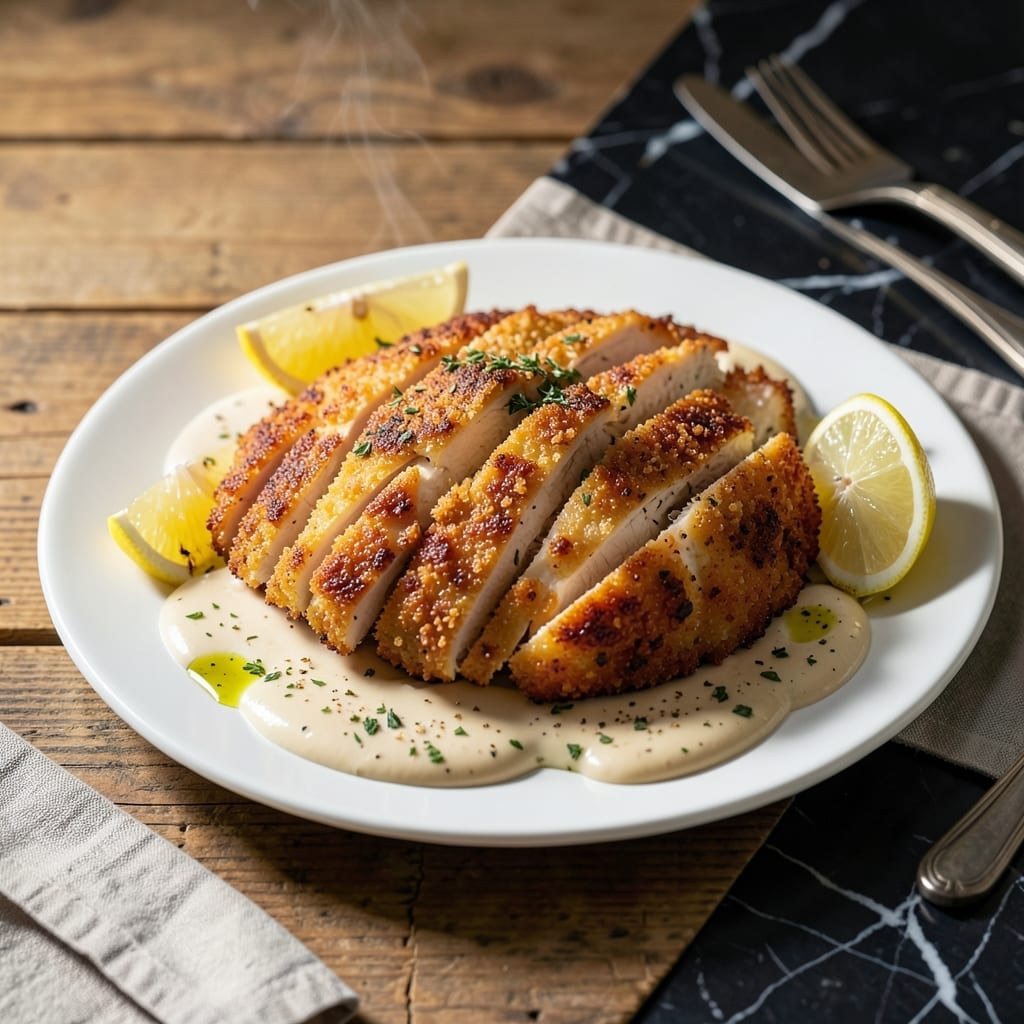
I developed this oven-baked method after burning through three batches of chicken, each with a different crispy coating technique. The ranch seasoning creates a crispy, golden exterior that locks in the juices beautifully.
This recipe relies on a simple breading process and a hot oven to achieve that perfect texture. The herb-infused juiciness comes from the ranch seasoning blend, which flavors the meat as it cooks.
You’ll end up with chicken that’s crispy on the outside and tender inside, with every bite packed with those classic ranch flavors. It’s a foolproof way to get restaurant-quality results at home.
Serve it hot for the best texture. The oven does most of the work—just set the timer and let it bake.
Ingredients for Ranch Chicken Recipe Oven
Standard pantry items plus chicken and ranch seasoning create this crispy oven-baked dish.
| Ingredient | Amount | Notes |
|---|---|---|
| Chicken Breast 🍗 | 1 ½ lb | Boneless, skinless, pounded even |
| Ranch Seasoning Mix 🌿 | 1 package | Dry, store-bought or homemade |
| All-Purpose Flour 🌾 | 1 cup | For initial dredging layer |
| Large Eggs 🥚 | 2 whole | Beaten for binding coating |
| Panko Breadcrumbs 🍞 | 1 ½ cups | For maximum crispiness |
| Buttermilk 🥛 | ½ cup | For tenderizing chicken |
| Vegetable Oil 🫒 | 2 tbsp | For light coating on baking sheet |
| Salt 🧂 | 1 tsp | Kosher or sea salt preferred |
| Black Pepper 🌶️ | ½ tsp | Freshly ground for best flavor |
| Garlic Powder 🧄 | 1 tsp | Enhances ranch seasoning flavor |
| Onion Powder 🧅 | 1 tsp | Complements herb blend perfectly |
| Dried Parsley 🌿 | 1 tsp | For color and freshness |
| Paprika 🌶️ | ½ tsp | Adds subtle smokiness |
The chicken breast quality directly impacts texture. Boneless, skinless thighs also work well if you prefer darker meat. For the ranch seasoning, Hidden Valley offers consistent flavor, but homemade blends (dried dill, parsley, garlic powder) are superior. Panko breadcrumbs are non-negotiable for that signature crunch—regular breadcrumbs won’t deliver the same crispiness.
No buttermilk? Whole milk with 1 tbsp vinegar works as a substitute. For a gluten-free version, swap the flour for cornstarch or almond flour. If avoiding eggs, mayonnaise or Greek yogurt can bind the coating (though texture may vary slightly). The seasoning blend can be adjusted—add extra dill or chives for more herb intensity.
Marinate the chicken in buttermilk for up to 12 hours for maximum tenderness. Store leftovers in an airtight container for 3-4 days in the fridge. Reheat in the oven at 375°F for 10-12 minutes to restore crispiness. Freezing isn’t recommended as it compromises the coating’s texture.
Why You’ll Love This Recipe
- One Pan Magic: I toss everything on a sheet pan, pop it in the oven, and the panko gets golden while I set the table.
- That Ranch Crunch: The seasoning mix in the breading gives every bite that herby, tangy kick I can’t resist.
- Weeknight Hero: Between us, this is my go-to for busy Tuesdays when I need dinner fast but still crave restaurant-quality flavor.
- Leftovers That Disappear: Honestly, the crispy ranch chicken tastes just as good cold the next day—if there’s any left.
Step-by-Step Instructions for Ranch Chicken Oven
Follow this method precisely and you’ll achieve maximum crispiness with juicy, herb-infused chicken every time.
Step 1: Prep and Season the Chicken
Pat the 1.5 lb Chicken Breast completely dry with paper towels. This step ensures the coating adheres properly and creates that coveted crunch. Season both sides evenly with 1 tsp Salt, 0.5 tsp Black Pepper, 1 tsp Garlic Powder, 1 tsp Onion Powder, 1 tsp Dried Parsley, and 0.5 tsp Paprika.
Pounding the chicken to an even thickness guarantees uniform cooking. I always use a meat mallet to achieve about ½-inch thickness throughout, which prevents dry spots and ensures each piece finishes at the same time.
Step 2: Set Up the Breading Station
In a shallow dish, combine the 1 cup All-Purpose Flour and 1 package Ranch Seasoning Mix. This blend creates the first layer of flavor and texture. In a second dish, whisk the 2 whole Large Eggs with 0.5 cup Buttermilk until fully combined.
Place the 1.5 cups Panko Breadcrumbs in a third dish. The buttermilk in the egg wash tenderizes the chicken while helping the breading cling. Arrange the dishes in order: flour, egg wash, panko—this sequence is critical for proper layering.
Step 3: Coat the Chicken Thoroughly
Dredge each piece of chicken in the flour mixture, pressing gently to ensure full coverage. Shake off any excess flour—too much creates a gummy layer under the crust. Next, dip the flour-coated chicken into the egg wash, letting any excess drip off for 3-5 seconds.
Finally, press the chicken into the panko breadcrumbs, turning to coat all sides completely. Apply firm pressure to help the crumbs adhere. For extra crispiness, I like to double-dip: repeat the egg wash and panko steps once more. Place the breaded chicken on a wire rack set over a baking sheet.
Step 4: Bake to Golden Perfection
Preheat your oven to 400°F. Drizzle the 2 tbsp Vegetable Oil lightly over the breaded chicken or brush it onto the tops. This step enhances browning and adds an extra layer of crunch. Arrange the pieces so they don’t touch, ensuring even air circulation.
Bake on the middle rack for 20-25 minutes until the coating is deep golden brown and the internal temperature reaches 165°F. Flip the chicken halfway through baking to ensure both sides crisp evenly. The panko should be crisp to the touch, and the chicken should feel firm when pressed.
Step 5: Rest and Serve Immediately
Remove the chicken from the oven and let it rest on the wire rack for 5 minutes. This brief rest allows the juices to redistribute, keeping the meat moist while the coating stays crisp. Resting on a rack prevents steam from softening the bottom crust.
Serve while hot. The exterior should shatter slightly when cut, revealing tender, juicy chicken underneath. Each bite delivers the herbaceous notes of the ranch seasoning, balanced by the crunch of the panko crust. This method guarantees a crispy finish without frying.
Pro Tips For Making Ranch Chicken Recipe Oven
- Preheat the Oven: Always preheat to 400°F before baking—this gives the panko that crispy texture without drying out the chicken.
- Pound the Chicken: Use a rolling pin to even out the chicken breasts to ½-inch thickness so they cook through at the same rate.
- Double Dip Coating: After the egg wash, press the chicken into the panko firmly—this prevents the breading from falling off during baking.
- Use Fresh Panko: Stale panko won’t crisp up the same way, so check the package date or buy from a store with high turnover.
Troubleshooting This Recipe
Coating Not Sticking
If your breading slides off, the chicken likely wasn’t dry enough. Pat it thoroughly with paper towels before seasoning. Also, ensure your flour and panko dishes are wide enough to fully submerge each piece. I learned this the hard way in my tiny Boston kitchen.
Soggy Bottoms
This happens when chicken sits in its own steam. Always use a wire rack on your baking sheet, never place pieces directly on the pan. The rack allows air to circulate underneath, keeping the coating crisp on all sides. 💡
Uneven Browning
Rotate your baking sheet halfway through the 20-25 minute bake time. If some pieces brown faster, move them to a cooler spot in the oven. My oven has hot spots near the back I’ve learned to avoid.
Dry Chicken
Overcooking is the usual culprit. Pull the chicken when it hits exactly 165°F internal temperature. Also, don’t skip pounding the breasts to ½-inch thickness—this ensures even cooking throughout each piece.
Breading Too Thick
Shake off excess flour after the first dredge and let excess egg wash drip for 3-5 seconds. Press firmly into panko but don’t over-pile. A thick coating won’t cook through and can taste doughy.
Seasoning Not Strong Enough
Mix the ranch seasoning into your flour, not just sprinkled on top. For extra flavor, add 1 tsp garlic powder and 1 tsp onion powder to the flour mixture. Biscuit always licks the plate clean when I do this. 🐾
Nutrition Facts
Frequently Asked Questions
Can I use chicken thighs instead of breasts?
Boneless, skinless thighs work great and stay extra juicy. Adjust baking time to 22-28 minutes since they cook slightly slower. The ranch-panko coating works the same way.
What if I don’t have buttermilk?
Mix ½ cup milk with 1½ tsp vinegar or lemon juice and let sit for 5 minutes. This creates a perfect substitute that tenderizes just as well.
How do I keep the coating crispy when storing?
Store leftovers on a wire rack in the fridge, not stacked. Reheat in a 400°F oven for 8-10 minutes to restore crunch. Microwaving will make it soggy.
Can I make this gluten-free?
Swap the flour for cornstarch or almond flour and use gluten-free panko. The texture may vary slightly but will still be delicious. Check your ranch seasoning for hidden gluten.

- Jollof Rice Sauce Recipe: West African Tomato and Spice Infusion - September 25, 2026
- Japanese Rice Soup Recipe: Umami-Rich Comfort in a Bowl - September 25, 2026
- Homemade Cream Of Rice Recipe: Silk-Smooth Breakfast in Minutes - September 25, 2026