
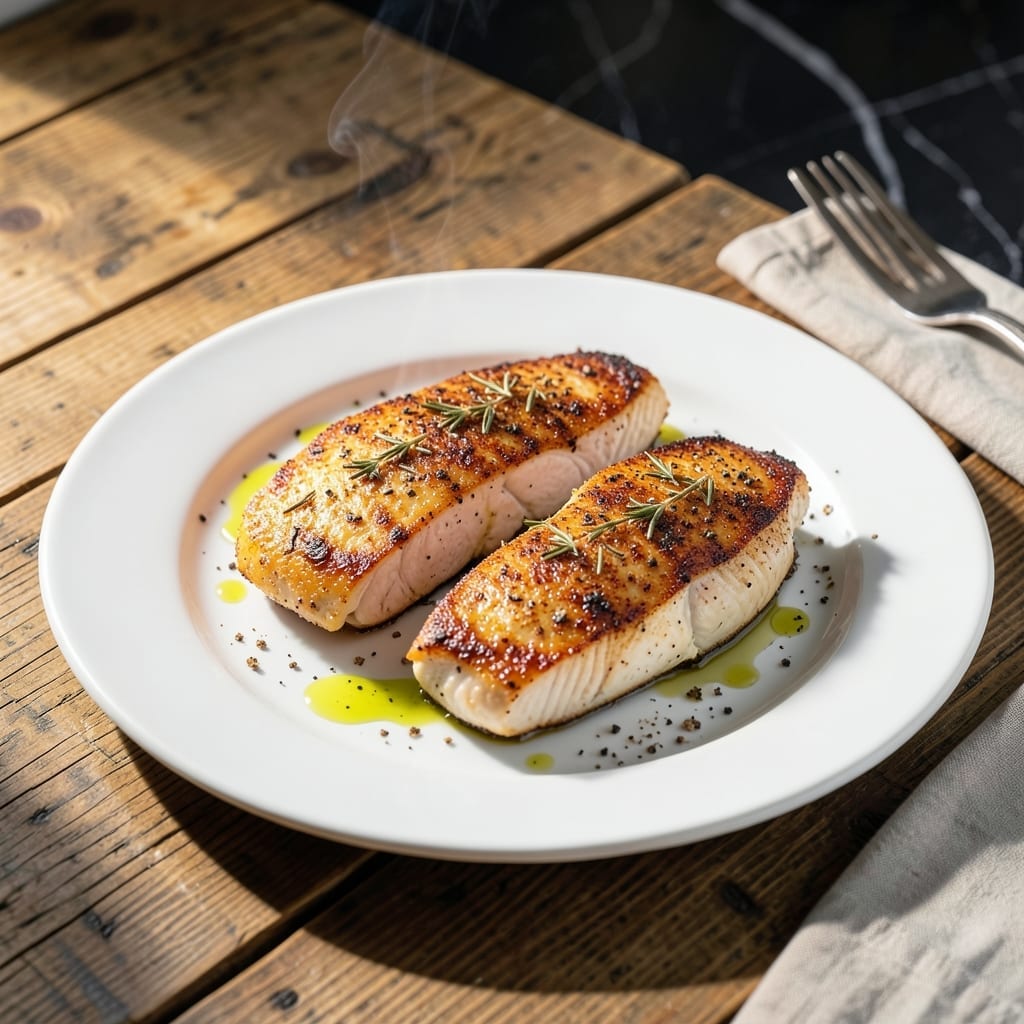
Achieving perfectly tender chicken fillet at home is simpler than you think. This method guarantees juicy results every time with minimal effort and maximum flavor.
The secret lies in proper temperature control and timing. Searing the fillets in a hot pan creates a golden crust while locking in moisture, then finishing them in the oven ensures even cooking throughout.
With just a few basic ingredients and about 20 minutes, you’ll have restaurant-quality chicken that’s tender inside with a flavorful, golden exterior. The technique works for both boneless breasts and tenderloins.
Serve as a main course with sides or slice for salads and sandwiches. This versatile preparation method delivers consistent results for any meal occasion.
Ingredients for Recipe for Chicken Fillet
Quality ingredients and proper technique transform simple chicken into restaurant-worthy fillets with ease.
| Ingredient | Amount | Notes |
|---|---|---|
| Boneless Chicken Breasts 🍗 | 1 ½ lb | Pounded to even thickness |
| Kosher Salt 🧂 | 1 ½ tsp | Diamond Crystal preferred |
| Freshly Ground Black Pepper 🌶️ | 1 tsp | Coarse grind ideal |
| Garlic Powder 🧄 | 1 tsp | Not garlic salt |
| Paprika 🌶️ | 1 tsp | Sweet or smoked variety |
| Dried Thyme 🌿 | ½ tsp | Rubbed between fingers |
| All-Purpose Flour 🌾 | ¼ cup | For light dredging |
| Unsalted Butter 🧈 | 3 tbsp | Or substitute olive oil |
| Extra-Virgin Olive Oil 🫒 | 2 tbsp | Divided for searing |
| Fresh Lemon Juice 🍋 | 1 tbsp | For brightness at finish |
| Fresh Parsley 🌿 | 2 tbsp | Finely chopped for garnish |
Optimal quality requires boneless, skinless chicken breasts of uniform thickness—pound them to 1/2-inch for even cooking. Diamond Crystal kosher salt is the professional standard for seasoning; its coarse texture and clean flavor distribute perfectly. For the butter, Plugrá or European-style offers superior browning and richness. Find these at Whole Foods or any well-stocked supermarket.
Substitutions are straightforward: olive oil replaces butter in a 1:1 ratio for dairy-free cooking. No fresh parsley? Dried at one-third the amount works, though fresh adds vibrancy. Chicken tenderloins can replace breasts—reduce cooking time by 2-3 minutes. For extra flavor, swap paprika for smoked paprika or add a pinch of cayenne for heat.
Store raw chicken in the coldest part of your fridge for up to 2 days. Cooked fillets keep 3-4 days refrigerated or freeze for 3 months. Reheat gently to preserve moisture—microwave with a damp paper towel or warm in a low oven.
Why You’ll Love This Recipe
- One Pan Wonder: I toss the chicken with salt, pepper, garlic powder, and paprika, then bake—no extra bowls, no mess.
- That Paprika Kick: The smoky paprika plus garlic powder gives it this warm, savory depth that’s honestly addictive.
- Meal Prep Hero: I make a double batch on Sunday and it stays juicy for salads or wraps all week.
- Budget Stretcher: Boneless breasts are affordable, and this recipe turns them into something crave-worthy without fancy add-ons.
Step-by-Step Instructions for Chicken Fillet
Master the technique for perfectly seared, juicy chicken with crisp edges every time.
Step 1: Pound and Season the Chicken
Place the boneless chicken breasts between two sheets of plastic wrap. Using a meat mallet or rolling pin, pound them to an even ½-inch thickness. This ensures uniform cooking and prevents dry, overdone edges while the center finishes.
Pat the pounded chicken dry with paper towels—moisture prevents proper browning. Season both sides evenly with the 1.5 tsp kosher salt, 1 tsp freshly ground black pepper, 1 tsp garlic powder, 1 tsp paprika, and 0.5 tsp dried thyme. Rub the spices in firmly so they adhere during cooking.
Step 2: Dredge and Prepare for Searing
Lightly coat each piece in the 0.25 cup all-purpose flour, shaking off any excess. The flour creates a delicate crust and helps thicken the pan sauce later. Don’t over-flour—this can lead to a gummy texture instead of a crisp finish.
Let the seasoned chicken sit at room temperature for 10 minutes while you heat the pan. This takes the chill off, allowing for more even cooking and better browning in the next step.
Step 3: Sear in Butter and Oil
Heat 1 tbsp extra-virgin olive oil and 2 tbsp unsalted butter in a large skillet over medium-high heat until the butter foams and subsides. Add the chicken and cook undisturbed for 5-6 minutes per side, until the crust is deep golden brown.
Avoid moving the chicken too soon—it needs time to develop a proper sear. The crust should release easily from the pan when it’s ready to flip. If the pan starts to smoke excessively, reduce the heat slightly to prevent burning the butter.
Step 4: Finish and Rest
In the final 2 minutes of cooking, add the remaining 1 tbsp unsalted butter and 1 tbsp extra-virgin olive oil to the pan. Baste the chicken with the hot butter continuously by spooning it over the top. This adds richness and ensures the edges stay moist.
Transfer the chicken to a plate and let it rest for 5 minutes before serving. This allows the juices to redistribute, keeping the meat tender and juicy. Drizzle with the 1 tbsp fresh lemon juice just before serving for brightness.
Step 5: Garnish and Serve
Sprinkle the finished chicken with the 2 tbsp fresh parsley for a pop of color and freshness. The parsley not only adds visual appeal but also a subtle herbal note that complements the spices.
Serve immediately while the crust is still crisp. Each piece should have a golden-brown exterior with juicy, tender meat inside. The residual pan juices can be drizzled over the top for extra flavor.
Pro Tips For Making Recipe For Chicken Fillet
- Pound the Breasts: Boneless chicken breasts cook unevenly if left thick on one end—I learned this the hard way after too many dry, chewy bites. Aim for a consistent ½-inch thickness with a meat mallet or rolling pin.
- Season Twice: Kosher salt and black pepper need to hit both sides, but don’t stop there—dust the chicken with garlic powder and paprika right before cooking so the spices don’t burn.
- Skip Cold Chicken: Pull the fillets from the fridge 15-20 minutes before cooking. Sounds weird, but it works: cold meat seizes up in the pan and cooks unevenly, even if you’ve pounded it.
- Rest Before Serving: Give it a solid 5 minutes under foil after cooking—yes, even if you’re impatient like me. The juices redistribute, and the paprika crust stays crisp instead of soggy.
Best Sauces and Condiments for This Dish
Creamy Garlic Sauce
Whisk together ½ cup heavy cream, 2 tbsp butter, and 3 minced garlic cloves in the hot pan after removing the chicken. Simmer for 3-4 minutes until slightly thickened. I love how this rich sauce soaks into the crispy crust. 🔥
Lemon-Herb Pan Sauce
Deglaze the pan with ¼ cup chicken broth, 1 tbsp lemon juice, and 1 tbsp fresh thyme leaves. Reduce by half for a bright, tangy complement to the savory chicken. This is my go-to for a lighter option.
Honey Mustard Glaze
Mix 3 tbsp Dijon mustard, 2 tbsp honey, and 1 tbsp apple cider vinegar. Brush over the chicken during the last 2 minutes of cooking for a sticky, sweet-spicy finish. It caramelizes beautifully under the broiler too.
Mushroom Cream Sauce
Sauté 1 cup sliced mushrooms in the pan, then add ½ cup heavy cream and 1 tsp Worcestershire sauce. Simmer until mushrooms are tender. This earthy sauce pairs wonderfully with the juicy fillets.
Spicy Sriracha Mayo
Combine ½ cup mayonnaise, 2 tbsp sriracha, and 1 tsp lime juice. The creamy heat balances the chicken’s mild flavor perfectly. I always keep this in my fridge for quick meals. ✨
Nutrition Facts
Frequently Asked Questions
What’s the best way to prevent dry chicken?
Pound the fillets to an even ½-inch thickness and don’t overcook. Use a meat thermometer—remove from heat at 160°F; the temperature will rise to 165°F while resting.
Can I use chicken tenderloins instead?
Yes! Reduce cooking time by 2-3 minutes per side since they’re thinner. They’ll cook faster but stay just as tender with the same seasoning.
How do I know when it’s done without a thermometer?
Press the thickest part with tongs. If it feels firm but still slightly springy, it’s ready. Juices should run clear when pierced, never pink.
What’s the secret to a crispy crust?
Pat the chicken completely dry before seasoning and don’t move it in the pan for at least 5 minutes. The flour dredge helps create that golden, crispy exterior.

- Jollof Rice Sauce Recipe: West African Tomato and Spice Infusion - September 25, 2026
- Japanese Rice Soup Recipe: Umami-Rich Comfort in a Bowl - September 25, 2026
- Homemade Cream Of Rice Recipe: Silk-Smooth Breakfast in Minutes - September 25, 2026