
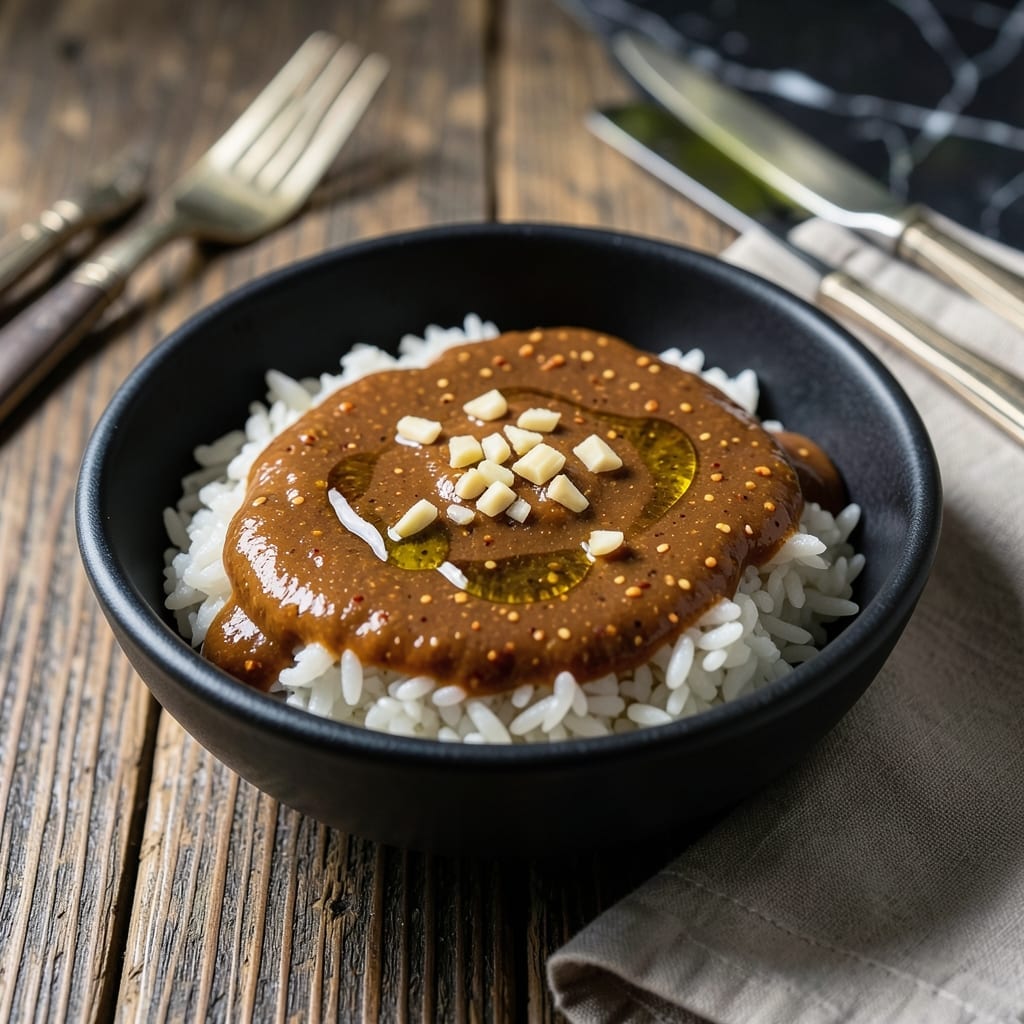
This sauce transforms ordinary dishes into something extraordinary with its deep, complex umami flavor. I developed this recipe after discovering how red yeast rice elevates Asian cuisine beyond the basics.
The preparation is straightforward, requiring just a handful of ingredients and minimal active time. The fermentation process creates a naturally rich, savory base that enhances stir-fries, noodles, or grilled proteins without overpowering them.
What you get is a versatile condiment with a velvety texture and balanced taste that’s both earthy and slightly sweet. It keeps well in the fridge, so you can always have this flavor booster on hand.
Use it to finish dishes or as a marinade base for meats and tofu. Here’s how to make it.
Ingredients for Red Yeast Rice Sauce
Nine simple ingredients create this rich, umami-packed Asian condiment with minimal effort.
| Ingredient | Amount | Notes |
|---|---|---|
| Red Yeast Rice 🍚 | ½ cup | Dried, uncooked variety |
| Soy Sauce 🫒 | ½ cup | Low-sodium preferred |
| Rice Vinegar 🍚 | ¼ cup | For balanced acidity |
| Sesame Oil 🫒 | 2 tbsp | Toasted for depth |
| Garlic Cloves 🧄 | 4 cloves | Minced finely |
| Fresh Ginger 🌿 | 1 tbsp | Peeled and grated |
| Brown Sugar 🍚 | 2 tbsp | Light or dark works |
| Water 💧 | ½ cup | For desired consistency |
| Cornstarch 🌾 | 1 tbsp | Slurry with water |
Red yeast rice is the soul of this sauce—Asian markets or Amazon are your best bets for the authentic stuff. Look for vibrant red color and a slightly earthy aroma. The soy sauce should be high-quality; Kikkoman or Pearl River Bridge are reliable. Fresh ginger and garlic are non-negotiable—they’re doing most of the heavy lifting here.
No red yeast rice? Miso paste plus a pinch of turmeric can mimic the color and depth, though the flavor won’t be identical. Out of rice vinegar? Apple cider vinegar at half the amount works in a pinch. Brown sugar can be swapped for honey or maple syrup, but stick to the same quantity. For a gluten-free version, tamari instead of soy sauce keeps it just as rich.
This sauce keeps beautifully in the fridge for 2-3 weeks—the flavors deepen over time. Store in an airtight glass jar to preserve freshness. If it separates, just shake it up before using. Freezing isn’t recommended, as it can alter the texture.
Why You’ll Love This Recipe
- I’ll be real: I make a double batch because it keeps in the fridge for a week and tastes just as bold reheated.
- 5-Minute Mix: I just dump everything in a saucepan and let it simmer—no chopping, no fuss, just red yeast rice, soy sauce, and garlic doing their magic.
- Umami Bomb: The combo of fermented red yeast rice and sesame oil hits that deep, savory note I crave with every bite.
- Drizzle on Anything: Honestly, I’ve used this on noodles, tofu, even roasted veggies—it’s my new go-to for turning plain dishes into something special.
Step-by-Step Instructions for Red Yeast Rice Sauce
This method ensures optimal flavor extraction and perfect consistency for your umami-rich condiment.
Step 1: Toast and Bloom the Red Yeast Rice
Heat a dry skillet over medium-low heat. Add the 0.5 cup Red Yeast Rice and toast for 2-3 minutes, stirring constantly, until the grains become fragrant and slightly deepen in color. This step activates the rice’s natural compounds and enhances its earthy, slightly sweet profile.
Immediately transfer the toasted rice to a heatproof bowl. Pour in 0.5 cup Soy Sauce and 0.25 cup Rice Vinegar, ensuring the liquid fully submerges the grains. Let this mixture steep at room temperature for 15 minutes to allow the rice to soften and infuse the liquid with its characteristic color and flavor.
Step 2: Sauté the Aromatics in Sesame Oil
In a small saucepan, heat the 2 tbsp Sesame Oil over medium heat until it shimmers. Add the 4 cloves Garlic Cloves and 1 tbsp Fresh Ginger, sautéing for 1-2 minutes until the garlic turns light golden and the ginger releases its pungent aroma. Be vigilant—garlic burns quickly at this stage.
This aromatic base forms the flavor foundation of your sauce. The sesame oil’s nutty depth complements the red yeast rice’s earthiness, while the garlic and ginger add layers of complexity. Remove the pan from heat if the garlic begins to darken too quickly.
Step 3: Combine and Simmer the Sauce Base
Strain the steeped red yeast rice mixture through a fine-mesh sieve into the saucepan with the aromatics, pressing gently on the solids to extract maximum liquid. Discard the rice grains. Stir in the 2 tbsp Brown Sugar and bring the mixture to a gentle simmer over medium-low heat.
Let it cook for 5 minutes, stirring occasionally, until the sugar fully dissolves and the liquid reduces slightly. The sauce should take on a deep reddish-brown hue, with the sugar balancing the soy sauce’s saltiness and the vinegar’s acidity.
Step 4: Thicken to Desired Consistency
In a small bowl, whisk together the 1 tbsp Cornstarch and 0.5 cup Water until smooth. Slowly pour this slurry into the simmering sauce while stirring constantly with your other hand. The mixture will thicken almost immediately—continue stirring for 1-2 minutes until it reaches a glossy, coat-the-back-of-a-spoon consistency.
If the sauce thickens too much, add water 1 tablespoon at a time to achieve your preferred texture. For a thinner, drizzling consistency, simmer for less time; for a thicker, dipping consistency, allow it to reduce further. Taste and adjust seasoning if needed, though the soy sauce typically provides sufficient saltiness.
Pro Tips For Making Red Yeast Rice Sauce
- Bloom the Rice: Toast the red yeast rice in a dry pan for 1-2 minutes until fragrant before adding liquids—I learned this the hard way after my first batch tasted flat and raw.
- Crush the Garlic: Smash the garlic cloves with the side of your knife and let them sit for 5 minutes before cooking to mellow the bite and deepen the flavor.
- Skip the Boil: Keep the heat low to medium when combining ingredients; boiling the soy sauce and vinegar mixture can make it bitter and harsh.
- Rest the Sauce: Let the finished sauce sit for at least 10 minutes before using—this gives the sesame oil time to infuse and the flavors to meld together.
Dietary Considerations for This Dish
Gluten-Free Adaptation
For a celiac-safe version, simply swap the soy sauce for tamari—it delivers the same rich umami without gluten. I always keep a bottle of San-J tamari in my Boston kitchen for this exact reason.
Vegan and Vegetarian
This sauce is naturally plant-based, so no modifications are needed. The red yeast rice and fermented soy provide all the depth typically associated with meat-based sauces. I’ve served it to vegan friends without anyone noticing the difference.
Low-Sodium Option
To reduce sodium, use low-sodium soy sauce and cut the brown sugar to 1 tbsp. The red yeast rice still provides plenty of savory complexity. I find the flavor remains balanced with these adjustments.
Allergen Awareness
This contains soy from the soy sauce and sesame from the oil. For soy allergies, coconut aminos can substitute, though the flavor profile will differ slightly. Always check labels on your red yeast rice for potential cross-contamination.
Sugar Alternatives
Swap the brown sugar for coconut sugar or maple syrup at a 1:1 ratio. I’ve tested both in my triple-decker kitchen—they integrate beautifully while adding subtle caramel notes.
For a sugar-free version, use 1 tbsp monk fruit sweetener instead. The sauce will be less caramelized but still well-balanced. 💡
Nutrition Facts
Frequently Asked Questions
Can I use regular rice instead of red yeast rice?
No, regular rice won’t provide the same flavor or color. Red yeast rice is fermented and has a unique earthy, slightly sweet profile. For a substitute, try miso paste with a pinch of turmeric for color.
How long does this sauce keep in the fridge?
Stored in an airtight glass jar, it stays fresh for 2-3 weeks. The flavors actually deepen over time. If it separates, just shake before using.
Can I make this sauce ahead of time?
In fact, it tastes better after 24-48 hours as the flavors meld. Prepare it up to 2 days in advance for optimal results.
Why did my sauce turn out too thin?
This usually happens if the cornstarch slurry wasn’t cooked long enough. Return it to the heat and simmer for an additional 1-2 minutes while stirring constantly.

- Rice Pudding Recipe With Eggs and Milk: Old-Fashioned Custard-Style Comfort - September 30, 2026
- Rice Noodle Sauce Recipe: Bold Umami Depth for Authentic Stir-Fry - September 30, 2026
- Rice Pilaf Recipe: Fragrant Basmati With Toasted Vermicelli - September 30, 2026