
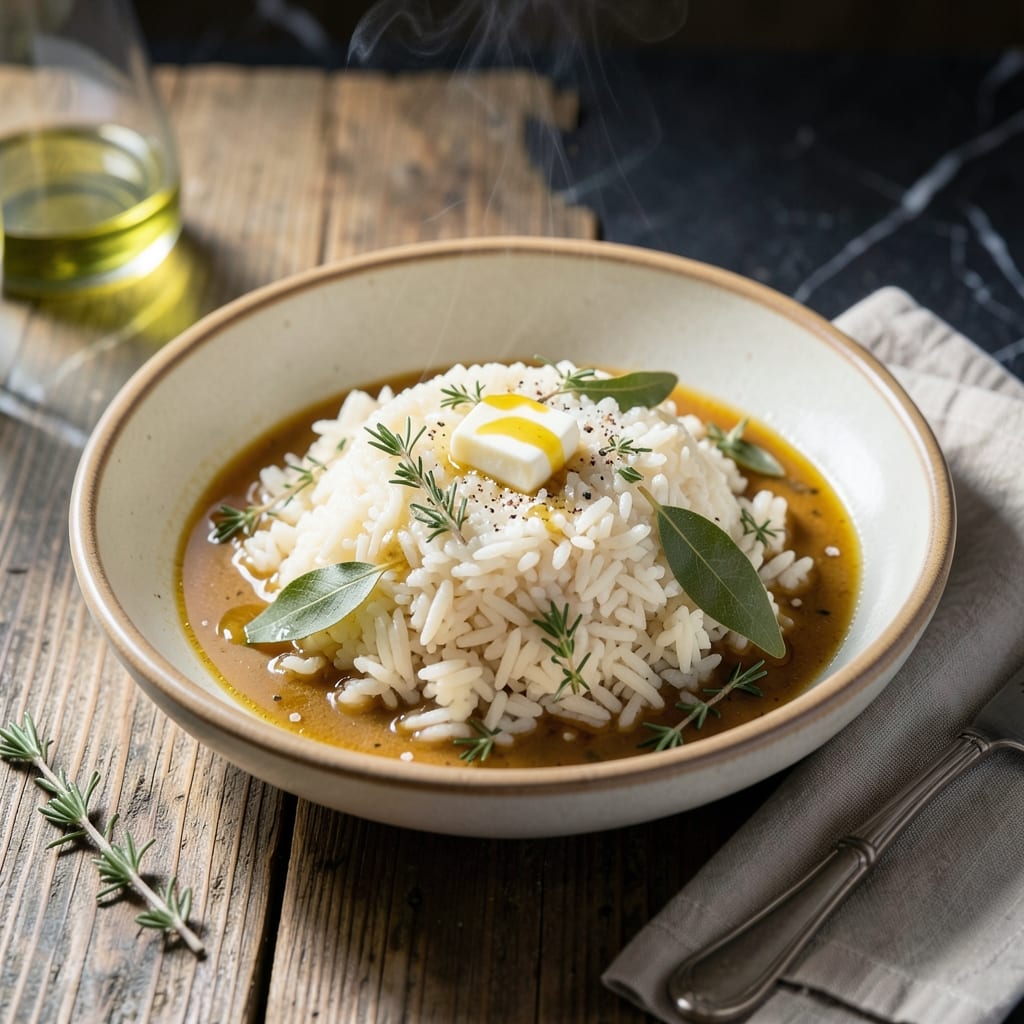
This simple rice and stock recipe transforms basic pantry staples into a deeply flavorful meal. The stock infuses every grain with savory richness you won’t get from water.
Using just 2 ingredients and 20 minutes, this method delivers tender rice with restaurant-quality depth. The key is proper liquid ratios and gentle simmering.
What emerges is perfectly cooked rice with a subtle complexity that elevates any plate. It works as a standalone dish or paired with proteins and vegetables.
Master this technique and you’ll never cook rice with plain water again. The difference in flavor is undeniable.
Ingredients for Rice and Stock
Transform pantry staples into a savory masterpiece with these essential ingredients for perfectly cooked rice.
| Ingredient | Amount | Notes |
|---|---|---|
| Long-Grain White Rice 🍚 | 2 cups | Rinsed until water runs clear |
| Chicken Stock 🍲 | 4 cups | Low-sodium preferred for control |
| Unsalted Butter 🧈 | 2 tbsp | Optional for finishing richness |
| Kosher Salt 🧂 | ½ tsp | Diamond Crystal preferred for consistency |
| Bay Leaf 🍃 | 1 whole | For aromatic depth during cooking |
| Fresh Thyme Sprigs 🌿 | 2 sprigs | Optional but recommended for complexity |
| Garlic Cloves 🧄 | 2 cloves | Smashed to release flavor |
| Shallot 🧅 | 1 whole | Finely minced for subtle onion flavor |
| Black Peppercorns 🌶️ | ¼ tsp | Freshly cracked for best aroma |
| Lemon Zest 🍋 | 1 tsp | For bright finishing note |
The stock is non-negotiable for this technique. Homemade chicken stock delivers the deepest flavor, but high-quality store-bought (look for Better Than Bouillon or Swanson) works in a pinch. For the rice, jasmine or basmati are stellar choices if you want to deviate from long-grain. The key is using a 2:1 liquid-to-rice ratio by volume, which ensures consistent absorption.
No chicken stock? Vegetable stock (I like Imagine brand) or even water with a bouillon cube can substitute in emergencies. Skip the bay leaf? Half a teaspoon of dried thyme adds similar depth. The butter is purely optional—olive oil or a pat of vegan butter works if avoiding dairy. The lemon zest at the end wakes up all the flavors (don’t skip this part).
Cooked rice holds well, covered, for 1-2 hours at room temperature. Refrigerate leftovers in an airtight container for up to 5 days. Reheat with a splash of water or stock to restore moisture. The stock itself can be frozen for 3 months if making ahead.
Why You’ll Love This Recipe
- One Pot Wonder: I just dump rice, stock, and a bay leaf in a pot and let it do its thing—no stirring, no fuss.
- Rich & Savory: The butter and chicken stock turn plain rice into something deeply flavorful, with a subtle herbal touch from the bay leaf.
- Meal Prep Dream: I make a big batch on Sunday and pair it with proteins or veggies all week long.
- Budget Stretch: Honestly, it’s one of the cheapest meals I make, but it tastes like a million bucks.
Step-by-Step Instructions for Rice and Stock
Here’s the method for achieving perfectly cooked rice with rich, aromatic depth every time.
Step 1: Rinse and Toast the Rice
Place the 2 cups Long-Grain White Rice in a fine-mesh strainer and rinse under cold water until the water runs completely clear. This removes excess starch, preventing gummy rice. Shake the strainer gently to remove all water.
In a heavy-bottomed pot, melt the 2 tbsp Unsalted Butter over medium heat. Add the drained rice and stir for 1-2 minutes until the grains become translucent at the edges. You’ll notice a subtle nutty aroma—this toasting step enhances the rice’s natural flavor and prevents stickiness.
Step 2: Sauté the Aromatics
Add the finely minced Shallot to the pot and cook for 2-3 minutes until soft and translucent, stirring frequently. The shallot should melt into the butter without browning—this builds a sweet, subtle onion base.
Stir in the 2 cloves Garlic Cloves (smashed) and cook for 30 seconds until fragrant. Add the 1 whole Bay Leaf, 2 sprigs Fresh Thyme Sprigs, and 0.25 tsp Black Peppercorns (freshly cracked). Toast these spices with the rice for 1 minute to bloom their flavors before adding liquid.
Step 3: Simmer with Stock
Pour in the 4 cups Chicken Stock and add the 0.5 tsp Kosher Salt. Stir well to combine, ensuring all rice grains are submerged. Bring the mixture to a rolling boil over medium-high heat.
Once boiling, reduce heat to low, cover the pot with a tight-fitting lid, and simmer for 15-18 minutes. Do not lift the lid during this time—steam is crucial for even cooking. You’ll know it’s ready when the liquid has been absorbed and the rice is tender with no chalky center.
Step 4: Rest and Finish
Remove the pot from heat and let it sit, covered, for 10 minutes. This resting period allows the rice to steam in its own heat, ensuring every grain is perfectly cooked. The rice should be fluffy with distinct, separate grains.
Discard the bay leaf and thyme sprigs. Gently fluff the rice with a fork, then stir in the 1 tsp Lemon Zest. This bright, citrusy finish balances the rich, savory notes from the stock and aromatics. Taste and adjust seasoning if needed before serving.
Pro Tips For Making Rice And Stock
- Toast the Rice: Heat the rice in the pot with butter for 2-3 minutes before adding stock—I learned this the hard way after my first few batches turned out gummy instead of light and separate.
- Use Hot Stock: Pour in chicken stock that’s already simmering, not cold, or the rice will absorb it too slowly and end up mushy rather than tender.
- Skip the Stirring: Once the stock is in, resist the urge to stir; disturbing the rice releases too much starch and makes it sticky instead of fluffy.
- Pull It Early: Take the pot off the heat when the rice is almost done—there’s enough residual heat to finish cooking it perfectly without overdoing it.
Health Benefits of These Flavors
Nutrient-Rich Foundation
This simple dish provides complex carbohydrates from rice, offering steady energy release throughout your day. The 2 cups of long-grain white rice deliver about 400 calories per serving, making it a satisfying base for any meal. I love how it keeps me full for hours. 💪
Hydration Boost
The 4 cups of chicken stock not only infuses flavor but also contributes to your daily hydration needs. Stock is rich in electrolytes like sodium and potassium, which help maintain fluid balance in your body. This is especially beneficial during warmer months.
Protein and Amino Acids
Using chicken stock adds a modest amount of high-quality protein to your meal, about 5-10 grams per serving. These proteins contain essential amino acids that support muscle repair and immune function. It’s a subtle but meaningful nutritional upgrade.
Digestive Benefits
The garlic and shallot in this recipe contain prebiotic fibers that promote healthy gut bacteria. Combined with the easy-to-digest rice, this dish supports a happy digestive system. I notice my digestion feels smoother after eating it. ✨
Low-Fat Option
With minimal added fat—just 2 tbsp of butter—this dish remains heart-healthy. You can easily omit the butter entirely or swap in olive oil for a different fat profile. Either way, it stays light while delivering rich flavor.
Vitamin and Mineral Infusion
The bay leaf and thyme contribute trace amounts of vitamins A and C, while the lemon zest adds a boost of vitamin C. These small additions enhance the dish’s nutritional profile without overpowering its simplicity.
Nutrition Facts
Frequently Asked Questions
Can I use vegetable stock instead of chicken?
Vegetable stock works perfectly and keeps the dish vegetarian. Use the same 4 cups measurement for identical texture and absorption.
Why toast the rice first?
Toasting for 1-2 minutes enhances the rice’s nutty flavor and prevents it from becoming sticky. This step is crucial for achieving separate, fluffy grains.
What if my rice is still crunchy after cooking?
Add 1/4 cup more stock, cover, and cook for another 5 minutes on low. Always let it rest 10 minutes off heat to finish steaming.
Can I make this in a rice cooker?
Yes! Sauté aromatics first, then add rice, stock, and herbs to the cooker. Use the standard white rice setting. The flavor will be just as rich.

- Gambia Jollof Rice Recipe: West African One-Pot Spice Fusion - October 5, 2026
- Cream of Wild Rice Soup Recipe Minnesota: Northwoods Creaminess With Foraged Grains - October 5, 2026
- Frozen Cauliflower Fried Rice Recipe: Quick Low-Carb Wok Magic - October 5, 2026