
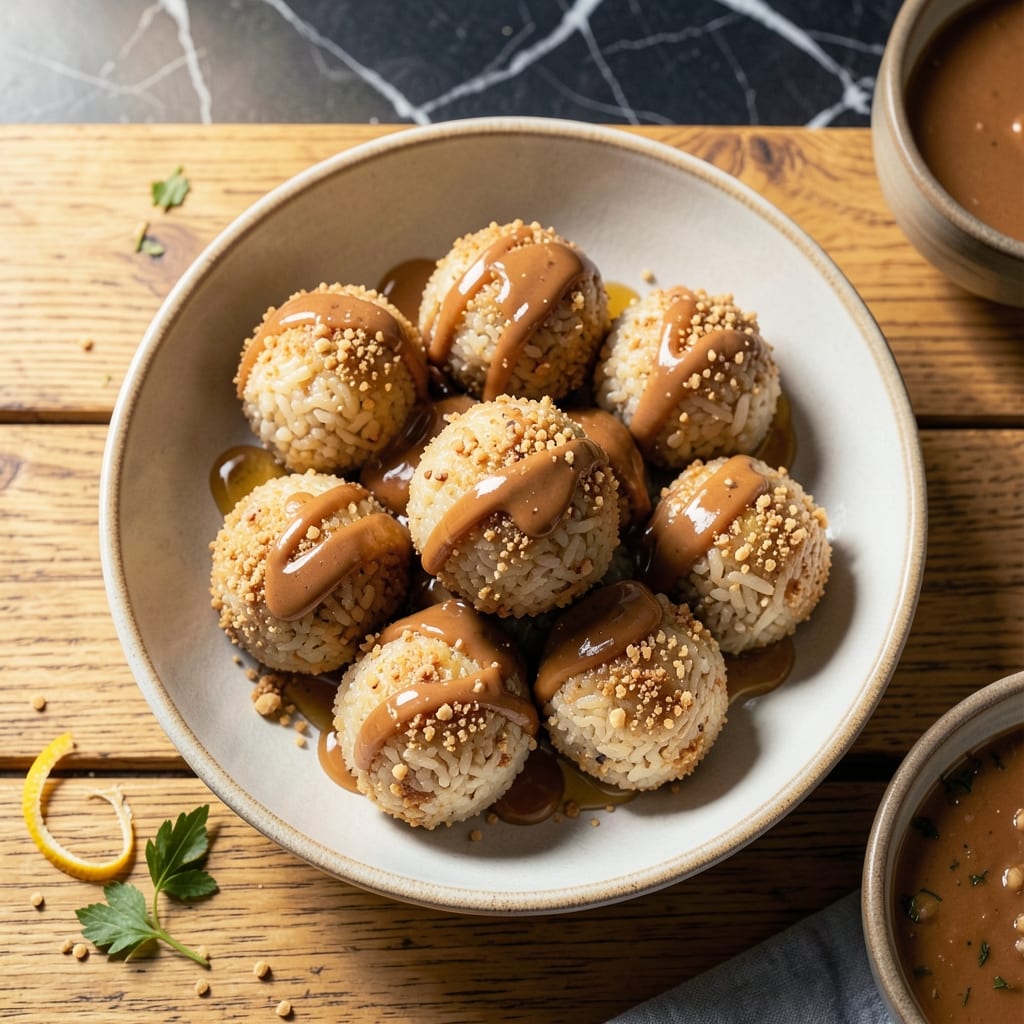
This recipe transforms simple rice cakes into an irresistible treat with a perfect balance of textures. The secret lies in the combination of chewy centers and a nutty exterior that delivers a satisfying crunch with every bite.
Creating these at home is simpler than you might expect. With just a few pantry staples and about 30 minutes, you can achieve results that rival any store-bought version. The process involves shaping the rice mixture into balls and coating them for that signature crunch.
What sets this dish apart is the contrast between the soft, slightly sticky interior and the crisp coating. Each ball offers a delightful mix of flavors and textures that makes them impossible to resist.
Serve these as a snack, dessert, or even a light main course. The versatility makes them a great addition to any meal plan.
Ingredients for Rice Cake Balls
Pantry staples meet nutty crunch in these irresistible rice cake treats.
| Ingredient | Amount | Notes |
|---|---|---|
| White Rice 🍚 | 2 cups | Cooked and cooled completely |
| Creamy Peanut Butter 🥜 | ½ cup | Natural or regular style |
| Honey 🍯 | ¼ cup | Or maple syrup for vegan |
| Vanilla Extract 🌿 | 1 tsp | Pure for best flavor |
| Salt 🧂 | ¼ tsp | Kosher or fine sea salt |
| Crushed Peanuts 🥜 | 1 cup | Chopped or food-processed |
| Toasted Coconut Flakes 🥥 | ¾ cup | Unsweetened preferred |
| Mini Chocolate Chips 🍫 | ½ cup | Optional for extra sweetness |
| Rolled Oats 🌾 | ½ cup | Quick or old-fashioned |
| Cinnamon 🌿 | ½ tsp | Ground for even distribution |
| Melted Butter 🧈 | 2 tbsp | For binding coating |
The rice is the base here—use day-old cooked rice (or cook and spread on a tray to cool fast). Jasmine or short-grain works best for that sticky texture. For the peanut butter, Smucker’s or Skippy are reliable, but I grab whatever’s on sale. The key is making sure your rice is completely cool before mixing (warm rice = mushy balls).
No peanut butter? Almond or sunflower seed butter swaps in one-to-one. Skip the honey? Maple syrup or agave works just as well. Want extra crunch? Crushed almonds or walnuts instead of peanuts. The coconut flakes can be swapped for shredded coconut (just pulse it a few times in the food processor to match the texture).
These keep 5-7 days in an airtight container at room temp. For longer storage, freeze for up to 3 months—just thaw at room temp before serving. The coating softens a bit over time, but the crunch comes back after a quick toast in the oven.
Why You’ll Love This Recipe
- Five Minute Mix: I just toss cooked rice with peanut butter, honey, and a splash of vanilla—no baking, no fuss.
- Sweet-Salty Magic: That combo of creamy peanut butter, floral honey, and a tiny pinch of salt? Ridiculously good.
- Snack or Treat: I pack these for lunchboxes one day, serve them as dessert the next. Honestly, they work everywhere.
- Pocket Change Friendly: White rice and peanut butter are pantry staples, so this costs pennies and still feels like a treat.
Step-by-Step Instructions for Rice Cake Balls
This no-bake method delivers perfectly chewy centers with a satisfying nutty crunch every time.
Step 1: Mix the Chewy Rice Base
In a large bowl, combine the 2 cups White Rice with 0.5 cup Creamy Peanut Butter, 0.25 cup Honey, 1 tsp Vanilla Extract, and 0.25 tsp Salt. I use a silicone spatula to fold everything together until the rice is fully coated and the mixture starts to clump.
You’ll notice the texture change as the peanut butter and honey bind the rice grains. Press the mixture against the bowl sides to encourage clumping. If it feels too dry, let it sit for 2-3 minutes—the rice will absorb some moisture from the honey.
This base needs to hold together when rolled, so don’t skip mixing thoroughly. The finished mixture should resemble wet sand, sticking together when squeezed but not dripping with liquid.
Step 2: Roll into Even Balls
Scoop 1-tablespoon portions of the rice mixture and roll them between your palms into smooth balls. I find slightly damp hands prevent sticking—dip your fingers in water and shake off the excess before each roll.
Place the formed balls on a parchment-lined tray. They should hold their shape without cracking. If they fall apart, press the mixture more firmly in your hands before rolling again.
You’ll end up with about 20-24 balls from this batch. Arrange them in a single layer so they don’t stick together while you prepare the coating.
Step 3: Prepare the Nutty Coating
In a shallow bowl, mix the 1 cup Crushed Peanuts, 0.75 cup Toasted Coconut Flakes, 0.5 cup Mini Chocolate Chips, 0.5 cup Rolled Oats, and 0.5 tsp Cinnamon. Stir until everything is evenly distributed—the chocolate chips will soften slightly from the warmth of your hands.
For extra sticking power, drizzle the 2 tbsp Melted Butter over the coating mixture and mix again. This helps the topping adhere to the rice balls and adds a subtle richness.
The coating should look chunky but uniform. If you prefer a finer texture, pulse the crushed peanuts and oats in a food processor before mixing.
Step 4: Coat and Set the Balls
Roll each rice ball in the coating mixture, pressing gently to ensure full coverage. I like to rotate the ball between my fingers while sprinkling extra coating on any bare spots. The mixture should cling easily thanks to the melted butter.
Place the coated balls back on the parchment tray. For best results, refrigerate them for 30 minutes to set. This firms up the peanut butter base and helps the coating harden slightly, creating that perfect texture contrast.
You’ll know they’re ready when the coating looks dry to the touch and the balls hold their shape when lifted. Serve immediately or store in an airtight container for up to 5 days.
Pro Tips For Making Rice Cake Balls
- Chill the Mixture: Let the rice and peanut butter mixture rest in the fridge for 20-30 minutes before rolling—it firms up just enough to stop the balls from falling apart in your hands.
- Use Day-Old Rice: Fresh rice is too moist and sticky; I learned this the hard way after my first batch turned into a gummy mess. Day-old, slightly dried rice binds better.
- Warm the Honey: Microwave the honey for 10-15 seconds before mixing—it blends into the peanut butter smoothly instead of clumping up like my early attempts.
- Skip the Overmixing: Stir just until combined, or the rice will release too much starch and turn the whole thing pasty. A few visible rice grains are fine, I promise.
Common Mistakes When Making This Dish
Overmixing the Base
I’ve found that vigorously stirring the rice and peanut butter mixture can break down the rice grains too much, turning your base into a pasty mess instead of a chewy delight. Use a gentle folding motion with a silicone spatula for 2-3 minutes max. 💡
Warm Rice Ruins Texture
Using freshly cooked rice is the most common mistake. The grains need to be completely cool to bind properly without turning mushy. Spread hot rice on a tray and let it sit for 15-20 minutes before mixing.
Skipping the Chill
These need 30 minutes in the fridge after coating to set properly. Without this step, the balls will fall apart when you try to serve them. I once skipped this and ended up with a crumbly disaster.
Uneven Coating
Press each ball firmly into the nut mixture and roll it between your palms to ensure full coverage. I use a spoon to sprinkle extra coating on any bare spots. The melted butter in the mixture helps everything stick better.
Wrong Rice Type
Short-grain or jasmine rice works best for that sticky texture. Long-grain varieties like basmati won’t bind properly, no matter how much peanut butter you add. I learned this the hard way with leftover takeout rice.
Overfilling Portions
Stick to 1-tablespoon portions for each ball. Larger portions won’t hold together as well and may crack when coating. I use a small cookie scoop for perfectly even sizes every time.
Nutrition Facts
Frequently Asked Questions
Can I use leftover rice for this?
Yes! Day-old cooked rice works perfectly. Spread it on a tray to cool completely before mixing—warm rice makes mushy balls.
What if my mixture won’t stick together?
Let it rest for 2-3 minutes so the rice absorbs moisture. If still dry, add 1 tsp more honey or peanut butter.
How do I make them gluten-free?
Use certified gluten-free oats and check that your peanut butter has no additives. The rest of the ingredients are naturally gluten-free.
Can I bake these instead of chilling?
Not recommended. Baking would dry them out. Chilling for 30 minutes sets the texture perfectly without losing moisture.

- Rice Pudding Recipe With Eggs and Milk: Old-Fashioned Custard-Style Comfort - September 30, 2026
- Rice Noodle Sauce Recipe: Bold Umami Depth for Authentic Stir-Fry - September 30, 2026
- Rice Pilaf Recipe: Fragrant Basmati With Toasted Vermicelli - September 30, 2026