
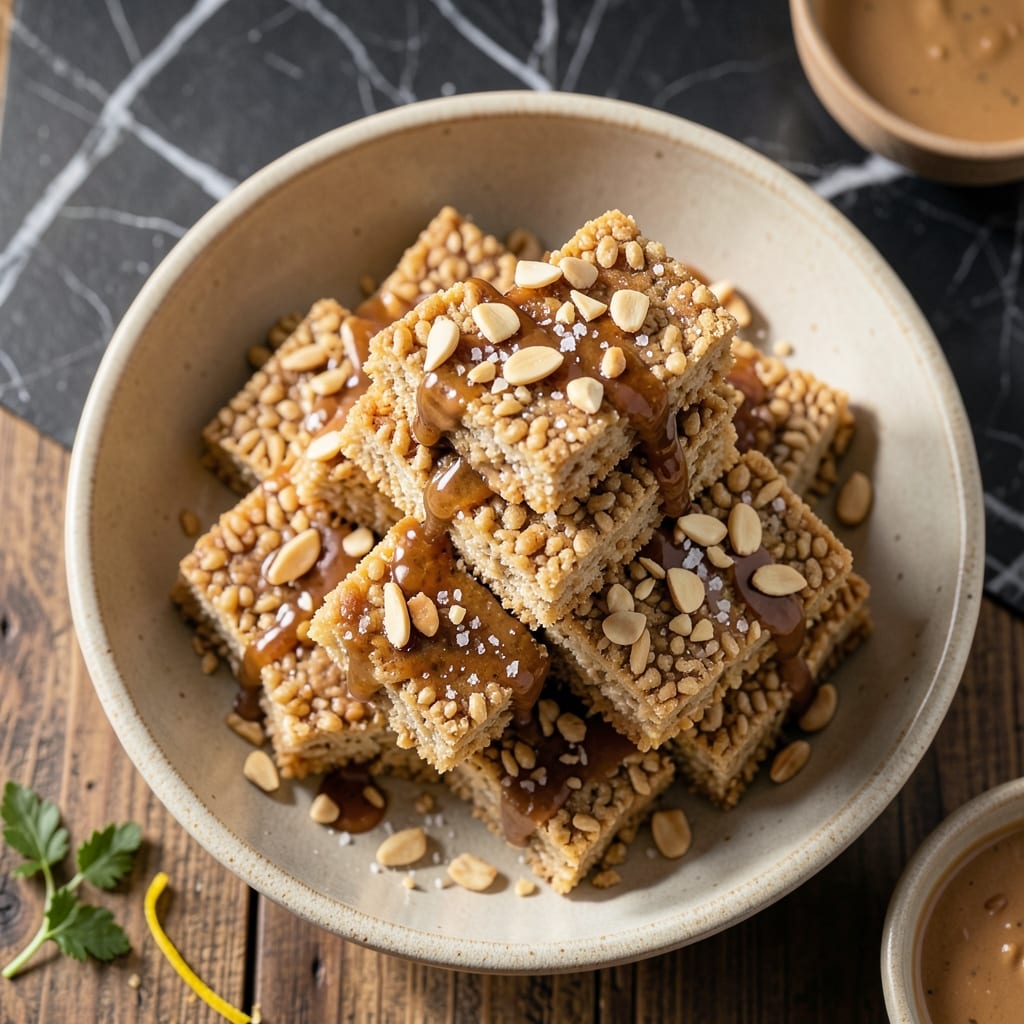
These bars combine the best of both worlds: chewy centers and a nutty crunch that keeps you coming back for more. I developed this recipe after years of experimenting with textures, and the result is a treat that satisfies every craving.
The secret lies in layering simple ingredients to create complexity. A base of puffed rice provides airy lightness, while the binding mixture adds density and richness. The nut topping delivers that final crunch that makes each bite perfect.
What you get is a bar that’s soft enough to feel indulgent, yet substantial enough to hold its shape. The contrast between the pillowy interior and crisp exterior is what makes this recipe stand out from typical rice treats.
Ideal for snacking, lunchboxes, or a quick energy boost. Here’s how to make them.
Ingredients for Rice Cake Bars
Simple pantry staples create these layered bars with pillowy and crisp textures.
| Ingredient | Amount | Notes |
|---|---|---|
| Puffed Rice Cereal 🌾 | 6 cups | Plain, unsweetened variety |
| Creamy Peanut Butter 🥜 | 1 cup | Natural or regular, well-stirred |
| Honey 🍯 | ¾ cup | Pure, liquid form |
| Vanilla Extract 🌿 | 1 tsp | Pure vanilla preferred |
| Salt 🧂 | ¼ tsp | Fine sea salt |
| Chopped Almonds 🌰 | 1 cup | Lightly toasted for crunch |
| Mini Chocolate Chips 🍫 | ½ cup | Semi-sweet or dark variety |
| Unsalted Butter 🧈 | 4 tbsp | For binding and richness |
| Brown Sugar 🥚 | ¼ cup | Light or dark, packed |
| Old-Fashioned Oats 🌾 | ½ cup | For added texture |
| Cinnamon 🌿 | ½ tsp | Ground, for warmth |
The peanut butter is key here—Jif or Skippy for consistent texture, though natural works if well-stirred. Puffed rice should be plain (no added sugar) and fresh for maximum crunch. Trader Joe’s has a great unsweetened option. For the almonds, buy raw and toast them yourself—350°F for 8-10 minutes brings out the best flavor.
No peanut butter? Almond butter or sunflower seed butter swap in at a 1:1 ratio. Honey can be replaced with maple syrup or agave (vegan option). Skip the chocolate chips if you prefer, or use white chocolate for a sweeter twist. The oats can be quick oats in a pinch, but old-fashioned gives better texture.
These keep beautifully at room temperature in an airtight container for 1 week. For longer storage, freeze for up to 3 months. Slice before freezing for easy grab-and-go portions (thaw 10 minutes before serving).
Why You’ll Love This Recipe
- No-Bake Magic: Honestly, I just melt peanut butter and honey together, stir in the cereal, and press it into a pan—no oven, no fuss.
- Sweet & Salty Fix: That combo of creamy peanut butter, honey, and a pinch of salt hits all the right notes. I’ll be real: I’ve caught myself sneaking seconds straight from the pan.
- Lunchbox Hero: Between us, these stay fresh for days, so I pack them for school snacks or my own afternoon pick-me-up.
- Pantry Staples: Five ingredients I always have on hand, and it comes together faster than deciding what to order for takeout.
Step-by-Step Instructions for Rice Cake Bars
This method ensures perfect texture with nutty crunch and chewy sweetness in every bite.
Step 1: Prepare the Binder Mixture
In a large saucepan, melt the 4 tbsp unsalted butter over medium-low heat. Once melted, add the 0.75 cup honey and 0.25 cup brown sugar, stirring constantly until the mixture begins to bubble gently at the edges.
Remove from heat and quickly stir in the 1 cup creamy peanut butter, 1 tsp vanilla extract, 0.25 tsp salt, and 0.5 tsp cinnamon until completely smooth. The mixture should be glossy and pourable—this forms the sticky base that holds everything together.
Step 2: Combine Dry Ingredients
In a large mixing bowl, toss together the 6 cups puffed rice cereal, 1 cup chopped almonds, and 0.5 cup old-fashioned oats. The almonds add crunch, while the oats provide subtle chewiness to balance the texture.
Make a well in the center of the dry mixture. Pour the warm peanut butter mixture over the dry ingredients and use a silicone spatula to fold everything together gently. You want every piece of puffed rice coated, but avoid crushing the cereal—it should remain light and airy.
Step 3: Add Chocolate and Press into Pan
Once the mixture is evenly combined, fold in the 0.5 cup mini chocolate chips. The residual heat from the binder will soften them slightly, creating melty pockets of chocolate throughout the bars.
Transfer the mixture to a parchment-lined 9×13-inch baking pan and press down firmly with the back of a spatula or your hands. The surface should be even and compact—this prevents the bars from crumbling when sliced. Press especially hard around the edges where the mixture tends to be less dense.
Step 4: Chill and Set
Refrigerate the pan uncovered for at least 2 hours or until the bars are completely set. This cooling time allows the binder to solidify, making the bars easy to cut without falling apart.
To test, press lightly on the surface—if it springs back and feels firm, it’s ready. If it still feels sticky, give it another 30 minutes. Once set, lift the entire slab out using the parchment overhang and cut into 16 even squares with a sharp knife.
Pro Tips For Making Rice Cake Bars
- Warm the Honey: Heat the honey for 15-20 seconds in the microwave before mixing—it blends smoothly with peanut butter instead of leaving sticky globs.
- Press Firmly: Pack the mixture into the pan with the back of a greased spoon, pressing hard so the bars hold together when cut.
- Use Fresh Cereal: I learned this the hard way—stale puffed rice makes the bars dense instead of crisp, so check the cereal’s freshness first.
- Chill Completely: Let the bars set in the fridge for at least 1 hour, or they’ll fall apart when you try to slice them.
Make-Ahead Tips for Leftovers
Room Temperature Storage
These bars stay fresh at room temperature in an airtight container for up to 1 week. I use glass containers with snap-tight lids to keep them from drying out. Separate layers with parchment paper to prevent sticking. 💪
Freezing for Longer Storage
For longer storage, freeze the bars for up to 3 months. Wrap individual bars in plastic wrap and place them in a freezer-safe bag. This method ensures they retain their texture and flavor.
Thawing Instructions
To thaw, leave the wrapped bars at room temperature for about 10 minutes. For a quick option, microwave unwrapped bars on low power for 15-20 seconds. Avoid high heat to prevent melting the chocolate chips.
Pre-Slicing for Convenience
Slice the bars before freezing for easy grab-and-go portions. This way, you can take out only what you need. I recommend cutting into 16 even squares for consistent servings. 📅
Reviving Stale Bars
If your bars lose their chewiness, warm them in the microwave for 5-10 seconds. Alternatively, place them in a 300°F oven for 3-5 minutes to restore their fresh-baked texture.
Portion Control Tips
These bars are rich, so I cut them into smaller pieces for portion control. Store the remaining bars in the freezer to maintain their quality. This also makes them perfect for lunchboxes or quick snacks.
Nutrition Facts
Frequently Asked Questions
Can I use a different nut butter?
Yes! Swap peanut butter for almond, cashew, or sunflower seed butter at a 1:1 ratio. Natural nut butters work best if well-stirred to prevent oil separation.
How do I prevent the bars from crumbling?
Press the mixture very firmly into the pan, especially around the edges. Chill for the full 2 hours before slicing to ensure they hold together.
Can I make these without honey?
Use maple syrup or agave as a 1:1 substitute. The texture may be slightly softer, but the flavor will still be delicious.
How long do they last at room temperature?
Store in an airtight container and they’ll stay fresh for up to 1 week. Separate layers with parchment to prevent sticking.

- Rice Pudding Recipe With Eggs and Milk: Old-Fashioned Custard-Style Comfort - September 30, 2026
- Rice Noodle Sauce Recipe: Bold Umami Depth for Authentic Stir-Fry - September 30, 2026
- Rice Pilaf Recipe: Fragrant Basmati With Toasted Vermicelli - September 30, 2026