
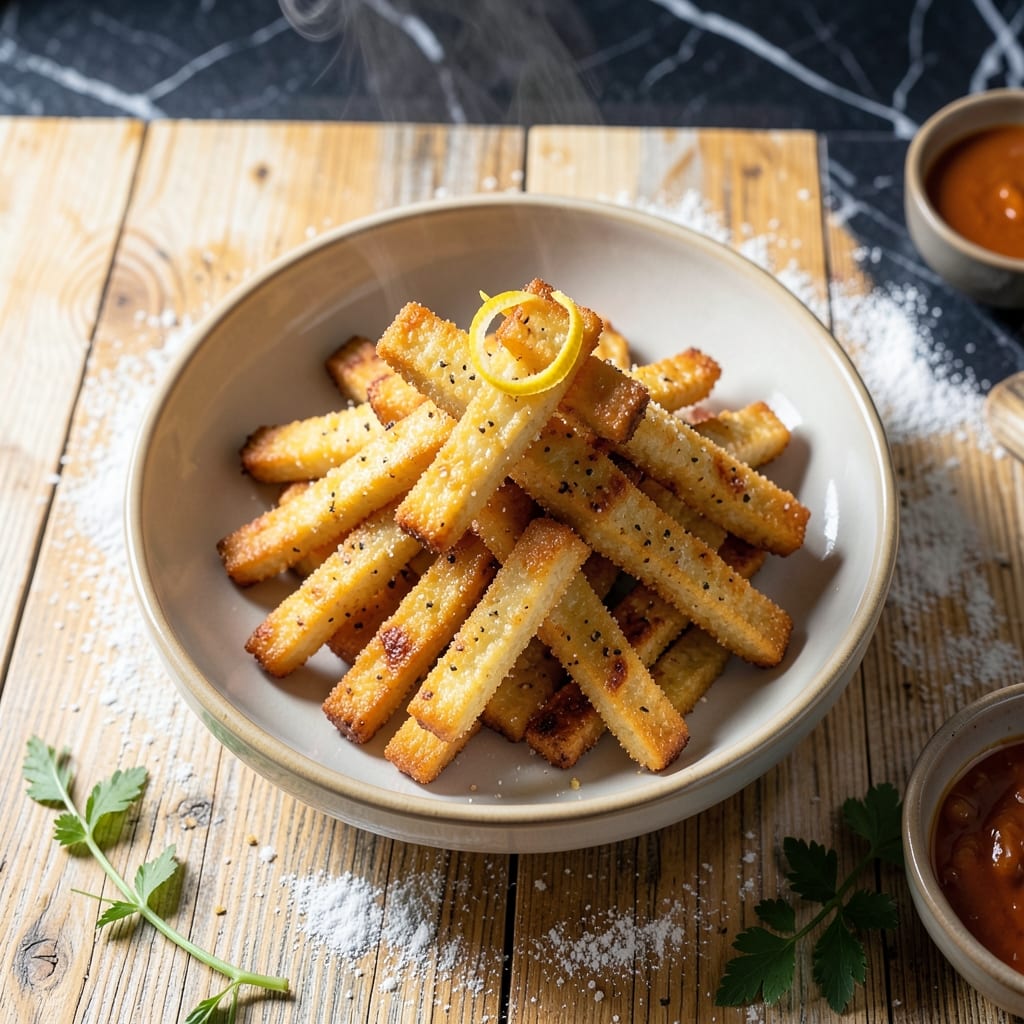
I developed this recipe after countless attempts to achieve that perfect crispy texture rice cake sticks are known for. The key lies in the double-frying method, which ensures a golden exterior while keeping the inside tender.
What makes this version special is the balance between simplicity and technique. The rice flour batter creates a light, airy base that fries up beautifully. The sweet glaze adds just the right amount of caramelized flavor without overwhelming the delicate rice cake.
You’ll end up with sticks that are uniformly crispy and golden, with a subtle sweetness that makes them impossible to resist. Each bite delivers a satisfying crunch followed by a melt-in-your-mouth texture.
Perfect for serving as an appetizer or a sweet snack. This method delivers consistent results every time.
Ingredients for Rice Cake Sticks
A handful of pantry staples transforms into these golden, crispy rice cake sticks with sweet glaze.
| Ingredient | Amount | Notes |
|---|---|---|
| Rice Flour 🌾 | 2 cups | Fine grain for smooth batter |
| Water 💧 | 1 ½ cups | Room temperature for even mixing |
| Granulated Sugar 🍚 | ¼ cup | Adjust for preferred sweetness |
| Salt 🧂 | ½ tsp | Fine sea salt preferred |
| Vegetable Oil 🫒 | 4 cups | For deep frying, high smoke point |
| Cornstarch 🌽 | 2 tbsp | For extra crispiness |
| Honey 🍯 | ¼ cup | For sweet glaze coating |
| Soy Sauce 🥢 | 1 tbsp | Low-sodium preferred |
| Rice Vinegar 🍶 | 1 tsp | Balances sweetness in glaze |
| Sesame Seeds 🌰 | 1 tbsp | Toasted for garnish |
| Green Onions 🧅 | 2 whole | Thinly sliced for topping |
| Garlic Powder 🧄 | ½ tsp | Enhances batter flavor |
The rice flour is non-negotiable for authenticity. Bob’s Red Mill produces a fine, consistent grind ideal for this batter. For the vegetable oil, peanut oil (available at Whole Foods or Costco) offers superior frying performance with its high smoke point. Ensure your cornstarch is fresh—old cornstarch loses its thickening power and won’t deliver that signature crispiness.
No rice flour? All-purpose flour with 2 tbsp additional cornstarch can work in a pinch, though the texture won’t be as light. Honey can be swapped for agave syrup or maple syrup at a 1:1 ratio. If avoiding gluten, use tamari instead of soy sauce. The sesame seeds can be omitted, but they add a nutty crunch that complements the sweet glaze beautifully.
Store unused rice flour in an airtight container for up to 6 months. The glaze can be made 2 days ahead and reheated gently before using. Fried sticks are best served immediately but can be kept warm in a 200°F oven for up to 1 hour without losing crispness.
Why You’ll Love This Recipe
- Five-Minute Mix: I just whisk rice flour, water, sugar, and a pinch of salt—no resting, no fuss.
- Crispy Sweet Bites: That sugar caramelizes in the oil, giving every stick a golden, crackly crust.
- Snack or Dessert: I serve them plain for tea or dust with cinnamon for a sweet finish.
- Pantry Staple: Rice flour and sugar are always in my cupboard, so I can make these anytime.
Step-by-Step Instructions for Rice Cake Sticks
Master the technique for achieving that perfect crisp texture with a glossy, sweet finish.
Step 1: Prepare the Batter for Optimal Consistency
In a large mixing bowl, whisk together the 2 cups Rice Flour, 2 tbsp Cornstarch, 0.25 cup Granulated Sugar, 0.5 tsp Salt, and 0.5 tsp Garlic Powder until fully combined. The fine grain of the rice flour ensures a smooth, lump-free batter that fries up light and airy.
Gradually pour in the 1.5 cups Water while continuing to whisk. The batter should achieve a pancake-like consistency—thick enough to coat the back of a spoon but thin enough to pour easily. Let the batter rest for 10 minutes to allow the rice flour to fully hydrate, which improves the final texture.
Step 2: Heat the Oil to the Perfect Temperature
Pour the 4 cups Vegetable Oil into a deep, heavy-bottomed pot or Dutch oven, ensuring it’s at least 2 inches deep. Heat over medium-high heat until it reaches 350°F on a deep-fry thermometer. Maintaining this temperature is critical—too low, and the sticks will absorb oil and become greasy; too high, and they’ll brown too quickly without cooking through.
While the oil heats, prepare a wire rack set over a baking sheet for draining the finished sticks. This setup allows air to circulate around the fried sticks, preserving their crispness instead of steaming them on a paper towel-lined plate.
Step 3: Fry the Sticks to Golden Perfection
Once the oil is hot, pour the batter into a squeeze bottle or a piping bag with a large round tip for easy handling. Carefully pipe 4-inch strips of batter directly into the hot oil, working in batches to avoid overcrowding the pot. Overcrowding lowers the oil temperature, leading to soggy results.
Fry the strips for 3-4 minutes, turning occasionally, until they turn golden brown and crisp. The sticks should puff slightly and develop a hollow interior. Use a slotted spoon to transfer them to the wire rack to drain.
Step 4: Prepare and Apply the Sweet Glaze
In a small saucepan, combine the 0.25 cup Honey, 1 tbsp Soy Sauce, and 1 tsp Rice Vinegar. Warm over low heat for 2-3 minutes, stirring until the mixture is smooth and slightly thinned. The vinegar balances the sweetness, while the soy sauce adds a subtle umami depth.
While the glaze is still warm, brush it generously over the fried sticks, ensuring an even coating. The heat from the sticks will help the glaze adhere and set with a glossy finish.
Step 5: Garnish and Serve Immediately
Sprinkle the sticks with the 1 tbsp Sesame Seeds and the thinly sliced 2 whole Green Onions while the glaze is still tacky. This ensures the toppings stick beautifully, adding both visual appeal and a textural contrast to the crispy sticks.
Serve immediately while hot and at their crispiest. The contrast of the sweet, sticky glaze with the light, airy interior and the nutty crunch of sesame seeds makes these irresistible. Avoid storing, as the texture is best fresh out of the oil.
Pro Tips For Making Rice Cake Sticks
- Use Warm Water: Mix the rice flour with warm water—around 110°F—so the batter comes together smoothly without clumps. Cold water makes it harder to dissolve the sugar and salt evenly.
- Rest the Batter: Let the rice flour batter sit for 10-15 minutes after mixing. This gives the flour time to hydrate fully, so your cake sticks hold their shape better when fried.
- Skip Overcrowding: Fry only a few sticks at a time in the oil, or the temperature drops too fast and they turn out greasy. I learned this the hard way after pulling out a batch that soaked up oil like a sponge.
- Test Oil Heat: Drop a tiny piece of batter into the oil first—if it sizzles and floats immediately, it’s ready. After burning my first batch in cool oil, I never skip this step.
Health Benefits of This rice cake sticks
Gluten-Free Friendly
This recipe is naturally gluten-free thanks to the rice flour base, making it perfect for anyone with celiac disease or gluten sensitivity. I love that you can enjoy this crispy treat without worrying about cross-contamination or digestive issues. 💪
Low in Saturated Fat
While frying does add some oil, the batter itself contains virtually no saturated fat. Using vegetable oil with a high smoke point like peanut or sunflower oil keeps the fat profile healthier than traditional deep-fried snacks.
Energy Boost
The combination of rice flour and a touch of sugar provides a quick energy boost, making these sticks a great pick-me-up snack. The 2 cups rice flour offers complex carbohydrates for sustained energy release throughout your day.
Minimal Added Sugar
With only ¼ cup granulated sugar in the batter and natural sweetness from ¼ cup honey in the glaze, this recipe keeps added sugars in check. You can reduce the sugar further or use alternatives like coconut sugar if preferred.
Rich in Antioxidants
The glaze contains honey, which is packed with antioxidants and antibacterial properties. Even the small amount used here contributes beneficial compounds that support overall health. 🍯
Easy to Digest
Rice flour is known for being gentle on the stomach, making this dish a great option for those with sensitive digestive systems. The light, airy texture also means it’s less likely to cause that heavy, sluggish feeling after eating.
Nutrition Facts
Frequently Asked Questions
Can I bake these instead of frying?
Baking won’t give the same crisp texture, but you can try 400°F for 15-20 minutes. The sticks may be denser and less golden. For best results, stick to frying.
Why did my sticks turn out soggy?
Sogginess usually means the oil wasn’t hot enough. Use a thermometer to maintain 350°F and avoid overcrowding the pot. Drain on a wire rack, not paper towels.
How can I make them extra crispy?
Add an extra 1 tbsp cornstarch to the batter and ensure the oil is at the right temperature. Double-frying for 1 minute after the first fry also helps.
Can I prepare the batter ahead of time?
The batter is best used fresh, but you can mix dry ingredients the night before. Add water just before frying for optimal texture.

- Gambia Jollof Rice Recipe: West African One-Pot Spice Fusion - October 5, 2026
- Cream of Wild Rice Soup Recipe Minnesota: Northwoods Creaminess With Foraged Grains - October 5, 2026
- Frozen Cauliflower Fried Rice Recipe: Quick Low-Carb Wok Magic - October 5, 2026