
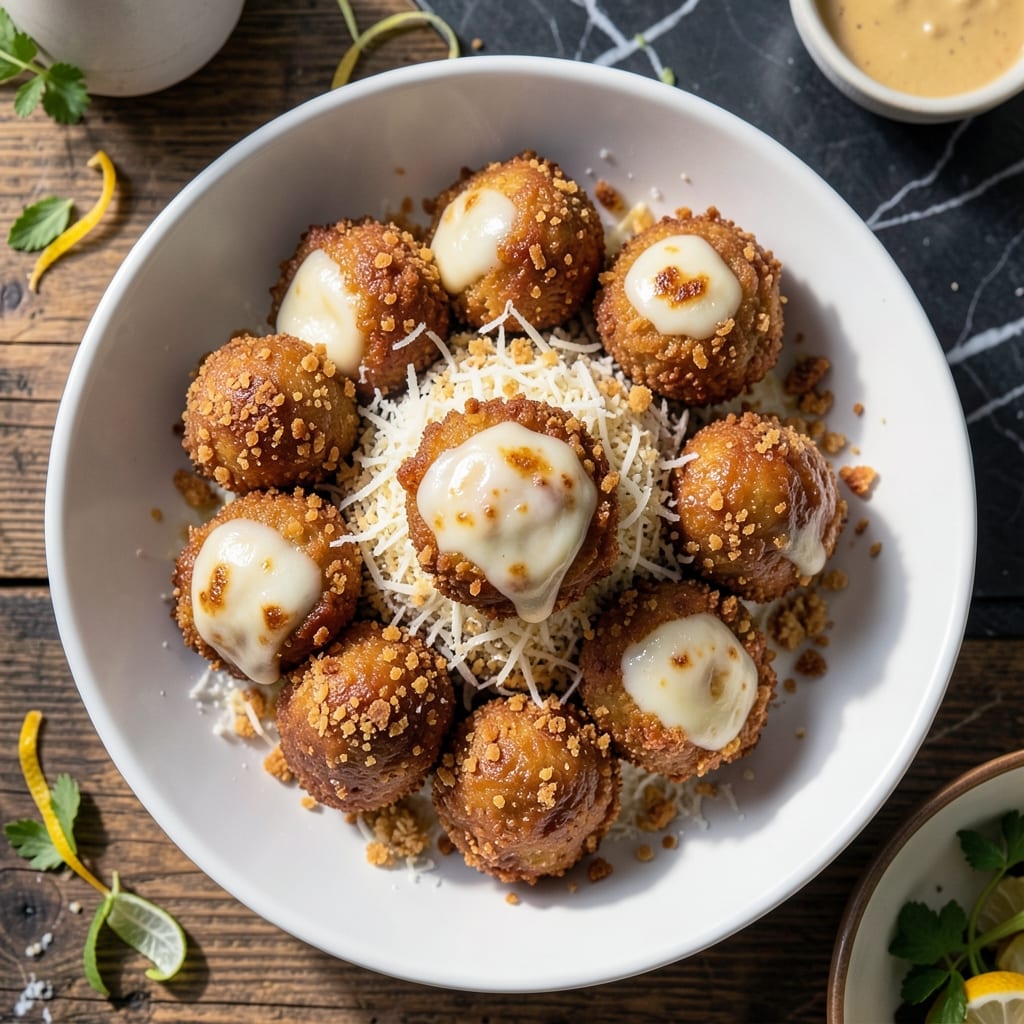
These golden rice cheese balls deliver a perfect contrast of textures that everyone loves. The exterior shatters at first bite, giving way to a gooey center that stretches with every pull.
I developed this method after testing various breading techniques to ensure maximum crispiness without losing the cheese inside. The key is using cold rice and chilled cheese, which prevents melting during the early frying stages.
The result is a crowd-pleasing appetizer or main that disappears faster than you can make it. Each ball maintains its structure just long enough to reach the table, then reveals that irresistible melted center.
Serve with marinara for dipping or enjoy them plain. This recipe works for parties or a special family treat.
Ingredients for Rice Cheese Balls
Cold rice, chilled cheese, and a crispy breadcrumb coating create these irresistible bites.
| Ingredient | Amount | Notes |
|---|---|---|
| Cooked Arborio Rice 🍚 | 2 cups | Cold, day-old preferred |
| Low-Moisture Mozzarella Cheese 🧀 | 8 oz | Shredded from block |
| Parmesan Cheese 🧀 | ½ cup | Freshly grated from wedge |
| All-Purpose Flour 🌾 | ½ cup | For initial dredging |
| Large Eggs 🥚 | 2 whole | Beaten for breading |
| Italian Breadcrumbs 🍞 | 1 ½ cups | Panko for extra crispiness |
| Olive Oil 🫒 | 2 cups | For deep frying |
| Garlic Powder 🧄 | 1 tsp | For seasoning breadcrumbs |
| Dried Oregano 🍃 | 1 tsp | For seasoning breadcrumbs |
| Salt 🧂 | 1 tsp | Divided for rice and breading |
| Black Pepper 🌶️ | ½ tsp | Freshly ground preferred |
| Marinara Sauce 🍅 | 1 cup | For serving, warmed |
The rice must be cold—day-old Arborio works best (its starch content holds shape better than long-grain). For the mozzarella, buy blocks and shred yourself; pre-shredded has anti-caking agents that prevent proper melting. Whole Foods and Trader Joe’s carry good low-moisture options. The Parmesan should be the real deal—Parmigiano-Reggiano for authentic flavor.
No Arborio? Short-grain sushi rice works as a swap. Out of mozzarella? Provolone shreds at a 1:1 ratio. For gluten-free breading, use crushed cornflakes or gluten-free panko. The eggs can be replaced with a cornstarch slurry (2 tbsp starch + 3 tbsp water per egg) for vegan versions. Marinara can be homemade or jarred—Rao’s is a solid store-bought choice.
Fry in batches to avoid crowding (keeps oil temp steady). Drain on a rack, not paper towels, for maximum crispiness. Leftovers? Reheat in a 400°F oven for 10 minutes—microwaves make them soggy. Best eaten same-day, but will keep in fridge for 2 days.
Why You’ll Love This Recipe
- No-Fuss Rolling: I use leftover Arborio rice, so half the work’s already done—just mix, shape, and fry.
- Cheesy Pull: That stretchy mozzarella center wrapped in crispy breaded rice? Ridiculously good.
- Party or Lunchbox: I pack these for picnics or serve them as appetizers—equally at home in both spots.
- Budget Stretch: A little rice and cheese goes a long way, and they reheat beautifully the next day.
Step-by-Step Instructions for Rice Cheese Balls
This method guarantees a crispy exterior with that signature melty cheese pull inside.
Step 1: Prepare and Season the Rice Mixture
In a large bowl, combine the 2 cups Cooked Arborio Rice with ½ cup Parmesan Cheese, ½ tsp Black Pepper, and ½ tsp Salt. Mix thoroughly—you want the rice cold (day-old works best) so it holds its shape during frying.
This step ensures the rice balls maintain structure while delivering maximum flavor in every bite. The rice should feel slightly sticky when pressed between your fingers, which helps it bind without falling apart.
Step 2: Form and Fill the Rice Balls
Take about 2 tablespoons of the rice mixture and flatten it in your palm. Place a small cube of Low-Moisture Mozzarella Cheese (about 1 oz) in the center, then gently mold the rice around it into a ball. Press firmly but don’t overwork it.
You should end up with uniform balls about the size of a golf ball. If the rice mixture feels too loose, add a bit more Parmesan Cheese to help bind it. Arrange them on a plate and refrigerate for 15 minutes to set before breading.
Step 3: Bread the Rice Balls for Maximum Crispiness
Set up a breading station with three shallow bowls. Place ½ cup All-Purpose Flour in the first, 2 beaten Large Eggs in the second, and in the third, mix 1.5 cups Italian Breadcrumbs, 1 tsp Garlic Powder, 1 tsp Dried Oregano, and ½ tsp Salt.
Dredge each rice ball in flour, shaking off excess, then dip in egg, letting any excess drip off. Finally, roll in the breadcrumb mixture, pressing gently to adhere. For extra crispiness, double-dip in egg and breadcrumbs. Place on a tray and let rest for 5 minutes before frying.
Step 4: Fry Until Golden and Crispy
In a deep, heavy pot, heat 2 cups Olive Oil to 350°F. Use a thermometer for accuracy—this temperature ensures even cooking without burning the breading. Fry the rice balls in batches to avoid overcrowding, turning occasionally, for 3-4 minutes or until deep golden brown.
Remove with a slotted spoon and drain on a paper towel-lined plate. The outside should be crispy, and the cheese inside should be fully melted. If the oil temperature drops below 325°F, let it recover before adding the next batch.
Serve immediately with warmed 1 cup Marinara Sauce for dipping. The contrast of the crispy exterior and gooey cheese center is what makes this dish irresistible.
Pro Tips For Making Rice Cheese Balls
- Chill the rice mix: After combining rice, cheeses, and eggs, refrigerate the mixture for 30 minutes—this keeps the balls from falling apart when frying. I learned this the hard way after making gooey, collapsed balls my first three tries.
- Use cold cheese: Cube the low-moisture mozzarella straight from the fridge and fold it in last so it stays in chunks rather than melting into the rice. Sounds weird, but it works.
- Skip warm oil: Test oil temperature with a pinch of flour—if it sizzles immediately, it’s ready. I used to rush this and ended up with greasy, undercooked centers.
- Double coat lightly: Roll the balls in flour, dip in beaten egg, then back in flour for a thin but sturdy crust. My grandmother swore by this, and she was right: it keeps them crisp without being heavy.
Pro Cooking Tips for This Recipe
Chill Your Ingredients
Always use cold rice and chilled cheese—this prevents premature melting during breading. I keep my 8 oz mozzarella in the freezer for 15 minutes before shredding, then return it to the fridge while prepping the rice. This simple step keeps the cheese from oozing out during frying. 💡
Perfect Breading Station
Use shallow dishes for each breading step to make dipping easier. I prefer stainless steel bowls for the flour and breadcrumbs—they’re durable and easy to clean. Press the breadcrumbs firmly onto each ball to create a thick, even coating that won’t fall off in the oil.
Oil Temperature Control
Invest in a candy thermometer (I use Taylor Precision) to monitor oil temp. 350°F is ideal for frying—too low and your balls will absorb oil, too high and the outside burns before the cheese melts. Adjust heat as needed between batches.
Fry in Small Batches
Never overcrowd the pot—4-5 balls at a time in a 5-quart Dutch oven keeps the oil temperature stable. Use a slotted spoon to gently turn them every 30-45 seconds for even browning. I find tongs work better for flipping without piercing the breading. 🔥
Drain Properly
Place fried balls on a wire rack set over a baking sheet, not paper towels. This allows air circulation on all sides, maintaining that perfect crispiness while excess oil drips away. Sprinkle with a pinch of flaky sea salt immediately after draining.
Rest Before Serving
Let them rest for 2-3 minutes after frying—the cheese inside stays molten while the exterior firms up just enough to hold its shape. Serve with warm marinara in a small bowl for dipping, as the acidity cuts through the richness beautifully.
Nutrition Facts
Frequently Asked Questions
Can I use regular long-grain rice instead?
Short-grain or Arborio rice works best for binding, but long-grain can be used if chilled thoroughly. Expect slightly less cohesive balls that may need extra Parmesan to hold shape.
Why did my cheese leak out during frying?
This happens if the cheese isn’t cold enough or the rice layer is too thin. Freeze cheese cubes for 15 minutes before using and ensure rice completely encases the filling.
Can I bake these instead of frying?
Yes! Bake at 400°F for 15-20 minutes on a wire rack for crispiness. Brush with oil first and flip halfway through for even browning.

- Jollof Rice Sauce Recipe: West African Tomato and Spice Infusion - September 25, 2026
- Japanese Rice Soup Recipe: Umami-Rich Comfort in a Bowl - September 25, 2026
- Homemade Cream Of Rice Recipe: Silk-Smooth Breakfast in Minutes - September 25, 2026