
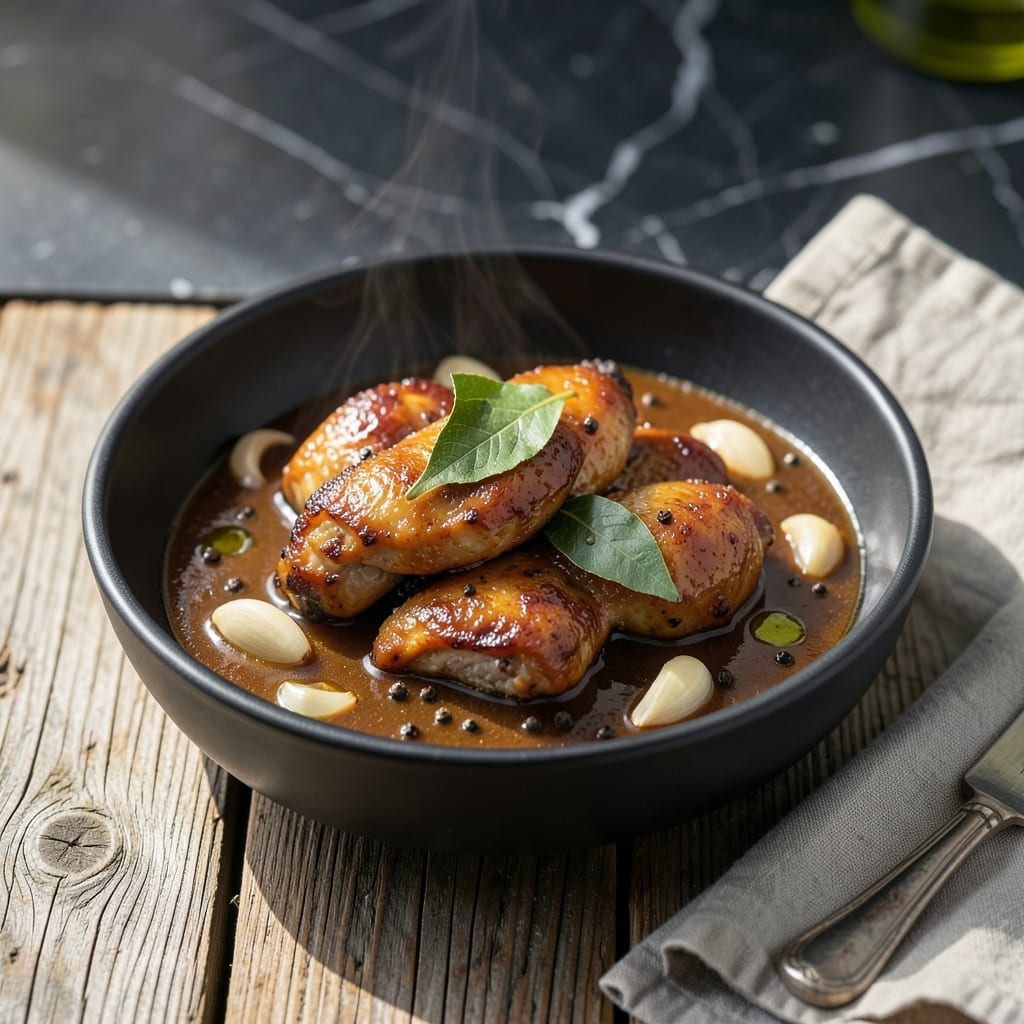
This hands-off method transforms a Filipino classic into the easiest weeknight meal. The rice cooker does all the work, infusing chicken with that signature tangy-savory adobo flavor.
I developed this technique for busy evenings when I still wanted perfect results. The vinegar and soy sauce create a balanced marinade that tenderizes the meat as it cooks.
The chicken emerges fall-off-the-bone tender, bathed in a rich, slightly reduced sauce that’s ideal over steamed rice. No babysitting, no stirring—just set it and forget it.
Traditional flavor meets modern convenience. Here’s how to make it at home.
Ingredients for Rice Cooker Chicken Adobo
A few quality ingredients deliver that iconic adobo flavor with minimal effort.
| Ingredient | Amount | Notes |
|---|---|---|
| Chicken Thighs 🍗 | 2 lb | Boneless, skinless preferred |
| Soy Sauce 🫒 | ½ cup | Low-sodium or regular |
| White Vinegar 🍶 | ½ cup | Cane vinegar preferred |
| Garlic Cloves 🧄 | 8 cloves | Peeled, smashed or minced |
| Bay Leaves 🍃 | 3 whole | Dried, for depth |
| Black Peppercorns 🌶️ | 1 tsp | Whole or freshly ground |
| Brown Sugar 🍚 | 2 tbsp | Light or dark variety |
| White Onion 🧅 | 1 whole | Medium, thinly sliced |
| Jasmine Rice 🍚 | 1 ½ cups | Uncooked, for serving |
| Water 💧 | 1 ½ cups | For rice cooker base |
| Green Onions 🧅 | ¼ cup | Thinly sliced for garnish |
| Vegetable Oil 🫒 | 1 tbsp | For searing chicken |
The chicken thighs are non-negotiable here—bone-in, skin-on works too (just trim excess fat). Costco or Whole Foods carry good options, but any supermarket with fresh poultry will do. For soy sauce, Silver Swan or Datu Puti are authentic Filipino brands that bring the right balance of salt and umami. The vinegar should be sharp—cane vinegar is traditional, but white vinegar works in a pinch.
No cane vinegar? Apple cider vinegar at the same amount adds a fruity note. Out of bay leaves? Skip them—they’re subtle but not essential. Want it sweeter? Double the brown sugar. For extra depth, add a splash of coconut aminos alongside the soy sauce. The garlic can be adjusted to taste, but don’t skimp—it’s a flavor cornerstone.
The adobo chicken tastes even better the next day once the flavors meld. Store leftovers in an airtight container for up to 4 days in the fridge or 3 months frozen. Reheat gently to preserve the sauce’s consistency.
Why You’ll Love This Recipe
- Set and Forget: I toss everything in the rice cooker and walk away—no stirring, no watching, just tender chicken by dinnertime.
- Tangy-Savory Magic: The soy sauce and vinegar balance is spot-on, with garlic and bay leaves adding depth that’s hard to resist.
- Meal Prep Hero: I make a big batch Sunday and it tastes even better reheated for Wednesday’s lunch.
- Budget-Friendly Feast: Chicken thighs stay juicy and affordable, and the pantry staples mean I’m never without the basics.
Step-by-Step Instructions for Chicken Adobo
This method delivers the perfect balance of tangy, savory, and sweet flavors with minimal effort.
Step 1: Sear the Chicken Thighs
Heat the 1 tablespoon vegetable oil in a large skillet over medium-high heat. Pat the 2 lb chicken thighs dry with paper towels, then season lightly with salt. Add the chicken in a single layer and sear for 3-4 minutes per side until golden brown.
This step builds a flavorful fond in the pan and ensures the chicken retains its juices during cooking. Don’t overcrowd the pan—work in batches if necessary. Transfer the seared chicken to a plate and set aside.
Step 2: Prepare the Adobo Marinade
In the same skillet, reduce heat to medium and add the thinly sliced white onion. Cook for 2-3 minutes until softened. Add the 8 cloves garlic cloves, 3 whole bay leaves, and 1 teaspoon black peppercorns, stirring for 30 seconds until fragrant.
Pour in the 0.5 cup soy sauce, 0.5 cup white vinegar, and 2 tablespoons brown sugar. Stir to dissolve the sugar and scrape up any browned bits from the bottom of the pan. Simmer for 2 minutes to meld the flavors.
Step 3: Combine and Cook in the Rice Cooker
Transfer the seared chicken to the rice cooker pot. Pour the marinade over the chicken, ensuring all pieces are submerged. Add the 1.5 cups jasmine rice to the pot, spreading it evenly around the chicken. Pour in the 1.5 cups water and stir gently to combine.
Close the rice cooker lid and set it to the standard cooking cycle. The cooker will handle the timing, but expect it to take about 30-40 minutes for the rice to cook and the chicken to become tender.
Step 4: Rest and Garnish
Once the rice cooker switches to the “keep warm” setting, let the dish rest for 10 minutes. This allows the flavors to deepen and the rice to absorb any remaining liquid.
Discard the bay leaves. Garnish with the 0.25 cup green onions just before serving. The chicken should be fall-off-the-bone tender, and the rice should have absorbed the rich, tangy adobo sauce.
Pro Tips For Making Rice Cooker Chicken Adobo
- Brown the Chicken First: I learned this the hard way—searing the chicken thighs for 2-3 minutes in a pan before adding to the rice cooker locks in flavor and prevents that boiled, pale look.
- Balance the Vinegar: Sounds weird, but it works: use slightly less vinegar than soy sauce (about a 1:1.5 ratio) to avoid an overly sharp taste that can dominate the adobo.
- Don’t Overfill the Cooker: After burning three batches, I finally figured out—leave at least 1 inch of space at the top of the rice cooker to prevent messy boil-overs from the liquid.
- Add Garlic Late: My grandmother swore by this, and she was right: toss in the garlic cloves only after the chicken has cooked halfway to keep them from turning bitter or burning.
Perfect Pairings for rice cooker chicken adobo
Side Dish Pairings
Steamed jasmine rice is the classic companion, soaking up that rich adobo sauce perfectly. I use my Zojirushi rice cooker for foolproof results every time. For texture contrast, try garlic sautéed bok choy with a splash of oyster sauce. 🥗
Vegetable Options
A simple cucumber and tomato salad with rice vinegar dressing cuts through the richness. Toss 1 sliced cucumber with 1 diced tomato, 1 tbsp rice vinegar, and a pinch of salt. Alternatively, steamed green beans with toasted garlic add freshness.
Beverage Pairings
An ice-cold San Miguel beer is my go-to with this dish—the crisp lager complements the tangy-savory flavors beautifully. For non-alcoholic options, calamansi juice or iced tea with lemon provides the perfect refreshing contrast. 🍺
Condiment Suggestions
Set out pickled vegetables like atchara (Filipino pickled papaya) for a sweet-tart crunch. A small bowl of chili garlic sauce lets guests add heat. I also like to offer extra green onions for garnishing at the table.
Nutrition Facts
Frequently Asked Questions
Can I use chicken breasts instead of thighs?
Yes, but thighs stay juicier. If using breasts, reduce cooking time to 25-30 minutes to prevent dryness.
Why sear the chicken first?
Searing builds flavor through caramelization. It also helps the chicken retain moisture during the longer rice cooker process.
Can I make this without a rice cooker?
Simmer everything in a pot with 1 cup water for 35-40 minutes on medium-low heat.
How do I know when it’s done?
Chicken should reach 165°F internally. The rice cooker switches to “keep warm” automatically when ready.

- Jollof Rice Sauce Recipe: West African Tomato and Spice Infusion - September 25, 2026
- Japanese Rice Soup Recipe: Umami-Rich Comfort in a Bowl - September 25, 2026
- Homemade Cream Of Rice Recipe: Silk-Smooth Breakfast in Minutes - September 25, 2026