
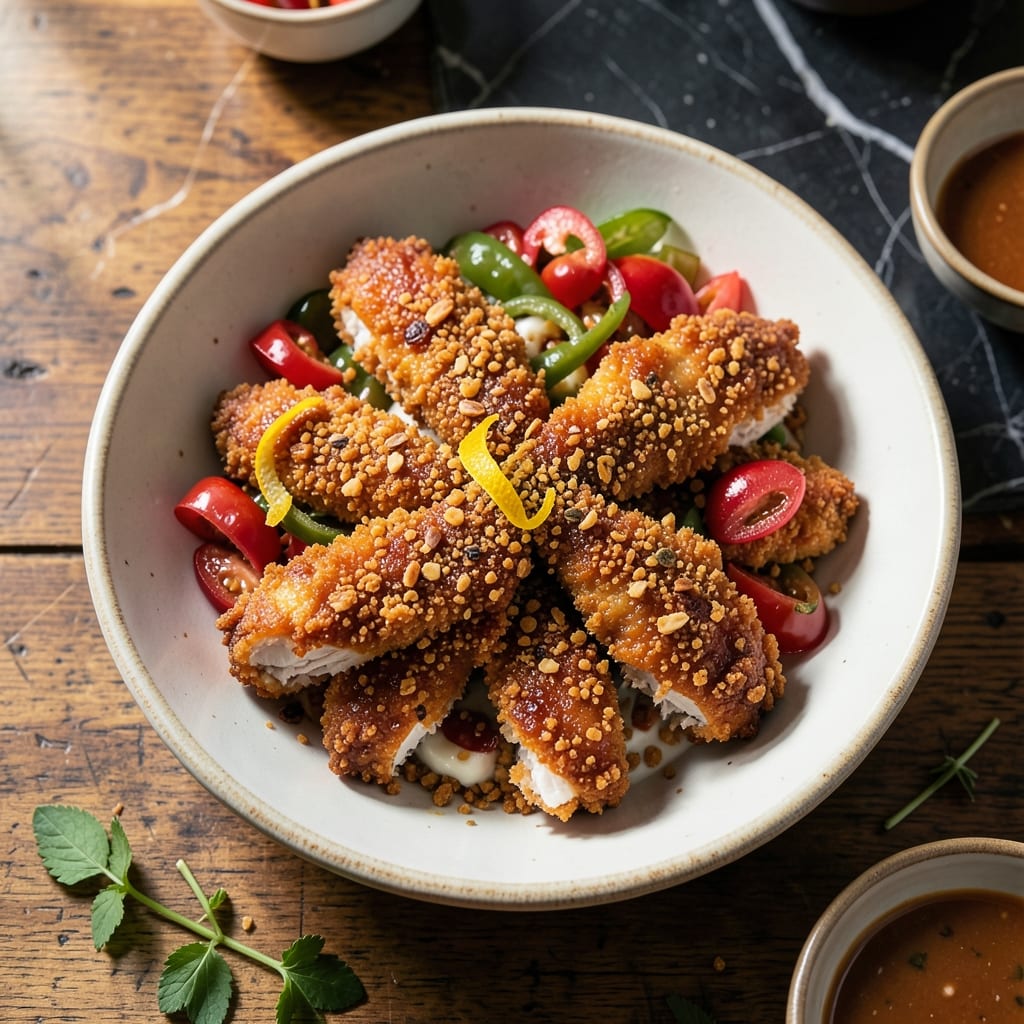
This recipe delivers the crispy texture you crave without complicated techniques. I developed this method after years of testing coatings at The Smoky Pig, and the cereal crust creates an unmatched crunch.
Crushed rice cereal replaces traditional breadcrumbs, forming a golden, shatteringly crispy exterior that stays intact through frying. The key is pressing the coating firmly onto each piece to ensure full coverage and maximum crunch.
The result is juicy chicken encased in a light, airy crust that crackles with every bite. This method guarantees consistent crispy results every time, whether you’re feeding a crowd or just your family.
Serve hot for the best texture, with your choice of dipping sauces. The coating holds up well even if you need to keep it warm before serving.
Ingredients for Rice Crispy Fried Chicken
Simple ingredients create that signature shatteringly crispy, golden crust you know and love.
| Ingredient | Amount | Notes |
|---|---|---|
| Chicken Thighs 🍗 | 2 lb | Boneless, skinless, cut into strips |
| Rice Cereal 🥣 | 4 cups | Crushed to fine crumbs |
| All-Purpose Flour 🌾 | 1 cup | For dredging chicken |
| Large Eggs 🥚 | 2 whole | Beaten for egg wash |
| Buttermilk 🥛 | 1 cup | For soaking chicken |
| Salt 🧂 | 1 ½ tsp | Kosher or sea salt |
| Black Pepper 🌶️ | 1 tsp | Freshly ground preferred |
| Paprika 🌶️ | 1 tsp | Sweet or smoked variety |
| Garlic Powder 🧄 | 1 tsp | For seasoning coating |
| Onion Powder 🧅 | 1 tsp | For seasoning coating |
| Vegetable Oil 🫒 | 4 cups | For deep frying |
| Hot Sauce 🔥 | 1 tbsp | Optional, for buttermilk soak |
The cereal is what makes this. Rice Krispies are the classic choice—generic store brands work just as well (and save you a few bucks). Look for plain, unsweetened rice cereal; the sugar in flavored kinds can burn. I grab mine from Walmart in bulk since it’s a pantry staple. For the chicken, thighs stay juicier than breasts, but use what you like.
No buttermilk? Milk plus a splash of vinegar or lemon juice does the trick—let it sit 5 minutes to curdle. Out of rice cereal? Cornflakes or panko give a different crunch but still work. The spices can be adjusted to taste—add a pinch of cayenne if you want heat. For oil, any neutral kind with a high smoke point works (peanut oil is my Smoky Pig go-to).
Fried chicken is best eaten fresh, but leftovers reheat decently in a 400°F oven for 10-12 minutes. Store cooked pieces in the fridge for up to 3 days—any longer and the crust loses its magic. Don’t freeze it; the texture suffers when thawed.
Why You’ll Love This Recipe
- One Bowl Wonder: I mix everything right in the buttermilk bag—no extra bowls, no mess.
- Crunch in Every Bite: The rice cereal gives it that addictive crispy coating that shatters with every bite.
- Crowd Pleaser: Honestly, even my picky nephew asks for seconds of this chicken.
- Budget Friendly: Chicken thighs and pantry staples mean I can feed six for under ten bucks.
Step-by-Step Instructions for Rice Crispy Fried Chicken
Here’s the method I use to get that irresistible crunch with every single bite.
Step 1: Season and Soak the Chicken
Start by cutting the 2 lb Chicken Thighs into 1-inch strips. Pat them dry with paper towels—this helps the coating stick better. In a large bowl, whisk together the 1 cup Buttermilk, 1.5 tsp Salt, 1 tsp Black Pepper, 1 tsp Paprika, 1 tsp Garlic Powder, 1 tsp Onion Powder, and 1 tbsp Hot Sauce.
Add the chicken strips to the buttermilk mixture, ensuring they’re fully submerged. Let them soak for at least 30 minutes (or up to 4 hours in the fridge). This step tenderizes the meat and infuses it with flavor. The longer it soaks, the juicier and more flavorful your chicken will be.
Step 2: Prepare the Breading Stations
Crush the 4 cups Rice Cereal into fine crumbs using a food processor or by placing it in a sealed bag and rolling with a rolling pin. Pour the crumbs into a shallow dish. In another shallow dish, place the 1 cup All-Purpose Flour.
In a third dish, beat the 2 whole Large Eggs until smooth. This three-step breading process creates layers of texture. The flour helps the egg wash adhere, the egg wash acts as a glue for the cereal crumbs, and the cereal gives that signature crunch. Have all your stations ready before you start breading.
Step 3: Bread the Chicken Thoroughly
Remove the chicken from the buttermilk, letting any excess drip off. Dredge each piece in the flour, shaking off the excess, then dip it into the beaten eggs, allowing any excess to drip off. Finally, press each piece firmly into the crushed rice cereal, ensuring it’s fully coated on all sides.
Place the breaded chicken on a wire rack set over a baking sheet. Don’t skip the rack—it allows air to circulate underneath, preventing the coating from getting soggy. Let the breaded chicken rest for 10-15 minutes before frying. This helps the coating set and adhere better during cooking.
Step 4: Fry to Golden Perfection
In a deep, heavy-bottomed pot or Dutch oven, heat the 4 cups Vegetable Oil to 350°F. Use a deep-fry or candy thermometer to monitor the temperature—it’s crucial for even cooking and that perfect crunch. Once the oil reaches temperature, carefully lower a few pieces of chicken into the pot using tongs.
Fry the chicken in batches to avoid crowding the pot, which can lower the oil temperature and lead to greasy results. Cook for 6-8 minutes, turning occasionally, until the chicken is golden brown and the internal temperature reaches 165°F. Drain on a wire rack or paper towels to keep it crispy.
Step 5: Rest and Serve Immediately
Let the fried chicken rest for 5 minutes before serving. This allows the juices to redistribute, ensuring the meat stays moist inside its ultra-crispy coating. Serve immediately while hot—the crunch is at its peak right out of the fryer.
I like to serve this with extra hot sauce on the side for those who want a little more kick. The contrast of the crispy cereal crust with the tender, juicy chicken inside is what makes this dish so special. Enjoy every crunchy, flavorful bite!
Pro Tips For Making Rice Crispy Fried Chicken
- Double Dredge: Dip the chicken in flour, then buttermilk, then flour again before the Rice Cereal coat—this creates a thicker crust that holds the cereal better and stays crispier longer.
- Crush the Cereal: Pulse the Rice Cereal in a food processor until it’s coarse but not powdery, so it clings to the chicken and fries up extra crispy without burning.
- Rest Before Frying: Let the breaded chicken rest 10 minutes on a wire rack before frying—this helps the coating set so it doesn’t slide off in the oil.
- Use Thighs, Not Breasts: Chicken thighs stay juicier than breasts when fried, and their fat content makes the Rice Cereal crust brown beautifully without drying out.
Flavor Customization for These Flavors
Spicy Kick
Add 1 tsp cayenne pepper to your cereal crumbs for a fiery version. I also mix in ½ tsp chipotle powder for smoky heat. Serve with ranch or blue cheese to cool the burn. This variation is a hit at my Atlanta food truck. 🌶️
Herb Infusion
Stir 1 tbsp dried parsley and 1 tsp dried thyme into the crushed cereal. The herbs add freshness that balances the richness. Fresh rosemary works too—just finely chop 1 tbsp and mix in.
Cheesy Crunch
Mix ½ cup grated Parmesan into your cereal crumbs before breading. The cheese melts slightly during frying, creating an extra crispy, savory crust. I use Parmigiano-Reggiano for the best flavor.
Citrus Zest
Add 1 tbsp lemon zest or 1 tbsp orange zest to your cereal mixture. The citrus brightens the flavor and adds a subtle tang. This works especially well with the buttermilk soak.
Sweet Heat
For a sweet and spicy twist, add 2 tbsp brown sugar to your cereal crumbs. The sugar caramelizes slightly, creating a sweet crunch. Balance it with ½ tsp cayenne for heat. 💡
Extra Crunchy
Double-dredge your chicken by repeating the flour, egg, and cereal steps. This creates an even thicker, crispier crust. Press firmly each time to ensure the coating adheres properly.
Nutrition Facts
Frequently Asked Questions
Can I use chicken breasts instead of thighs?
Yes, but they dry out faster. Reduce frying time to 5-6 minutes and monitor internal temp closely. Thighs stay juicier, but breasts work if pounded to even thickness.
Why is my coating falling off?
Press firmly when breading and let it rest 10-15 minutes before frying. Also ensure oil is at 350°F—cool oil makes coating absorb oil and detach.
Can I bake instead of fry?
Yes, at 400°F for 15-20 minutes, flipping halfway. Spray with oil first for crispiness. It won’t be as crunchy but still delicious.
How do I keep it crispy for a party?
Fry in batches and keep warm on a wire rack in a 200°F oven. Never stack pieces—steam makes them soggy. Serve within 1 hour for best texture.

- Jollof Rice Sauce Recipe: West African Tomato and Spice Infusion - September 25, 2026
- Japanese Rice Soup Recipe: Umami-Rich Comfort in a Bowl - September 25, 2026
- Homemade Cream Of Rice Recipe: Silk-Smooth Breakfast in Minutes - September 25, 2026