
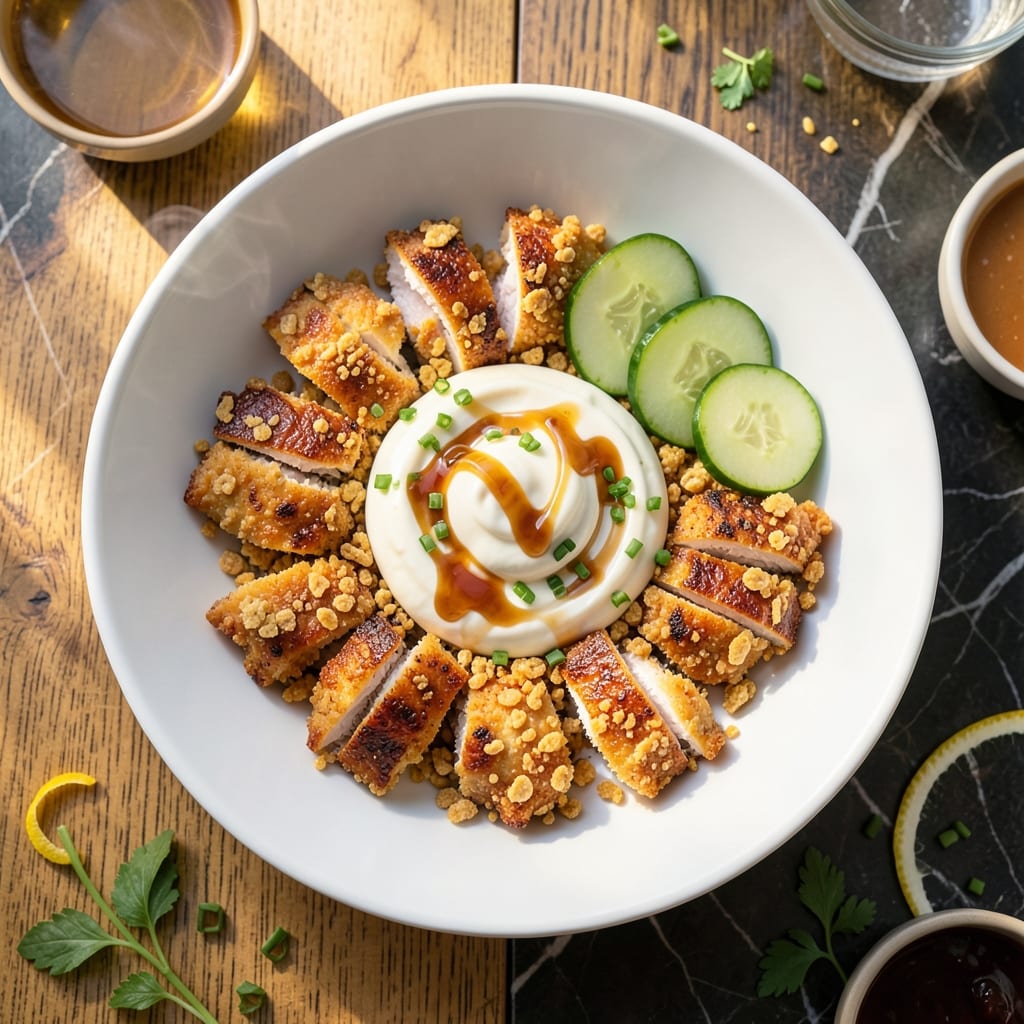
This cereal-coated chicken delivers an unexpected crispy texture that’s impossible to resist. I developed this method after discovering how well crushed Rice Krispies adhere to chicken, creating a golden, shatteringly crunchy crust with every bite.
The mayonnaise serves as both a binder and a flavor enhancer, keeping the chicken moist while helping the cereal coating cling perfectly. A quick bake at high heat ensures the exterior gets golden without drying out the meat.
What emerges from the oven is juicy chicken pieces encased in a light, airy crust that crackles between your teeth. The contrast between the tender meat and the cereal coating makes this dish uniquely satisfying.
Serve with a simple side salad or honey mustard dipping sauce to complete the meal.
Ingredients for Rice Krispie Chicken Mayonnaise
Short list. Big crunch. Pantry staples plus a quick cereal crush.
| Ingredient | Amount | Notes |
|---|---|---|
| Boneless Skinless Chicken Breasts 🍗 | 1 ½ lb | Cut into 1-inch strips |
| Rice Krispies Cereal 🥣 | 4 cups | Crushed into fine crumbs |
| Mayonnaise 🥫 | ½ cup | Regular or light variety |
| All-Purpose Flour 🌾 | ½ cup | For light dusting |
| Large Egg 🥚 | 1 whole | Beaten for egg wash |
| Salt 🧂 | 1 tsp | Kosher or sea salt |
| Black Pepper 🌶️ | ½ tsp | Freshly ground preferred |
| Garlic Powder 🧄 | 1 tsp | For extra flavor |
| Paprika 🌶️ | 1 tsp | Sweet or smoked variety |
| Olive Oil 🫒 | 2 tbsp | For greasing baking sheet |
| Honey Mustard 🍯 | ½ cup | For dipping sauce (optional) |
The Rice Krispies are the star here. Any brand works, but generic versions can be less crispy—stick with name-brand if possible. I grab mine from Target or Walmart in the cereal aisle. For the chicken, thighs work too if you prefer darker meat (just reduce baking time by a few minutes). Look for evenly sized pieces so they cook at the same rate.
No mayonnaise? Greek yogurt works in a pinch but won’t brown as well. Out of Rice Krispies? Corn Flakes or Special K make decent substitutes (though the texture won’t be as light). The flour helps the coating stick, but cornstarch at half the amount works too. For extra crunch, add a handful of panko to the cereal crumbs.
Bake right away after coating—the cereal absorbs moisture fast. Leftovers keep 3-4 days in the fridge. Reheat in the oven at 350°F to keep the crust crispy (microwave turns it soggy).
Why You’ll Love This Recipe
- One Bowl Wonder: I love that I can mix the mayo, flour, and egg in one bowl, dip the chicken, and coat it in crushed Rice Krispies—no fancy prep.
- Crunchy Comfort: The Rice Krispies give it this nostalgic snap, while the mayo keeps the chicken juicy inside.
- Weeknight Hero: Between us, this is my go-to for busy evenings—ready faster than takeout and the kids actually eat it.
- Budget Friendly: A box of cereal and chicken breasts stretch further than you’d think, and leftovers taste just as good.
Step-by-Step Instructions for Crispy Cereal-Coated Chicken
Here’s how to make these crunchy bites with a simple process that always delivers.
Step 1: Prep Chicken and Season Flour
Cut the 1.5 lb Boneless Skinless Chicken Breasts into 1-inch strips. This size ensures even cooking and perfect crispiness. Pat them dry with paper towels—this helps the coating stick better.
In a shallow bowl, combine the 0.5 cup All-Purpose Flour, 1 tsp Salt, 0.5 tsp Black Pepper, 1 tsp Garlic Powder, and 1 tsp Paprika. Whisk until evenly mixed. The seasoning in the flour gives every bite great flavor.
Step 2: Make the Mayonnaise Egg Wash
In another bowl, whisk together the 0.5 cup Mayonnaise and 1 whole Large Egg until smooth. The mayonnaise adds richness and helps the cereal coating cling to the chicken. Use regular or light variety—both work equally well.
This mixture acts as the glue between the flour and cereal. I’ve found that dipping the chicken first in flour, then the egg wash, creates the best texture. Don’t skip this step—it’s what makes the coating so crispy.
Step 3: Coat Chicken with Crushed Cereal
Place the 4 cups Rice Krispies Cereal in a food processor or sealed bag and crush into fine crumbs. Spread them on a plate. Working with one piece at a time, dredge each chicken strip in the flour mixture, shake off excess, dip in the egg wash, then press into the cereal crumbs.
Make sure each piece is fully coated with the crushed cereal. The fine crumbs create a crispy texture that stays put during baking. If your cereal isn’t finely crushed, the coating won’t stick as well.
Step 4: Bake Until Golden and Crispy
Preheat oven to 400°F and line a baking sheet with parchment paper. Brush or drizzle with 2 tbsp Olive Oil—this prevents sticking and adds extra crispiness. Arrange the coated chicken strips on the sheet without crowding.
Bake for 18-20 minutes, flipping halfway through, until the coating is golden brown and the chicken reaches an internal temperature of 165°F. The cereal will puff slightly and turn a deep golden color when done.
Step 5: Serve with Honey Mustard Dipping Sauce
Transfer the chicken to a serving platter and let it rest for 2-3 minutes. The coating will firm up slightly as it cools. Serve warm with the 0.5 cup Honey Mustard for dipping.
Each piece should have a crisp exterior with tender, juicy chicken inside. If you’re serving a crowd, keep the baked chicken warm in a 200°F oven while you finish cooking the rest.
Pro Tips For Making Rice Krispie Chicken Mayonnaise
- Crush Fine First: Pulse the Rice Krispies in a food processor or crush them in a bag with a rolling pin until they’re fine crumbs—this makes the coating stick better and gives an even crisp.
- Pat Chicken Dry: Before dredging, blot the chicken breasts with paper towels to remove moisture; the flour and mayonnaise coating will adhere much better to dry meat.
- Chill Before Frying: After coating the chicken in the Rice Krispies, let it rest in the fridge for 15 minutes—I learned this the hard way to prevent the coating from sliding off during cooking.
- Use Full-Fat Mayo: Skip the low-fat mayonnaise; the full-fat version adds richness and helps the Rice Krispies cling to the chicken, giving that perfect crunch.
Serving Suggestions for Leftovers
Dipping Sauce Pairings
While honey mustard is my go-to, ranch dressing adds a creamy contrast that kids love. I mix ½ cup ranch with 1 tbsp hot sauce for a spicy kick. These sauces balance the cereal’s sweetness beautifully. 🔥
Fresh Side Salads
A simple green salad with cucumber and cherry tomatoes cuts through the richness. Toss with 2 tbsp balsamic vinaigrette for tang. The acidity refreshes your palate between crispy bites.
Vegetable Sides
Steamed broccoli or roasted carrots add color and nutrition. For carrots, toss with 1 tbsp olive oil and roast at 400°F for 20 minutes until caramelized. Their natural sweetness complements the cereal coating.
Starchy Complements
Mashed potatoes or buttered corn make hearty additions. I love the contrast of creamy mashed potatoes with the crunchy chicken. For corn, 1 cup frozen kernels sautéed with butter works perfectly.
Casual Serving Ideas
For game day, serve these as sliders on mini buns with lettuce and sauce. Or pile into tortillas with shredded cabbage for cereal-coated chicken tacos. The possibilities are endless. ✨
Garnish Tips
Sprinkle with chopped parsley or sesame seeds for visual appeal. A squeeze of lemon wedges adds brightness. These small touches elevate the dish from everyday to special.
Nutrition Facts
Frequently Asked Questions
Can I use chicken thighs instead of breasts?
Yes! Chicken thighs work beautifully and often stay juicier. Reduce baking time by 3-4 minutes since thighs cook faster. Ensure the internal temperature still reaches 165°F.
What if I don’t have a food processor for the cereal?
Place the cereal in a sealed plastic bag and crush with a rolling pin. Aim for fine, even crumbs to ensure the coating sticks properly during baking.
Why does the coating sometimes fall off?
This usually happens if the chicken wasn’t patted dry first or if the cereal wasn’t crushed finely. Press firmly when coating, and let the egg wash drip off slightly before adding the cereal.
Can I air fry this recipe?
Air fry at 375°F for 12-14 minutes, flipping halfway. The coating will crisp up even faster, and you’ll get the same delicious crunch.

- Jollof Rice Sauce Recipe: West African Tomato and Spice Infusion - September 25, 2026
- Japanese Rice Soup Recipe: Umami-Rich Comfort in a Bowl - September 25, 2026
- Homemade Cream Of Rice Recipe: Silk-Smooth Breakfast in Minutes - September 25, 2026