
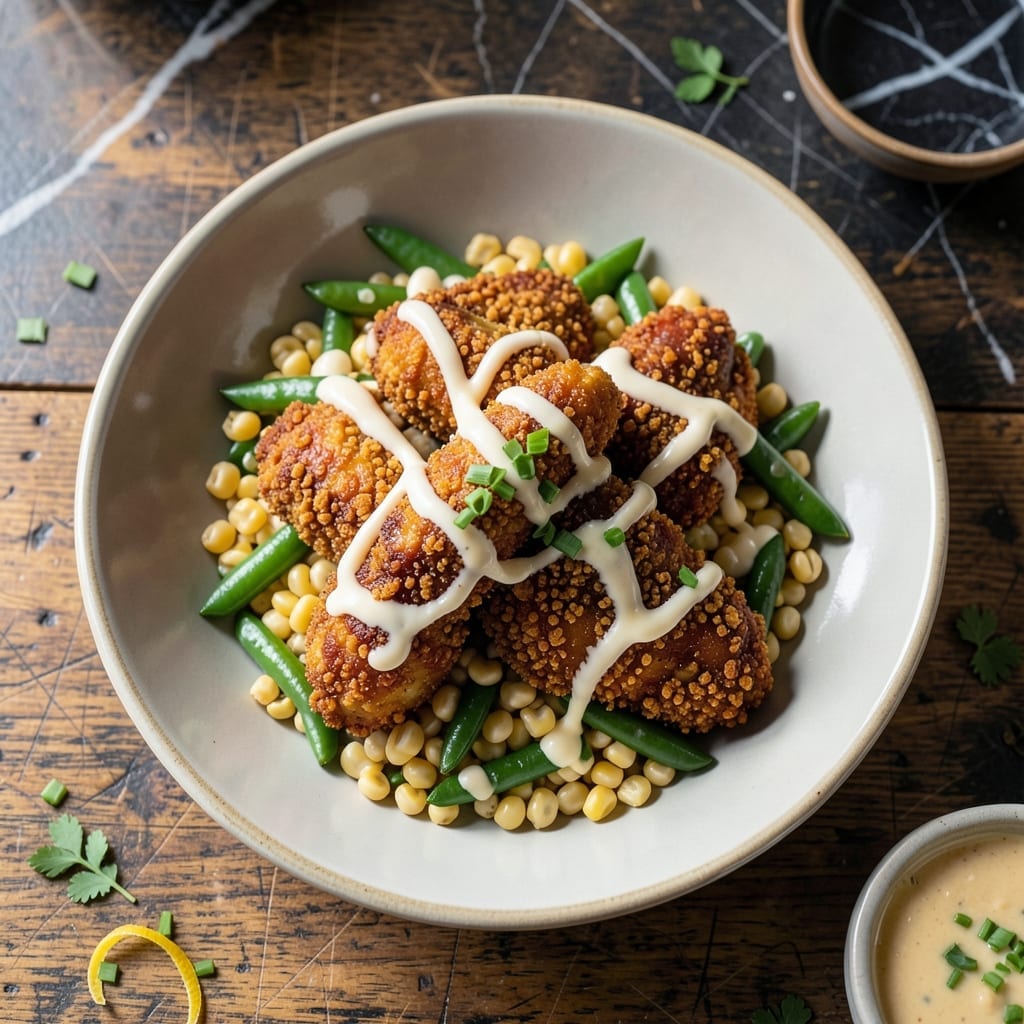
This recipe transforms ordinary fried chicken into something extraordinary with a crunchy coating that hides a delightful surprise. I developed this method during a particularly busy week at The Smoky Pig, looking for a way to add texture without extra effort.
The secret lies in the cereal—crushed Rice Krispies create an irresistibly crispy exterior that stays golden even after baking. Each bite delivers a satisfying crunch followed by tender, juicy chicken underneath. The technique is simple but delivers restaurant-quality results.
What makes this dish special is its versatility. It works for weeknight dinners or impressive gatherings, and the coating adheres perfectly without falling apart. The cereal adds a subtle sweetness that balances the savory chicken beautifully.
Serve with your favorite dipping sauce for a meal that’s as fun to eat as it is to make. The contrast between the crunchy coating and tender meat will have everyone asking for seconds.
Ingredients for Rice Krispie Chicken
Pantry staples plus chicken deliver restaurant-quality crunch with a hidden surprise inside.
| Ingredient | Amount | Notes |
|---|---|---|
| Boneless, Skinless Chicken Breasts 🍗 | 1 ½ lb | Pounded to even thickness |
| Rice Krispies Cereal 🥣 | 4 cups | Crushed to fine crumbs |
| All-Purpose Flour 🌾 | ¾ cup | For initial dredging |
| Large Eggs 🥚 | 2 whole | Beaten for binding |
| Buttermilk 🥛 | ½ cup | For marinating chicken |
| Salt 🧂 | 1 ½ tsp | Divided for seasoning |
| Black Pepper 🌶️ | 1 tsp | Freshly ground preferred |
| Paprika 🌶️ | 1 tsp | Sweet or smoked variety |
| Garlic Powder 🧄 | 1 tsp | For seasoning flour |
| Onion Powder 🧅 | 1 tsp | For seasoning flour |
| Vegetable Oil 🫒 | ½ cup | For frying or baking |
| Cayenne Pepper 🔥 | ¼ tsp | Optional, for heat |
The chicken quality is paramount here. Boneless, skinless breasts from Costco or Whole Foods ensure even cooking and tenderness. Pound them to uniform thickness (about ½-inch) for consistent results. The Rice Krispies must be fresh and unflavored—generic brands work fine, but avoid any with added sugar or artificial colors. For the buttermilk, full-fat yields the juiciest results, though low-fat works in a pinch.
No buttermilk? Mix ½ cup milk with 1½ tsp vinegar or lemon juice and let sit for 5 minutes. Out of Rice Krispies? Corn Flakes or Special K can substitute, though the crunch won’t be as pronounced. For extra flavor, add 1 tsp dried thyme or rosemary to the flour mixture. The cayenne is optional but recommended for a subtle kick (the heat mellows during cooking).
Marinate the chicken in buttermilk for 30 minutes to 2 hours for maximum tenderness. Store uncooked chicken in the fridge for up to 24 hours. Leftovers keep for 3-4 days refrigerated or freeze for 2 months—reheat in the oven to maintain crispiness.
Why You’ll Love This Recipe
- One Bowl Wonder: I just toss the Rice Krispies, flour, and eggs in one bowl—no fancy prep stations needed.
- Crunch in Every Bite: That buttermilk-soaked chicken coated in crushed Rice Krispies? Ridiculously good, with a snap you can hear across the table.
- Kid-Approved Dinner: Honestly, my picky nephew cleans his plate every time I serve this—no complaints, just requests for seconds.
- Budget Stretcher: A box of cereal and chicken breasts feed my family of four for less than takeout. Between us, it’s my weeknight lifesaver.
Step-by-Step Instructions for Rice Krispie Chicken
Here’s the method. Straightforward, tested, works every time.
Step 1: Prepare and Season the Chicken
Place the boneless, skinless chicken breasts between two sheets of plastic wrap and pound them to an even ½-inch thickness using a meat mallet. This ensures uniform cooking and prevents dryness in thicker areas.
Season both sides of the chicken generously with 1 tsp salt, 1 tsp black pepper, 1 tsp paprika, and 0.25 tsp cayenne pepper. I like to press the seasoning into the meat lightly so it adheres well. Let the chicken rest for 10 minutes to allow the seasoning to penetrate.
Step 2: Create the Breading Stations
Set up three shallow bowls for breading. In the first, combine the 0.75 cup all-purpose flour with 0.5 tsp salt, 1 tsp garlic powder, and 1 tsp onion powder. Mix well to distribute the spices evenly.
In the second bowl, whisk together the 2 whole large eggs and 0.5 cup buttermilk until fully combined and slightly frothy. This creates a rich binding mixture that helps the coating adhere to the chicken.
For the third bowl, crush the 4 cups Rice Krispies cereal into fine crumbs. I pulse them in a food processor for 15-20 seconds until they resemble coarse breadcrumbs. Transfer the crushed cereal to the bowl.
Step 3: Bread the Chicken
Dredge each piece of chicken in the seasoned flour, pressing gently to ensure full coverage. Shake off any excess flour—too much can create a thick, pasty coating rather than a crispy one.
Next, dip the floured chicken into the egg and buttermilk mixture, allowing any excess to drip off. Finally, press the chicken into the crushed Rice Krispies, coating both sides completely. The cereal should adhere firmly to the chicken. Place the breaded chicken on a wire rack set over a baking sheet to rest for 5 minutes—this helps the coating set.
Step 4: Cook to Golden Perfection
Heat the 0.5 cup vegetable oil in a large skillet over medium heat until it shimmers or reaches 350°F. Working in batches to avoid crowding the pan, carefully place the breaded chicken in the hot oil.
Fry for 4-5 minutes per side or until the coating is deep golden brown and crispy. The internal temperature of the chicken should reach 165°F. Use a splatter screen to protect against oil splatters.
Transfer the cooked chicken to a paper towel-lined plate to drain excess oil. The Rice Krispies coating will maintain its crunch if served immediately.
Pro Tips For Making Rice Krispie Chicken
- Crush the Cereal Fine: Pulse the Rice Krispies in a food processor until they’re the texture of coarse breadcrumbs—I learned this the hard way after biting into a piece with a whole crispy flake still intact.
- Buttermilk Soak Overnight: Let the chicken bathe in the buttermilk for at least 4 hours, or ideally overnight. Sounds like extra effort, but it makes the meat noticeably juicier and helps the coating stick better.
- Double Dredge for Crisp: Dip the chicken in flour, then egg, then back in flour before pressing it into the Rice Krispies. After burning a few batches, I finally figured out this is the only way to get that golden, crunchy crust.
- Use a Wire Rack: Place the chicken on a wire rack over a baking sheet to let air circulate underneath. My grandmother swore by this, and she was right: it prevents the bottoms from getting soggy.
Storing and Reheating This Dish
Refrigerator Storage
Let your chicken cool completely before storing—this prevents soggy coatings. I use glass containers with tight lids to keep the cereal crisp. Store in the fridge at 40°F or below for up to 3 days. Honestly, it’s best eaten fresh, but leftovers still taste great. ❄️
Freezer Storage
For longer storage, freeze in a single layer on a baking sheet first, then transfer to freezer bags. This prevents the pieces from sticking together. It’ll keep for 2 months without losing much texture. I always label with the date—trust me, you’ll forget otherwise.
Oven Reheating
Preheat your oven to 375°F and place chicken on a wire rack over a baking sheet. This allows air circulation, keeping the coating crisp. Heat for 10-12 minutes until the internal temp hits 165°F. I check it with my ThermoWorks thermometer to be sure. 🔥
Air Fryer Method
My favorite way to revive leftovers. Preheat the air fryer to 375°F and cook for 5-6 minutes, flipping halfway. The hot air circulates perfectly, bringing back that fresh-from-the-kitchen crunch. No extra oil needed.
Microwave Last Resort
Only use this if you’re in a hurry. Place chicken on a paper towel-lined plate and microwave on 50% power for 1-2 minutes. The coating won’t be as crispy, but it’ll still taste good with a dipping sauce.
Nutrition Facts
Frequently Asked Questions
Can I bake instead of frying?
Yes! Bake at 400°F for 20-25 minutes, flipping halfway. Use a wire rack on a baking sheet for even crispiness. The coating may be slightly less crunchy but still delicious.
Why does the coating stay crispy?
The cereal’s sugar content caramelizes during cooking, creating a sturdy, crunchy shell. Pounding the chicken evenly prevents steam from making it soggy. Always rest breaded pieces 5 minutes before cooking.
Can I use chicken tenders?
Reduce frying time to 3-4 minutes per side. Tenders cook faster due to their size. The same breading method works perfectly.
What dipping sauces pair best?
Honey mustard, ranch, or sweet chili sauce complement the cereal’s subtle sweetness. For a tangy kick, try a yogurt-based dip with lemon and dill.

- Jollof Rice Sauce Recipe: West African Tomato and Spice Infusion - September 25, 2026
- Japanese Rice Soup Recipe: Umami-Rich Comfort in a Bowl - September 25, 2026
- Homemade Cream Of Rice Recipe: Silk-Smooth Breakfast in Minutes - September 25, 2026