
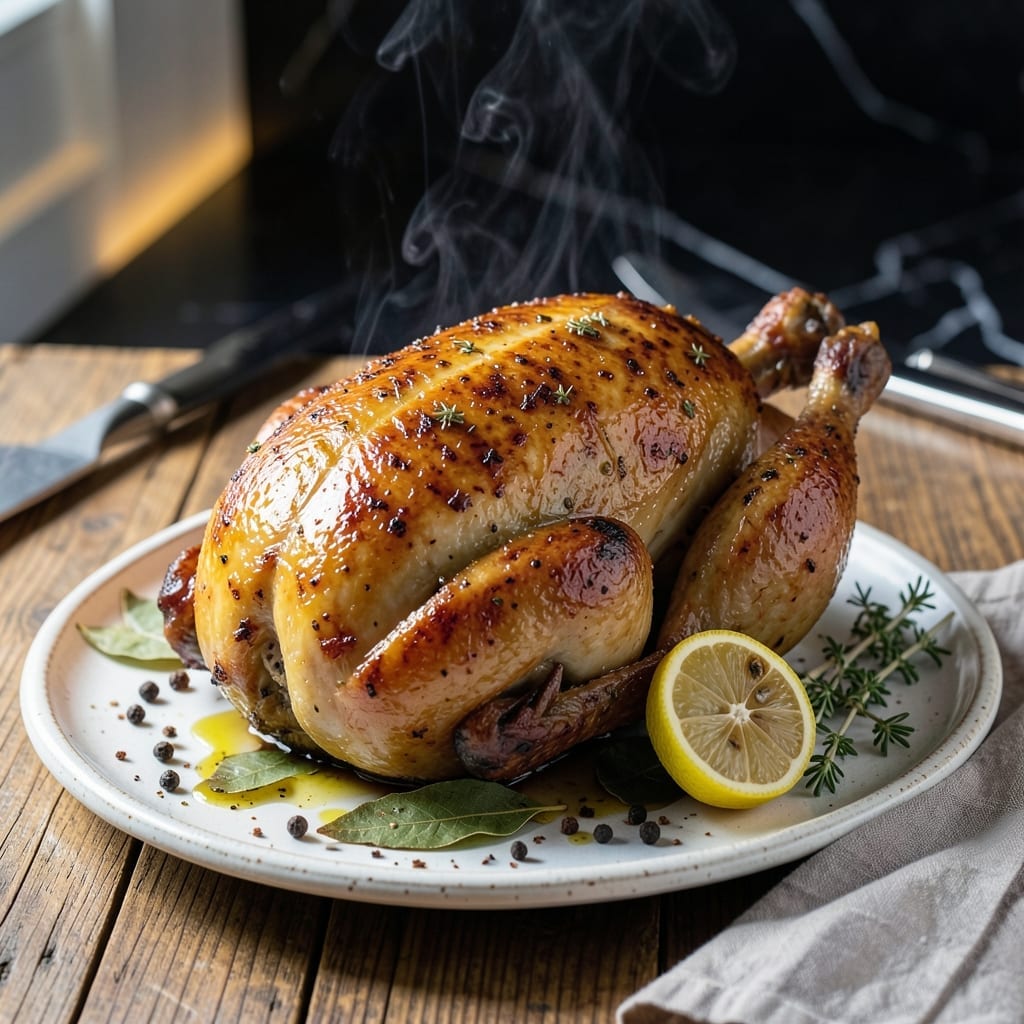
Achieving perfectly moist roasted chicken with golden, crisp skin starts with a simple brining technique. This method guarantees juicy meat that stays tender throughout the cooking process.
The brine infuses the chicken with flavor while breaking down proteins to retain natural moisture. After brining, a high-heat roast creates that coveted crispy skin without drying the meat.
This approach delivers consistent results every time, whether cooking for a weeknight dinner or special occasion. The combination of brining and proper roasting transforms ordinary chicken into an extraordinary meal.
Serve with roasted vegetables or a fresh salad for a complete, impressive dish. Here’s how to make it happen.
Ingredients for Roasted Brined Chicken
Quality ingredients transform this into an extraordinary roasted chicken experience with crisp skin.
| Ingredient | Amount | Notes |
|---|---|---|
| Whole Chicken 🍗 | 4 lb | Giblets removed, patted dry |
| Water 💧 | 8 cups | For brining solution |
| Kosher Salt 🧂 | ¾ cup | Diamond Crystal preferred |
| Granulated Sugar 🍚 | ¼ cup | Balances brine saltiness |
| Bay Leaves 🍃 | 4 whole | Dried, for brine infusion |
| Black Peppercorns 🌶️ | 1 tbsp | Lightly crushed |
| Fresh Thyme Sprigs 🌿 | 6 whole | For aromatic brining |
| Garlic Cloves 🧄 | 6 cloves | Smashed, peeled |
| Unsalted Butter 🧈 | 4 tbsp | Melted, for basting |
| Extra-Virgin Olive Oil 🫒 | 2 tbsp | For skin crisping |
| Lemon 🍋 | 1 whole | Sliced, for cavity |
| Fresh Rosemary Sprigs 🌿 | 4 whole | For cavity aromatics |
| Yellow Onion 🧅 | 1 whole | Quartered, for cavity |
The chicken quality is paramount for optimal results. Seek out air-chilled whole chickens from reputable producers like Bell & Evans or Mary’s—they retain moisture better than water-chilled birds. For the brine, Diamond Crystal kosher salt dissolves cleanly without metallic aftertaste. Fresh herbs make a noticeable difference; farmers market thyme and rosemary have superior fragrance to grocery store offerings (though both work).
No whole chicken? Bone-in, skin-on chicken parts work well—just reduce brining time to 4 hours. Short on herbs? Dried thyme at one-third the amount substitutes adequately. The sugar can be omitted if preferred, though it helps achieve that perfect golden color. For the butter, European-style cultured butter adds depth, but standard unsalted works fine (don’t use salted).
Brine the chicken for exactly 12-16 hours—longer can make the meat mushy. Roast immediately after brining for best results. Leftovers keep 3-4 days refrigerated, though this is best eaten fresh when the skin is at its crispiest. The brined chicken freezes well raw for up to 3 months.
Why You’ll Love This Recipe
- Set It and Forget: I mix the brine the night before, pop the chicken in, and the oven does the rest.
- Juicy Every Time: The salt and sugar brine locks in moisture so the meat stays tender, even the breast.
- Feeds Everyone: One bird, endless options—sandwiches, tacos, or soup the next day.
- Budget Stretcher: A whole chicken costs less than parts, and this makes it taste like a fancy roast.
Step-by-Step Instructions for Roasted Brined Chicken
Here’s the method. Straightforward, tested, works every time.
Step 1: Prepare the Brine Solution
In a large stockpot, combine the 8 cups Water with 0.75 cup Kosher Salt and 0.25 cup Granulated Sugar. Heat over medium-high heat until the salt and sugar dissolve completely, stirring occasionally to expedite the process.
Remove from heat and add the 4 whole Bay Leaves, 1 tbsp Black Peppercorns, 6 whole Fresh Thyme Sprigs, and 6 cloves Garlic Cloves. Let the brine cool to room temperature before using. This ensures the chicken doesn’t begin cooking during the brining process.
Step 2: Brine the Chicken
Submerge the 4 lb Whole Chicken (giblets removed, patted dry) completely in the cooled brine solution. If the chicken isn’t fully covered, prepare additional brine using the same ratios. Refrigerate for 12-24 hours to allow the brine to penetrate the meat thoroughly.
The brining process enhances moisture retention and seasons the chicken deeply. I’ve found that 12 hours is the minimum for noticeable improvement in both juiciness and flavor distribution throughout the meat.
Step 3: Prepare and Roast the Chicken
Preheat your oven to 425°F. Remove the chicken from the brine and pat it completely dry with paper towels. Place the 1 whole Yellow Onion (quartered), 1 whole Lemon (sliced), and 4 whole Fresh Rosemary Sprigs in the cavity. This aromatic combination infuses the meat from within as it roasts.
Truss the chicken legs together with kitchen twine and tuck the wings under the body. Rub the skin with 2 tbsp Extra-Virgin Olive Oil and place it breast-side up on a roasting rack set in a rimmed baking sheet. Roast for 1 hour to 1 hour 15 minutes, basting with 4 tbsp Unsalted Butter every 20 minutes.
Step 4: Check for Doneness and Rest
The chicken is done when the skin is deep golden brown and crispy, and an instant-read thermometer inserted into the thickest part of the thigh (not touching bone) registers 165°F. The juices should run clear when you pierce the thickest part of the thigh.
Transfer the chicken to a cutting board and tent loosely with foil. Let it rest for 15-20 minutes before carving. This resting period allows the juices to redistribute throughout the meat, ensuring every serving remains moist and flavorful. The internal temperature will rise by 5-10°F during this time due to carryover cooking.
Pro Tips For Making Roasted Brined Chicken
- Brine Overnight: Give the chicken a full 12-24 hours in the salt-sugar-water mix—any less and the seasoning won’t penetrate deep enough. I learned this the hard way after pulling out a bland bird that only tasted salty on the surface.
- Pat It Dry: After brining, thoroughly pat the chicken dry with paper towels before roasting. Sounds tedious, but it’s the only way to get that crispy, golden skin instead of a steamed look.
- Skip Cold Chicken: Let the brined chicken sit at room temperature for 30 minutes before roasting. Resist the urge to rush—cold chicken goes into the oven unevenly and takes forever to cook through.
- Use Fresh Bay: Old bay leaves lose their punch fast. If yours have been in the cupboard for years, swap in fresh ones—just 2-3 leaves make a real difference in the brine’s aroma.
Perfect Pairings for This Dish
Wine Pairings
A crisp Sauvignon Blanc from New Zealand cuts through the richness with its bright acidity and citrus notes. I love how its grassy undertones complement the herbaceous brine flavors. Serve chilled at 45-50°F for best results. 🍷
Beer Options
A light Belgian-style witbier like Hoegaarden works beautifully here. The subtle orange and coriander notes enhance the chicken’s savory depth without overpowering it. Avoid heavy IPAs—their bitterness clashes with the brined meat.
Side Dish Ideas
Roasted root vegetables like carrots and parsnips caramelize alongside the chicken, soaking up its juices. Toss 2 lbs chopped veggies with 2 tbsp olive oil and roast at 400°F for 40 minutes.
Fresh Salad Pairing
A simple arugula salad with shaved Parmesan and lemon vinaigrette adds a peppery contrast. I use 5 oz baby arugula, ¼ cup shaved cheese, and a dressing of 3 tbsp olive oil with 1 tbsp lemon juice. 🥗
Bread Suggestions
Warm crusty bread or garlic bread soaks up the delicious pan juices perfectly. A baguette from a local bakery, sliced and toasted with garlic butter, takes this meal to the next level.
Nutrition Facts
Frequently Asked Questions
How long should I brine the chicken?
Brine for 12-24 hours in the refrigerator. This timeframe allows the salt solution to fully penetrate the meat, ensuring maximum moisture retention and flavor. Don’t exceed 24 hours or the texture can become mushy.
Can I use table salt instead of kosher salt?
Not recommended. Table salt is much denser, so you’d need significantly less to avoid over-salting. Stick with Diamond Crystal kosher salt for reliable, even results.
Why do I need to pat the chicken dry after brining?
Drying the skin ensures it crisps properly in the oven. Excess moisture creates steam, which softens the skin instead of making it golden and crispy. Use paper towels for thorough drying.
Can I roast at a lower temperature for longer?
You can, but 425°F is ideal for crisp skin and juicy meat. Lower temps may dry it out before the skin browns. If needed, finish under the broiler for 2-3 minutes for extra crispiness.

- Jollof Rice Sauce Recipe: West African Tomato and Spice Infusion - September 25, 2026
- Japanese Rice Soup Recipe: Umami-Rich Comfort in a Bowl - September 25, 2026
- Homemade Cream Of Rice Recipe: Silk-Smooth Breakfast in Minutes - September 25, 2026