
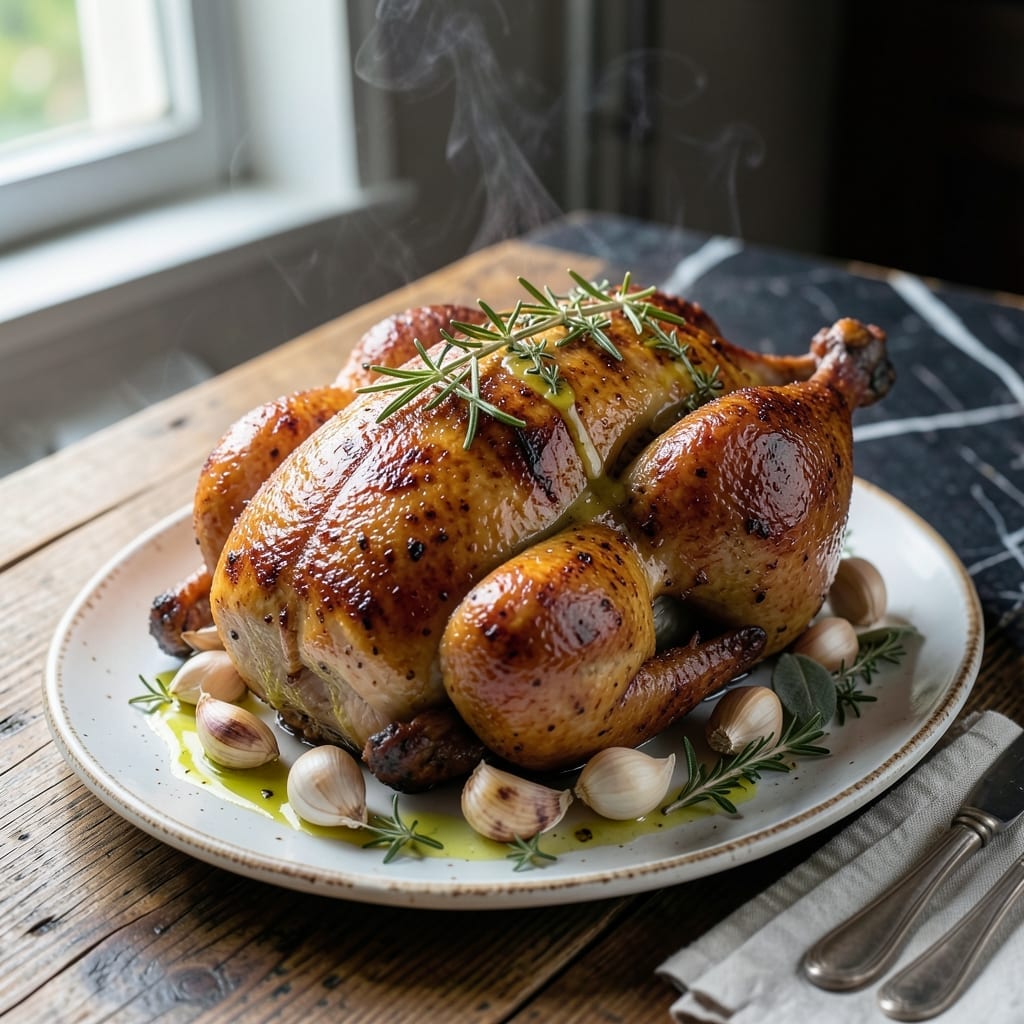
Achieving perfectly crispy roasted chicken with golden skin at home is simpler than you might think. This method delivers consistent results every time with minimal effort.
The key lies in a proper herb rub and precise oven temperature. I’ve tested this approach extensively to ensure the skin crisps beautifully while the meat stays juicy throughout.
You’ll end up with a bird that’s evenly browned, herb-infused, and tender from breast to thigh. The aroma alone will have everyone gathering in the kitchen well before it’s done.
Serve this as a centerpiece for Sunday dinner or any occasion that calls for a comforting, impressive meal. The technique works for all whole chickens regardless of size.
Ingredients for Roaster Chicken
Whole chicken, fresh herbs, and pantry staples create this herb-infused centerpiece with minimal effort and maximum flavor.
| Ingredient | Amount | Notes |
|---|---|---|
| Whole Chicken 🍗 | 4 lb | Giblets removed, patted dry |
| Unsalted Butter 🧈 | ½ cup | Softened to room temperature |
| Fresh Rosemary 🌿 | 2 tbsp | Finely chopped, stems discarded |
| Fresh Thyme 🍃 | 2 tbsp | Leaves stripped from stems |
| Fresh Sage 🌿 | 1 tbsp | Finely minced for even distribution |
| Garlic Cloves 🧄 | 6 cloves | Minced to paste consistency |
| Coarse Kosher Salt 🧂 | 1 ½ tbsp | Diamond Crystal preferred for texture |
| Freshly Ground Black Pepper 🌶️ | 2 tsp | Coarse grind for robust flavor |
| Lemon 🍋 | 1 whole | Zested and juiced separately |
| Yellow Onion 🧅 | 1 whole | Quartered for cavity aromatics |
| Carrots 🥕 | 3 whole | Peeled, cut into 2-inch chunks |
| Celery Stalks 🥬 | 3 pieces | Cut into 2-inch lengths |
| Olive Oil 🫒 | 2 tbsp | Extra-virgin for basting |
The chicken quality is paramount. Opt for air-chilled birds from Whole Foods or a trusted local butcher—they retain moisture better than water-chilled. The skin should be dry to the touch, never slimy. For the herbs, organic bunches from the produce section outperform pre-packaged options. Diamond Crystal kosher salt is the professional standard for its clean flavor and ideal texture.
No fresh herbs? Dried herbs at one-third the quantity work in a pinch, though the flavor profile will be less vibrant. Substitute sage with marjoram or oregano if needed. The butter is essential for crispiness—do not replace with oil. For a citrus variation, swap the lemon for lime or orange zest, adjusting sweetness to taste.
The chicken can rest at room temperature for up to 1 hour before roasting. Leftovers keep in the fridge for 3-4 days or freeze for 3 months. Reheat gently in the oven to maintain the skin’s crispness (microwaving makes it soggy).
Why You’ll Love This Recipe
- One Pan Wonder: Honestly, I just rub the chicken with butter, toss in the herbs, and let the oven do the work—no complicated steps.
- Herb-Infused Bliss: That rosemary, thyme, and sage combo makes the skin so crispy and fragrant, it’s ridiculous.
- Feeds a Crowd: I made this for Sunday dinner and had enough leftovers for sandwiches the next day.
- Budget Stretcher: A whole chicken costs less than buying parts, and it tastes way better with that buttery herb crust.
Step-by-Step Instructions for Herb-Rubbed Roaster Chicken
Master the technique for crispy-skinned, herb-infused roast chicken with this professional approach.
Step 1: Prepare and Season the Chicken
Remove the giblets from the 4 lb whole chicken and pat it completely dry inside and out with paper towels. This dry surface is essential for achieving crispy skin. I use a clean kitchen towel after the paper towels for a final thorough drying—moisture is the enemy of good browning.
In a small bowl, combine the 0.5 cup softened unsalted butter, 2 tbsp finely chopped fresh rosemary, 2 tbsp fresh thyme leaves, 1 tbsp minced fresh sage, and 6 cloves minced garlic. Season this herb butter with the 1.5 tbsp coarse kosher salt and 2 tsp freshly ground black pepper, mixing thoroughly to create a uniform paste.
Step 2: Loosen Skin and Apply Herb Butter
Gently separate the skin from the breast meat by sliding your fingers underneath, creating pockets without tearing the skin. Rub about half of the herb butter directly onto the meat under the skin, distributing it evenly across both breasts. This ensures the meat stays moist and absorbs maximum flavor during roasting.
Rub the remaining herb butter all over the outside of the chicken, including the legs and thighs. Don’t forget to season the cavity as well. The butter will melt during cooking, basting the meat and helping to create that golden, crispy exterior we’re after.
Step 3: Stuff and Truss for Even Cooking
Place the 1 whole lemon (zested and juiced separately) halves, 1 quartered yellow onion, 3 peeled carrots cut into 2-inch chunks, and 3 celery stalks cut into 2-inch lengths into the cavity. This aromatic stuffing adds subtle flavor and helps keep the bird moist.
Tuck the wings under the body (this prevents them from burning) and tie the legs together with kitchen twine. Trussing helps the chicken cook evenly and maintains a compact shape for better heat circulation. Place the chicken breast-side up on a roasting rack set in a rimmed baking sheet.
Step 4: Roast and Baste to Perfection
Preheat your oven to 425°F. Roast the chicken for 15 minutes to start the browning process, then reduce the temperature to 375°F. Baste the chicken with the 2 tbsp extra-virgin olive oil and any accumulated juices every 20-25 minutes.
Continue roasting until the skin is deep golden brown and the juices run clear when you pierce the thickest part of the thigh. The internal temperature should reach 165°F in the thickest part of the breast and 175°F in the thigh. This typically takes about 1 hour and 15 minutes to 1 hour and 30 minutes total, depending on your oven.
Step 5: Rest and Carve for Maximum Juiciness
Transfer the chicken to a cutting board and tent loosely with foil. Let it rest for at least 15-20 minutes before carving. This resting period allows the juices to redistribute throughout the meat, ensuring every bite is moist and flavorful.
Remove the twine and carve the chicken into serving pieces. Start by removing the legs and thighs, then separate the wings, and finally slice the breast meat against the grain. Serve immediately with the roasted vegetables and any pan juices spooned over the top for maximum flavor impact.
Pro Tips For Making Roaster Chicken
- Dry the Skin First: Pat the chicken completely dry with paper towels before seasoning—I learned this the hard way after years of soggy skin.
- Room Temp Start: Let the chicken sit out for 30-45 minutes before roasting. Sounds weird, but it works: more even cooking and juicier meat.
- Butter Under Skin: Gently loosen the skin and rub unsalted butter directly on the breast meat—my grandmother swore by this, and she was right.
- Rest Before Carving: Give it a solid 15 minutes under foil after roasting. I skip this when I’m lazy, but the dish is noticeably better when I don’t.
Pro Cooking Tips for Great roaster chicken
Dry the Skin Thoroughly
Never skip drying the chicken completely inside and out with paper towels. I follow up with a clean kitchen towel to catch every last drop. Even a little moisture prevents the Maillard reaction that creates crispy, golden skin. This step takes 2-3 minutes but makes all the difference.
Butter Under the Skin
Gently separate the skin from the breast meat, creating pockets for the herb butter. Rub about half the mixture directly onto the meat. This ensures the herb-infused butter bastes the meat from within, keeping it juicy while the skin crisps beautifully on the outside. 🔥
Start Hot, Finish Lower
Begin roasting at 425°F for 15 minutes to jumpstart browning, then reduce to 375°F. This high-low technique gives you the best of both worlds: deep color and even cooking without burning the exterior.
Baste Regularly
Every 20-25 minutes, baste the chicken with pan juices and 2 tbsp olive oil. This keeps the surface moist for continued browning and adds layers of flavor. I use a pastry brush for even distribution.
Use a Meat Thermometer
Don’t guess—check the internal temperature. Aim for 165°F in the breast and 175°F in the thigh. A ThermoWorks instant-read thermometer gives accurate results in 3-4 seconds. This prevents overcooking.
Rest Before Carving
Always let the chicken rest for 15-20 minutes after roasting. This allows juices to redistribute, so every slice stays moist and flavorful. Tent loosely with foil to keep it warm while resting. 💡
Nutrition Facts
Frequently Asked Questions
How do I know when it’s done?
Use a meat thermometer to check the internal temperature. It should read 165°F in the breast and 175°F in the thigh. The juices should also run clear when pierced.
Can I use dried herbs instead?
Yes, but reduce the amount to one-third of fresh. Dried herbs are more concentrated, so 2 tsp dried replaces 2 tbsp fresh. The flavor will be slightly different but still delicious.
Why does the skin stay pale?
Pale skin usually means the oven wasn’t hot enough or the chicken wasn’t dry before roasting. Start at 425°F and pat the skin completely dry for best browning.
Should I cover it while roasting?
No, covering traps steam and prevents crisping. Keep it uncovered the entire time for golden, crispy skin. Basting with oil helps protect it from drying out.

- Jollof Rice Sauce Recipe: West African Tomato and Spice Infusion - September 25, 2026
- Japanese Rice Soup Recipe: Umami-Rich Comfort in a Bowl - September 25, 2026
- Homemade Cream Of Rice Recipe: Silk-Smooth Breakfast in Minutes - September 25, 2026