
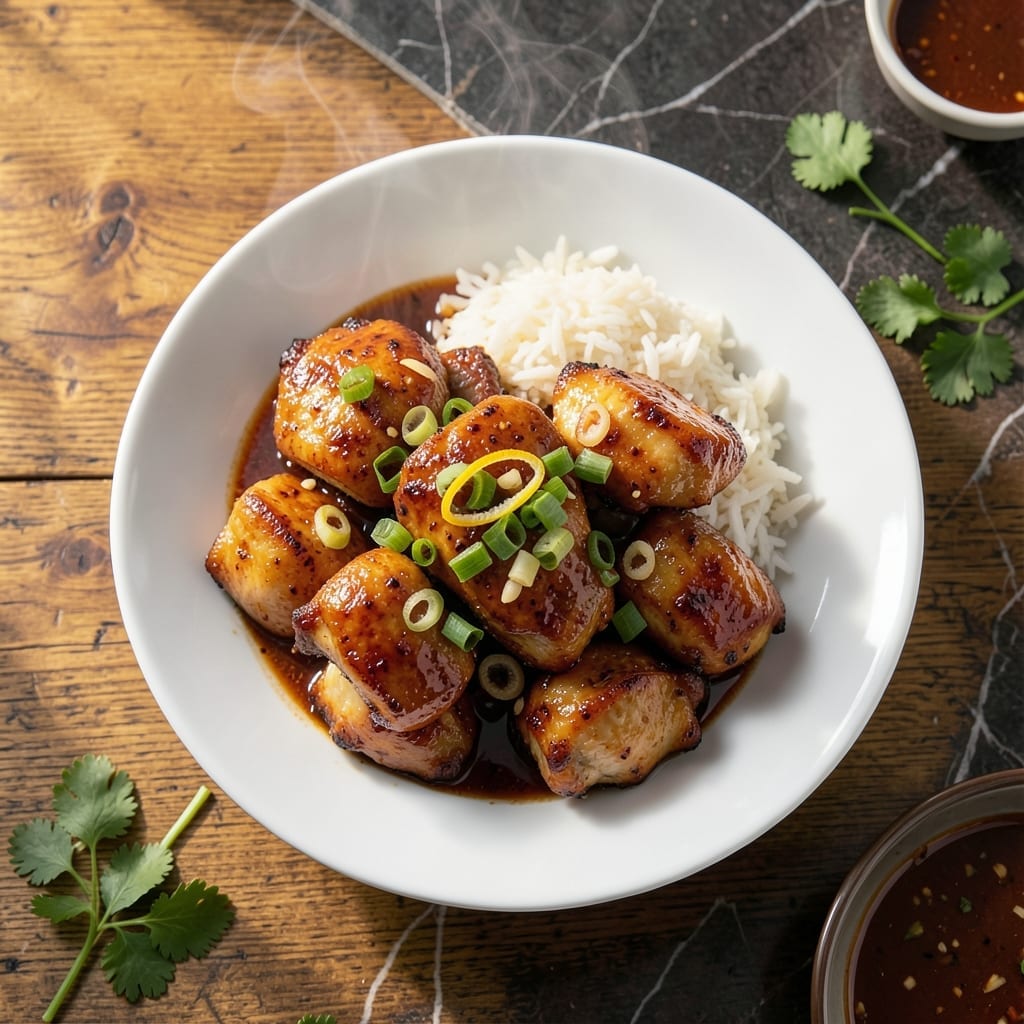
I’ve spent years perfecting this wok-seared chicken to capture the exact flavors of Sarku’s famous teriyaki. The key is high heat and a homemade sauce that caramelizes beautifully on the chicken.
This recipe delivers restaurant-quality results with simple ingredients and a foolproof technique. The chicken stays tender and juicy while absorbing the rich, savory-sweet teriyaki glaze.
You’ll achieve that signature sticky, glossy coating with crisp edges and a melt-in-your-mouth texture. The sauce is balanced—neither too sweet nor too salty—just like the original.
Serve it over steamed rice with steamed vegetables for the full Sarku experience at home.
Ingredients for Sarku Chicken
Simple ingredients, restaurant-quality results. Wok-seared chicken with that signature teriyaki glaze.
| Ingredient | Amount | Notes |
|---|---|---|
| Boneless Skinless Chicken Thighs 🍗 | 1 ½ lb | Cut into bite-sized pieces |
| Soy Sauce 🫒 | ½ cup | Low-sodium preferred for balance |
| Brown Sugar 🧈 | ⅓ cup | Packed, for caramelization |
| Rice Vinegar 🍚 | ¼ cup | Unseasoned variety |
| Fresh Garlic Cloves 🧄 | 4 cloves | Minced finely for even distribution |
| Fresh Ginger Root 🌿 | 1 tbsp | Grated, peeled |
| Cornstarch 🌾 | 2 tbsp | For thickening the sauce |
| Water 💧 | ¼ cup | Cold, for slurry |
| Vegetable Oil 🫒 | 2 tbsp | High smoke point for wok searing |
| Sesame Oil 🫒 | 1 tsp | Toasted, for finishing |
| Green Onions 🧅 | 3 whole | Thinly sliced for garnish |
| Sesame Seeds 🌰 | 1 tbsp | Toasted for garnish |
The chicken thighs are non-negotiable for that Sarku texture—boneless, skinless ensures even cooking and maximum sauce absorption. Costco or Sam’s Club offer great bulk options if you plan to make this often. Look for thighs with a bit of fat marbling for juicier results. The soy sauce should be low-sodium to control the salt level in your final dish.
No rice vinegar? Apple cider vinegar at the same amount works in a pinch. Brown sugar can be swapped for honey or maple syrup (though the flavor profile shifts slightly). If you’re out of fresh ginger, ground ginger at one-third the quantity is acceptable, but fresh delivers the authentic zing. For a gluten-free version, use tamari instead of soy sauce.
The sauce keeps for 1 week refrigerated in an airtight container, but the chicken is best served fresh. Leftovers reheat well for 3-4 days—just add a splash of water to prevent drying. For meal prep, store sauce and chicken separately and combine when reheating.
Why You’ll Love This Recipe
- 20-Minute Dinner: I can have this on the table faster than takeout arrives, just sear the thighs and let the soy-brown sugar glaze do its thing.
- Sweet-Savory Balance: The brown sugar caramelizes with the soy and rice vinegar while the garlic punches up every bite—ridiculously good.
- Meal Prep Hero: It reheats like a dream, so I make a double batch for lunches all week. Honestly, it tastes even better the next day.
- Budget Stretcher: Chicken thighs stay juicy and cheap, and a few pantry staples turn them into something my family begs for.
Step-by-Step Instructions for Wok-Seared Teriyaki Chicken
Master the wok technique with these precise steps for restaurant-quality results at home.
Step 1: Prepare the Chicken and Sauce Base
Cut the 1.5 lb boneless skinless chicken thighs into 1-inch pieces and pat them completely dry with paper towels. This ensures even browning and prevents the meat from steaming in the wok instead of searing. Place the chicken in a bowl and set aside.
In a separate bowl, whisk together the 0.5 cup soy sauce, 0.33 cup brown sugar, and 0.25 cup rice vinegar until the sugar fully dissolves. This creates the foundation of your teriyaki glaze. The brown sugar should incorporate completely, leaving no grainy texture.
Step 2: Create the Cornstarch Slurry and Aromatics
In a small bowl, combine the 2 tbsp cornstarch with the 0.25 cup water and whisk until smooth. The slurry should be lump-free and the consistency of heavy cream. This will thicken your sauce to the perfect glaze-like consistency later.
Mince the 4 cloves fresh garlic cloves and grate the 1 tbsp fresh ginger root directly into the soy sauce mixture. These aromatics need to infuse the sauce while you cook, so prepare them before you begin searing. The ginger should be finely grated to distribute evenly throughout the dish.
Step 3: Wok-Sear the Chicken to Perfection
Heat the 2 tbsp vegetable oil in a wok or large skillet over high heat until it shimmers and just begins to smoke. Add the chicken in a single layer, working in batches if necessary to avoid overcrowding. Let it sear undisturbed for 2-3 minutes until the pieces develop a deep golden-brown crust on the bottom.
Flip the chicken and cook for another 2-3 minutes until cooked through and browned on all sides. The internal temperature should reach 165°F. Transfer the cooked chicken to a clean plate and set aside. The wok should be very hot throughout this process to achieve proper searing.
Step 4: Build and Reduce the Teriyaki Glaze
Reduce the heat to medium-high and pour the soy sauce mixture into the wok. Add the minced garlic and grated ginger if you haven’t already. Bring the mixture to a rolling boil, then stir in the cornstarch slurry. The sauce should immediately begin to thicken and become glossy.
Cook for 1-2 minutes, stirring constantly, until the sauce reduces slightly and coats the back of a spoon. The color should deepen to a rich amber, and the consistency should be thick enough to cling to the chicken. Remove from heat immediately to prevent over-thickening.
Step 5: Finish and Garnish for Serving
Return all the cooked chicken to the wok and toss to coat evenly with the teriyaki glaze. Cook for an additional 30-60 seconds over medium heat to allow the flavors to meld and the sauce to adhere to the chicken. The pieces should be thoroughly glazed and slightly sticky.
Drizzle with the 1 tsp sesame oil and toss once more. Transfer to a serving platter and garnish with the 3 whole green onions, thinly sliced, and 1 tbsp sesame seeds. Serve immediately while hot, with the sauce still glossy and the sesame seeds just beginning to toast from the residual heat.
Pro Tips For Making Sarku Chicken
- Marinate Overnight: Let the chicken soak in the soy sauce, brown sugar, and garlic mix for at least 4 hours—preferably overnight. I learned this the hard way when my first batch tasted flat because I only marinated for 30 minutes.
- Pat Dry First: Before marinating, pat the chicken thighs completely dry with paper towels. Sounds weird, but it works: the marinade clings better and you get a deeper sear when cooking.
- Skip the Boiling: Resist the urge to boil the marinade to thicken it—it’ll turn the sugar bitter. Instead, simmer it on low heat for 3-4 minutes until it reduces slightly.
- Use Fresh Garlic: After burning three batches, I finally figured out that fresh minced garlic makes a real difference compared to the jarred stuff. It’s sharper and more aromatic in the finished dish.
Wine and Beer Pairings for This sarku chicken
Asian Lagers
Crisp, light lagers like Sapporo or Asahi cut through the richness of the teriyaki glaze beautifully. Their clean finish refreshes your palate between bites. I always keep a few in my fridge for this exact pairing. 🍺
Riesling Wines
An off-dry German Riesling offers a perfect balance with the sweet and savory notes. The slight sweetness complements the brown sugar in the sauce while the acidity keeps the dish from feeling too heavy. Serve it slightly chilled.
Wheat Beers
Hefeweizen or Belgian witbier bring citrusy, spicy notes that enhance the ginger and garlic in the recipe. The bubbles also help cleanse your palate. I love how the wheat malt subtly echoes the sauce’s caramelization.
Sake Options
A chilled junmai ginjo sake with its fruity, floral notes pairs elegantly with wok-seared flavors. For a budget option, Tyku Junmai is widely available and offers great value. The alcohol content helps balance the dish’s sweetness.
Pinot Noir
If you prefer red wine, a light-bodied Pinot Noir from Oregon works surprisingly well. Its bright acidity and red fruit notes don’t overpower the chicken. Avoid heavy tannic reds that would clash with the teriyaki.
Non-Alcoholic
For a non-alcoholic option, try ginger beer with lime. Its spicy kick and effervescence mirror the dish’s flavors. I also recommend jasmine iced tea—its floral notes complement the sesame garnish perfectly. ✨
Nutrition Facts
Frequently Asked Questions
What’s the best cut of chicken for this dish?
Use boneless, skinless chicken thighs for the juiciest, most flavorful results. Their higher fat content keeps the meat tender during high-heat searing, and they absorb the teriyaki glaze beautifully.
Can I make this ahead of time?
The chicken is best served fresh, but you can prep the sauce up to 3 days ahead. Store it in an airtight container in the fridge. Leftovers keep for 3-4 days—reheat with a splash of water to prevent drying.
Why is my sauce not thickening properly?
Ensure your cornstarch slurry is lump-free and added to boiling sauce. If it’s still thin, mix an extra 1 tsp cornstarch with 1 tbsp water and stir in. Avoid overcooking after thickening to prevent a gummy texture.

- Jollof Rice Sauce Recipe: West African Tomato and Spice Infusion - September 25, 2026
- Japanese Rice Soup Recipe: Umami-Rich Comfort in a Bowl - September 25, 2026
- Homemade Cream Of Rice Recipe: Silk-Smooth Breakfast in Minutes - September 25, 2026