
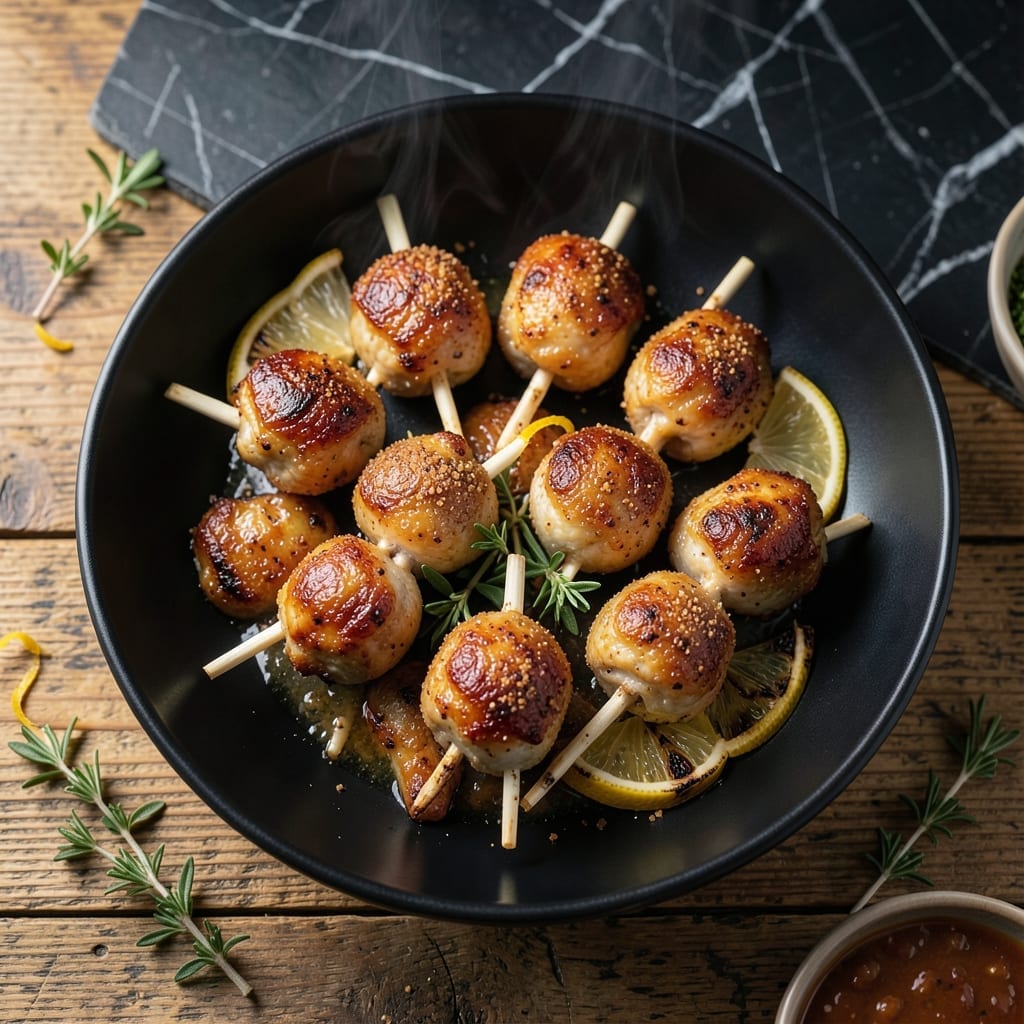
This recipe transforms chicken into an elegant, crispy finger food that impresses at any gathering. The secret lies in proper preparation and precise smoking technique.
I developed this method after testing various approaches to achieve the perfect balance of texture and flavor. Exposing the bone creates the signature lollipop presentation, while a dry brine ensures the meat stays juicy throughout smoking.
The smoking process at 225°F allows the skin to render and crisp while the interior remains tender. Each bite delivers smoky depth with a satisfying crunch at the handle.
Perfect for parties or casual meals, these lollipops will become your go-to appetizer or main course. The technique is straightforward but delivers professional results.
Ingredients for Smoked Chicken Lollipop
Eleven ingredients create these impressive smoked chicken lollipops with crispy skin and juicy meat.
| Ingredient | Amount | Notes |
|---|---|---|
| Chicken Drumsticks 🍗 | 8 whole | Skin-on, bone-in for presentation |
| Kosher Salt 🧂 | 2 tbsp | Diamond Crystal preferred for dry brine |
| Light Brown Sugar 🍚 | 1 tbsp | For balancing salt in brine |
| Smoked Paprika 🌶️ | 1 tbsp | Adds depth to dry rub |
| Garlic Powder 🧄 | 1 tbsp | Fine grind for even coating |
| Onion Powder 🧅 | 1 tbsp | Enhances savory profile |
| Ground Black Pepper 🌶️ | 1 tsp | Freshly ground for best flavor |
| Cayenne Pepper 🔥 | ½ tsp | Adjust for heat preference |
| Mustard Powder 🟡 | 1 tsp | Boosts crust formation |
| Apple Cider Vinegar 🍏 | ¼ cup | For tenderizing meat |
| Olive Oil 🫒 | 2 tbsp | For binding dry rub |
| Hickory Wood Chips 🌳 | 2 cups | Soaked for smoking |
The chicken drumsticks are non-negotiable here—skin-on, bone-in is essential for both presentation and texture. Costco has great bulk packs, but any supermarket will do. Look for similar-sized pieces to ensure even cooking. The dry brine requires Diamond Crystal kosher salt (its flake structure dissolves better), though Morton works in a pinch if you adjust the volume by half.
No smoked paprika? Regular paprika plus a pinch of liquid smoke gets you close. Out of mustard powder? Dijon mustard at half the quantity works, though it adds moisture. The cayenne can be omitted for heat-sensitive palates, but the garlic and onion powders are doing heavy lifting—don’t skip those. Freshly ground black pepper makes a noticeable difference in the final crust.
Dry-brined chicken keeps 2-3 days in the fridge before smoking. Smoked lollipops reheat well—store in an airtight container for up to 4 days. The wood chips? Keep them in a sealed bag away from moisture until ready to use.
Why You’ll Love This Recipe
- One Pan Magic: I just toss the drumsticks with the brown sugar and spices, then let the smoker do the work—no flipping, no fuss.
- Smoky Sweet Bite: That combo of smoked paprika and brown sugar caramelizes into a sticky, finger-licking glaze.
- Crowd Pleaser: I serve these at backyard BBQs, and honestly, they disappear faster than the burgers.
- Budget Friendly: A pack of drumsticks and a few pantry staples feed my family for less than takeout.
Step-by-Step Instructions for Smoked Chicken Lollipops
Master the technique for perfectly crispy handles and juicy meat with this professional approach.
Step 1: Prepare the Chicken Lollipops
Using a sharp knife, carefully expose the bone on each of the 8 whole Chicken Drumsticks by cutting around the meat at the thicker end. Push the meat down toward the thinner end to create the lollipop shape. This exposes more bone for presentation while keeping the meat plump and juicy.
Pat the drumsticks completely dry with paper towels—this ensures the dry rub adheres properly and promotes even browning during smoking. Any moisture on the surface will create steam, which prevents that desired crispy exterior.
Step 2: Apply the Dry Brine and Rub
In a bowl, combine the 2 tbsp Kosher Salt, 1 tbsp Light Brown Sugar, 1 tbsp Smoked Paprika, 1 tbsp Garlic Powder, 1 tbsp Onion Powder, 1 tsp Ground Black Pepper, 0.5 tsp Cayenne Pepper, and 1 tsp Mustard Powder. Stir until evenly blended.
Drizzle the 2 tbsp Olive Oil over the chicken drumsticks, then generously coat each piece with the spice mixture. Press the rub into the meat firmly to ensure full coverage. Let the seasoned drumsticks rest at room temperature for 30 minutes while you prepare the smoker.
Step 3: Prepare the Smoker
Soak the 2 cups Hickory Wood Chips in water for at least 30 minutes to ensure they smolder rather than burn, producing the ideal smoke. Preheat your smoker to 225°F using indirect heat.
Once the smoker reaches temperature, drain the wood chips and add them to the smoker box or directly onto the coals. You want a steady stream of thin, blue smoke—not thick white smoke, which can impart a bitter flavor to the meat.
Step 4: Smoke to Perfection
Arrange the chicken lollipops on the smoker grates, ensuring they’re not touching each other. Smoke the drumsticks at 225°F for 1.5 to 2 hours, or until the internal temperature reaches 165°F.
During the last 30 minutes, lightly brush the chicken with the 0.25 cup Apple Cider Vinegar to enhance flavor and tenderize the meat. The skin should be a deep, mahogany color with a slightly crispy texture. Use a meat thermometer to check for doneness at the thickest part of each drumstick.
Step 5: Rest and Serve
Remove the chicken lollipops from the smoker and let them rest for 5 to 10 minutes under loosely tented foil. This allows the juices to redistribute throughout the meat, ensuring each bite is moist and flavorful.
Serve the lollipops immediately while hot. The exterior should be crispy with a deep, smoky aroma, while the interior remains tender and juicy. The exposed bone provides a convenient handle, making these as fun to eat as they are delicious.
Pro Tips For Making Smoked Chicken Lollipop
- Prep the Bones: Use a sharp knife to scrape the meat down to expose about 1-2 inches of bone—this isn’t just for looks, it actually changes the outcome by letting the smoke penetrate better and giving you that perfect handle.
- Dry the Skin: Pat the drumsticks bone-dry with paper towels before seasoning. I learned this the hard way—wet skin steams instead of crisping, and you’ll lose that smoky crust you’re after.
- Low and Slow: Keep your smoker at 225°F and give them 2.5-3 hours. After burning a few batches at higher temps, I finally figured out that patience is the thing that matters most for tender, fall-off-the-bone meat.
- Double the Rub: Sounds weird, but it works: use more rub than you think you need—especially the brown sugar and smoked paprika. The bold flavors mellow out during the long smoke, so don’t be shy.
Perfect Pairings for smoked chicken lollipop
Side Dish Pairings
For a light contrast, I love serving these with a crisp coleslaw made from 4 cups shredded cabbage and ½ cup mayonnaise. The cool crunch balances the smoky heat beautifully. 🥗
A simple cornbread with honey butter complements the smoky flavors perfectly. I use a cast iron skillet for that golden crust.
Dipping Sauces
My go-to is a spicy ranch—mix 1 cup ranch dressing with 1 tbsp hot sauce and ½ tsp smoked paprika. The creamy heat enhances the chicken’s smokiness.
For a tangy twist, try Alabama white sauce—blend 1 cup mayonnaise, ¼ cup apple cider vinegar, and 1 tsp horseradish. 🌶️
Beverage Pairings
A crisp IPA like Hazy Little Thing cuts through the richness with its citrusy hop profile. The carbonation refreshes your palate.
For non-drinkers, sparkling lemonade with a rosemary sprig offers a refreshing contrast to the smoky depth. 💫
Nutrition Facts
Frequently Asked Questions
How do I prevent the meat from sliding down the bone?
Cut around the base of the drumstick to expose the bone, then push the meat down firmly. This creates a secure base.
Can I use a different wood for smoking?
Yes! Apple or cherry wood adds a sweeter note, while pecan offers a milder flavor. Avoid mesquite—it can overpower.
What if my smoker runs hotter than 225°F?
Reduce the cook time to 1 hour and check internal temp early. Consistency matters more than the exact temperature.
Should I sauce the lollipops before or after smoking?
After! Sauce during the last 15 minutes to prevent burning. Brushing with vinegar in the final 30 minutes works perfectly.

- Jollof Rice Sauce Recipe: West African Tomato and Spice Infusion - September 25, 2026
- Japanese Rice Soup Recipe: Umami-Rich Comfort in a Bowl - September 25, 2026
- Homemade Cream Of Rice Recipe: Silk-Smooth Breakfast in Minutes - September 25, 2026