
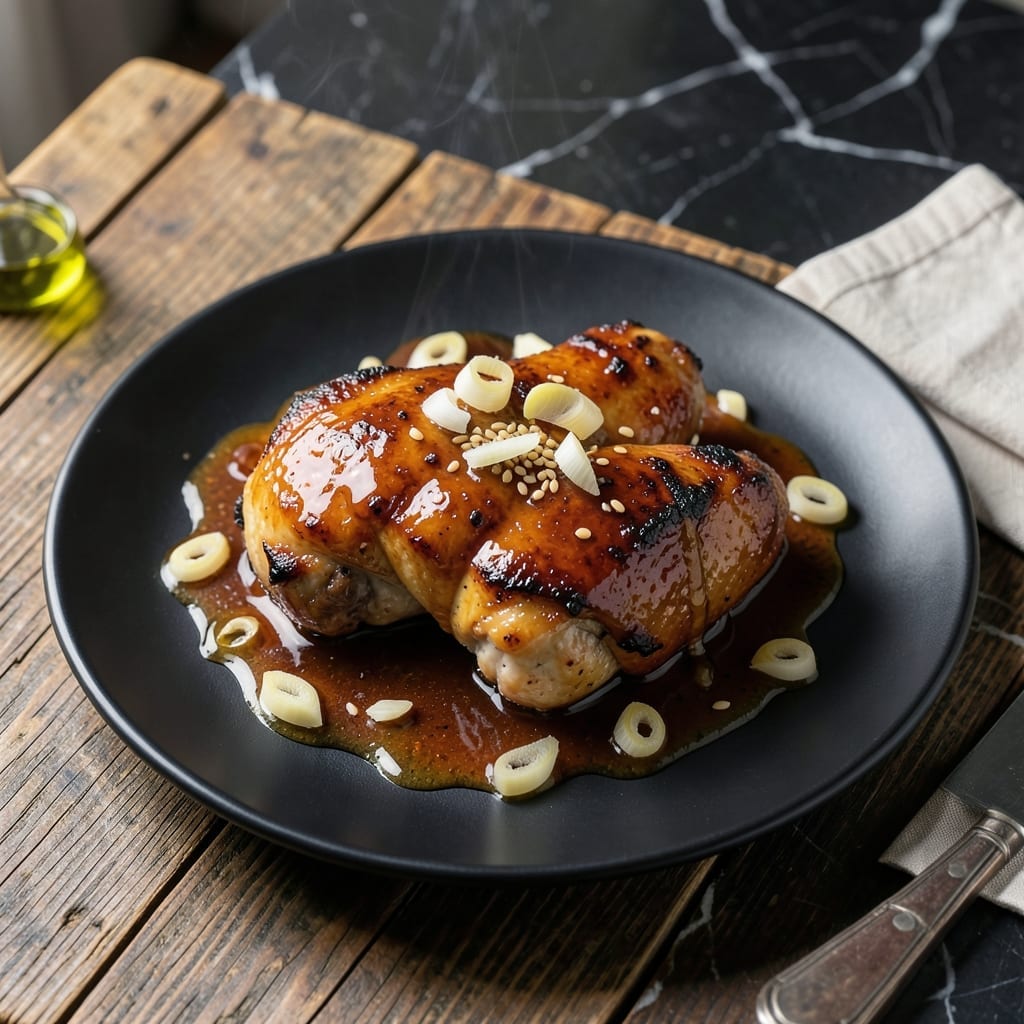
This Japanese-inspired dish delivers a perfect balance of sweet and savory in every bite. The soy-based glaze caramelizes beautifully, creating a sticky coating that clings to tender chicken.
I developed this recipe to bring restaurant-quality flavors to the home kitchen. The key is reducing the sauce to just the right consistency, ensuring maximum flavor in every mouthful.
You’ll achieve juicy chicken with a glossy, finger-licking glaze that’s both rich and well-balanced. The technique is simple but delivers impressive results.
Serve over steamed rice with steamed vegetables for a complete meal that’s sure to become a weeknight favorite.
Ingredients for Soyaki Chicken
Pantry staples plus fresh aromatics create this restaurant-worthy dish at home.
| Ingredient | Amount | Notes |
|---|---|---|
| Boneless Skinless Chicken Thighs 🍗 | 1 ½ lb | Trimmed of excess fat |
| Soy Sauce 🫒 | ½ cup | Low-sodium preferred |
| Honey 🍯 | ¼ cup | Local or raw for depth |
| Rice Vinegar 💧 | 2 tbsp | Unseasoned variety |
| Fresh Garlic Cloves 🧄 | 4 cloves | Minced finely |
| Fresh Ginger Root 🌿 | 1 tbsp | Grated or minced |
| Sesame Oil 🫒 | 1 tbsp | Toasted for aroma |
| Brown Sugar 🍚 | 2 tbsp | Light or dark works |
| Cornstarch 🌾 | 1 tbsp | For thickening glaze |
| Vegetable Oil 🫒 | 2 tbsp | High smoke point |
| Toasted Sesame Seeds 🌰 | 1 tsp | For garnish |
| Green Onions 🧅 | 3 whole | Thinly sliced for topping |
| Kosher Salt 🧂 | ½ tsp | Diamond Crystal preferred |
| Black Pepper 🌶️ | ¼ tsp | Freshly cracked |
The chicken thighs are non-negotiable here—bone-in works too but boneless cooks faster and absorbs more glaze. I grab mine from Costco for bulk savings (the air-chilled ones are great). For the soy sauce, Kikkoman low-sodium is my go-to, but any brand with clean ingredients works. The honey? Local if you can swing it (the flavor’s deeper, and you’re supporting bees).
No honey? Maple syrup or agave at a 1:1 ratio. Out of rice vinegar? Apple cider vinegar in a pinch (just reduce the amount by half—it’s stronger). Fresh ginger and garlic are ideal, but jarred minced works if you’re short on time (drain the liquid first). For extra richness, swap half the soy sauce with oyster sauce (vegetarian if needed).
The glaze thickens as it cools, so don’t stress if it seems thin. Leftovers keep 4-5 days in the fridge—reheat gently to avoid drying out. Freezes beautifully for 3 months (portion before freezing for easy meals).
Why You’ll Love This Recipe
- One Pan Wonder: I toss everything in a single skillet and let the soy-honey glaze do its magic—minimal cleanup, maximum flavor.
- Sweet & Savory Bomb: The honey caramelizes with the soy sauce while the garlic and rice vinegar cut through with that perfect tangy kick.
- Meal Prep MVP: I make a double batch on Sunday and it stays juicy all week for lunches or quick dinners.
- Budget Friendly Feast: Boneless thighs are cheap, and this sauce stretches to feed a crowd without breaking the bank.
Step-by-Step Instructions for Soyaki Chicken
Here’s the method. Straightforward, tested, works every time.
Step 1: Season and Sear the Chicken Thighs
Pat the 1.5 lb boneless skinless chicken thighs dry with paper towels to ensure they brown properly. Season both sides with the 0.5 tsp kosher salt and 0.25 tsp black pepper. I always press the seasoning in gently so it adheres well to the meat.
Heat the 2 tbsp vegetable oil in a large skillet over medium-high heat until shimmering. Add the chicken thighs in a single layer, being careful not to crowd the pan. Cook for 5-6 minutes per side until golden brown and cooked through. The internal temperature should reach 165°F.
Transfer the chicken to a plate and cover loosely with foil to keep warm. Don’t clean the skillet—those browned bits are pure flavor for your glaze.
Step 2: Sauté Aromatics and Build the Glaze Base
In the same skillet, reduce heat to medium and add the 4 cloves fresh garlic cloves and 1 tbsp fresh ginger root. Sauté for 1-2 minutes until fragrant—you’ll know it’s ready when the aroma fills your kitchen.
Pour in the 0.5 cup soy sauce, 0.25 cup honey, 2 tbsp rice vinegar, and 2 tbsp brown sugar. Stir well to combine, scraping up any browned bits from the bottom of the pan. This is where the magic starts to happen as all those flavors meld together.
Let the mixture simmer for 3-4 minutes until it reduces slightly and the honey begins to thicken. Watch for small bubbles at the edges—that’s your signal it’s ready for the next step.
Step 3: Thicken and Finish the Glaze
In a small bowl, whisk together the 1 tbsp cornstarch with 2 tbsp of cold water until smooth. Slowly pour this slurry into the simmering glaze while stirring constantly. The mixture will begin to thicken immediately.
Continue cooking for 1-2 minutes until the glaze coats the back of a spoon. It should be glossy and slightly syrupy, not thick like paste. Stir in the 1 tbsp sesame oil at this point—it adds a deep, nutty aroma that takes this dish to the next level.
Return the chicken to the skillet and spoon the glaze over each piece, turning to coat completely. Let it simmer together for 1-2 minutes so the flavors penetrate the meat.
Step 4: Garnish and Serve
Transfer the glaze-coated chicken to a serving platter. Drizzle any remaining glaze from the pan over the top—you don’t want to waste a drop of this delicious sauce. Sprinkle with the 1 tsp toasted sesame seeds and the 3 whole green onions, thinly sliced.
The chicken should be glossy and caramelized, with the sesame seeds and green onions adding a pop of color and texture. Serve immediately while hot—the glaze will thicken slightly as it cools, but it’s best enjoyed fresh from the pan.
This dish pairs perfectly with steamed rice to soak up all that incredible sauce. The combination of sweet, salty, and umami flavors in every bite is what makes this recipe so special.
Pro Tips For Making Soyaki Chicken
- Sear First, Simmer Later: Brown the chicken thighs first in a hot pan—about 3-4 minutes per side—then add the soyaki sauce and drop the heat to medium-low. I learned this the hard way after ending up with pale, steamed chicken that tasted flat.
- Grate the Garlic: Skip the mincing and grate fresh garlic cloves instead—it disperses evenly in the sauce and infuses more flavor. Sounds fussy, but it actually changes the outcome.
- Reduce the Sauce: After cooking the chicken, pull it out and crank the heat to reduce the leftover soy-honey mixture for 2-3 minutes. The glossy, thicker sauce clings better to the meat.
- Slice Against Grain: Before serving, slice the thighs crosswise into strips—it shortens the fibers and makes every bite more tender. My grandmother swore by this, and she was right.
Dietary Considerations for This Dish
Gluten-Free Option
For a gluten-free version, simply swap the soy sauce with tamari—it has the same deep umami flavor without the wheat. I use San-J tamari and find it works perfectly in this recipe. The texture and taste remain identical to the original. 💪
Lower Sodium Version
To reduce sodium, use low-sodium soy sauce and cut the added kosher salt by half. The dish will still be flavorful thanks to the garlic, ginger, and honey. I often do this when serving kids or anyone watching their salt intake.
Dairy-Free and Nut-Free
This recipe is naturally free of dairy and nuts, making it safe for most allergies. Just double-check your soy sauce and sesame oil labels for cross-contamination warnings if allergies are severe. Always better to be safe than sorry.
Lower Sugar Variant
Replace the honey with 1 tbsp sugar-free maple syrup and reduce the brown sugar to 1 tbsp. The glaze will be less sticky but still delicious. I’ve tested this version and it caramelizes just as nicely.
Protein Alternatives
Swap chicken for tofu or salmon without changing the glaze. Press and drain 1.5 lb extra-firm tofu before cooking, or use 4 salmon fillets. Both absorb the flavors beautifully and cook in the same 5-6 minutes per side. 🌟
Meal Prep Friendly
The dish reheats well, making it perfect for meal prep. Store in airtight containers for up to 4 days in the fridge. The glaze thickens when chilled but loosens when reheated gently in a pan or microwave.
Nutrition Facts
Frequently Asked Questions
What’s the best way to avoid a burnt glaze?
Keep the heat at medium when reducing the sauce. Stir frequently and remove from heat as soon as it thickens. The residual heat will continue cooking it.
Can I use chicken breast instead of thighs?
Yes, but it cooks faster and can dry out. Reduce cooking time to 4-5 minutes per side and keep a close eye on the internal temperature. Thighs are more forgiving.
How can I make the glaze thicker?
Simmer the sauce longer before adding the cornstarch slurry. Or increase the cornstarch to 1.5 tbsp for a more syrupy consistency. Stir constantly to prevent clumping.
Is it okay to marinate the chicken first?
Marinate in the sauce mixture (without cornstarch) for 30 minutes to 2 hours before cooking. This adds extra flavor but skip the pre-salting.

- Jollof Rice Sauce Recipe: West African Tomato and Spice Infusion - September 25, 2026
- Japanese Rice Soup Recipe: Umami-Rich Comfort in a Bowl - September 25, 2026
- Homemade Cream Of Rice Recipe: Silk-Smooth Breakfast in Minutes - September 25, 2026