
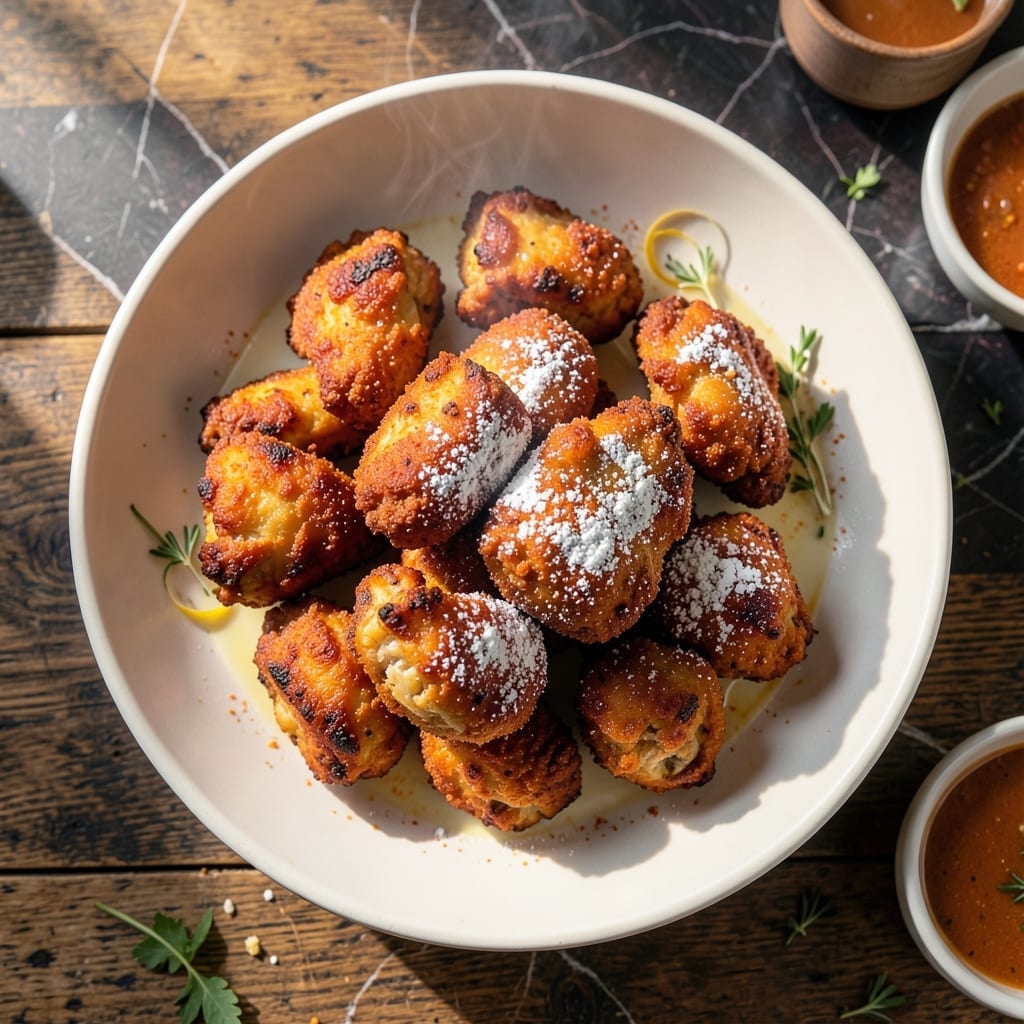
Crispy, golden-brown fried chicken gets an upgrade with a warm spice blend that adds depth to every bite. This recipe transforms a classic into something extraordinary.
The secret lies in a well-balanced spice mix that infuses the coating with layers of flavor. The result is a crunchy exterior giving way to juicy, tender meat inside.
Each piece emerges from the fryer with a perfectly seasoned crust that crackles with the first bite. The spices don’t overpower but rather complement the chicken’s natural richness.
Serve hot for the best texture and flavor experience. This dish is sure to become a favorite for gatherings or weeknight dinners.
Ingredients for Spiced Fried Chicken
Pantry staples and a few spices create this extraordinary crispy classic with layered flavor.
| Ingredient | Amount | Notes |
|---|---|---|
| Chicken Thighs 🍗 | 2 ½ lb | Boneless, skin-on, cut into pieces |
| All-Purpose Flour 🌾 | 2 cups | For dredging chicken |
| Cornstarch 🌽 | ½ cup | For extra crispiness |
| Paprika 🌶️ | 2 tbsp | Sweet or smoked variety |
| Garlic Powder 🧄 | 1 ½ tbsp | Not garlic salt |
| Onion Powder 🧅 | 1 ½ tbsp | Fresh ground preferred |
| Ground Cumin 🌿 | 1 tsp | Toasted for deeper flavor |
| Cayenne Pepper 🔥 | ½ tsp | Adjust for heat preference |
| Salt 🧂 | 1 tbsp | Diamond Crystal kosher preferred |
| Black Pepper 🌶️ | 1 tsp | Freshly ground preferred |
| Buttermilk 🥛 | 1 cup | For marinating chicken |
| Vegetable Oil 🫒 | 4 cups | For deep frying |
| Large Eggs 🥚 | 2 whole | Beaten for coating |
| Baking Powder 🍞 | ½ tsp | Helps coating crisp up |
The chicken is the foundation. Thighs are optimal for juiciness and flavor—avoid dry breast meat. Skin-on ensures maximum crunch. For sourcing, Costco or local butchers offer high-quality options. The buttermilk is non-negotiable for tenderness; full-fat produces superior results. Ensure the oil has a high smoke point—peanut or vegetable oil works best for frying.
No buttermilk? Whole milk plus a tablespoon of vinegar works as a substitute. Short on spices? Pre-made Cajun seasoning can replace the blend in a pinch. The cornstarch is key for that extra-crispy texture, but arrowroot powder works too. For a lighter version, baking the chicken at high heat yields a similar crunch without frying.
Marinate the chicken in buttermilk for at least 4 hours for maximum flavor. Leftovers keep in the fridge for 3-4 days, though best served fresh. Reheat in the oven to maintain crispiness. The spice blend can be made ahead and stored for up to 6 months.
Why You’ll Love This Recipe
- Minimal Effort: I toss the thighs in flour, cornstarch, and spices—no marinating, no fuss. Honestly, it’s ready for the pan in five minutes flat.
- Crave-Worthy Crisp: That paprika and garlic powder combo gives it a smoky kick with a crunch that’s ridiculous. Between us, I sneak a piece straight from the pan.
- Weeknight Hero: It’s my go-to for busy evenings, but it also wows at picnics and potlucks. (Yes, even on a Tuesday night)
- Budget Friendly: Chicken thighs stay cheap, and a little flour plus cornstarch stretches to feed a crowd. Leftovers? They’re even better cold the next day.
Step-by-Step Instructions for Spiced Fried Chicken
Achieve perfectly crispy, flavorful results with this proven frying technique and spice blend.
Step 1: Marinate the Chicken in Buttermilk
Begin by cutting the 2.5 lb Chicken Thighs into even, bite-sized pieces. Place them in a large bowl and pour over the 1 cup Buttermilk. This acidic marinade tenderizes the meat while adding rich flavor.
Ensure all pieces are fully coated, then cover and refrigerate for at least 1 hour (overnight for maximum tenderness). The buttermilk’s tang also helps the coating adhere better during frying.
Step 2: Prepare the Spiced Dredge
In a large shallow dish, whisk together the 2 cups All-Purpose Flour, 0.5 cup Cornstarch, 2 tbsp Paprika, 1.5 tbsp Garlic Powder, 1.5 tbsp Onion Powder, 1 tsp Ground Cumin, 0.5 tsp Cayenne Pepper, 1 tbsp Salt, 1 tsp Black Pepper, and 0.5 tsp Baking Powder. The cornstarch and baking powder create an ultra-crispy crust.
Whisk thoroughly to distribute the spices evenly—this ensures every bite delivers consistent warm, aromatic flavor. The mixture should look uniformly golden-brown with visible spice specks.
Step 3: Coat and Rest the Chicken
Beat the 2 whole Large Eggs in a separate shallow dish. Working with one piece at a time, remove the chicken from the buttermilk, letting excess drip off, then dip into the egg, followed by the spiced flour mixture.
Press firmly to adhere the coating completely. Place each piece on a wire rack and let rest for 10 minutes. This rest period allows the coating to set, preventing it from falling off during frying.
Step 4: Deep-Fry to Golden Perfection
Heat the 4 cups Vegetable Oil in a deep, heavy-bottomed pot to 350°F. Use a thermometer for precision—this temperature ensures even cooking without burning the coating. Carefully lower in the chicken pieces in batches, avoiding overcrowding.
Fry for 8-10 minutes, turning occasionally, until the coating is deep golden brown and the internal temperature reaches 165°F. The oil should bubble steadily but not violently around each piece.
Step 5: Drain and Serve Immediately
Transfer the fried chicken to a wire rack set over a baking sheet or paper towels to drain. This method keeps the coating crispy by allowing air circulation rather than steaming on a solid surface.
Let rest for 2-3 minutes before serving. The chicken should have an audibly crisp exterior with a moist, tender interior. The spice blend will deliver a warm, slightly smoky flavor with just a hint of heat from the cayenne.
Pro Tips For Making Spiced Fried Chicken
- Double-Dredge the Thighs: Dip the chicken in flour once, then again after a 2-minute rest—this builds a craggier crust that holds more paprika and garlic powder.
- Use Thighs with Skin: I learned this the hard way—boneless, skinless thighs dry out fast, but skin-on stays juicy and crisps up like it should.
- Skip the Cold Oil: After burning three batches, I finally figured out the oil needs to hit 350°F before the chicken goes in, or the coating soaks up grease instead of frying.
- Swap Half the Flour: Replace ¼ cup of the all-purpose flour with extra cornstarch—sounds weird, but it makes the crust lighter and crunchier every time.
Serving Suggestions for This Recipe
Classic Comfort Pairings
Serve this creation with creamy mashed potatoes to balance the spice warmth. The smooth texture contrasts beautifully with the crispy coating. I also love pairing it with buttery cornbread for a true Southern experience. 💛
Fresh Contrasts
A crisp coleslaw made with green cabbage and a tangy vinegar dressing cuts through the richness. For brightness, try a cucumber-tomato salad with a light lime vinaigrette. These sides refresh your palate between spicy bites.
Sauce It Up
Offer honey mustard for dipping—mix 3 tbsp mayonnaise with 2 tbsp honey and 1 tbsp Dijon mustard. For heat lovers, a spicy aioli with 1 tbsp sriracha blended into mayo works perfectly.
Picnic-Style Serving
For casual gatherings, arrange pieces on a large platter with crinkle-cut fries and pickle spears. The acidity from pickles enhances the spice flavors. I always include wet wipes for easy cleanup.
Beverage Partners
Cold sweet tea is my go-to—it complements the warmth without overwhelming it. For beer lovers, a crisp lager like Bud Light or a wheat beer such as Blue Moon cleanses the palate. 🍺
Nutrition Facts
Frequently Asked Questions
Can I use chicken breasts instead of thighs?
Yes, but thighs stay juicier. If using breasts, reduce frying time to 6-8 minutes to prevent dryness. The coating will still be crispy, but the meat may be less flavorful.
How do I keep the coating crispy longer?
Place fried pieces on a wire rack, not paper towels. This prevents steam buildup. Reheat in a 400°F oven for 5-10 minutes if needed.
Can I make this in an air fryer?
Spray pieces with oil and air fry at 375°F for 12-15 minutes, flipping halfway. The texture will be slightly different but still delicious.
Why did my coating fall off during frying?
Likely causes: not resting coated chicken before frying, or oil temperature too low. Ensure oil reaches 350°F and rest pieces for 10 minutes after coating.

- Jollof Rice Sauce Recipe: West African Tomato and Spice Infusion - September 25, 2026
- Japanese Rice Soup Recipe: Umami-Rich Comfort in a Bowl - September 25, 2026
- Homemade Cream Of Rice Recipe: Silk-Smooth Breakfast in Minutes - September 25, 2026