
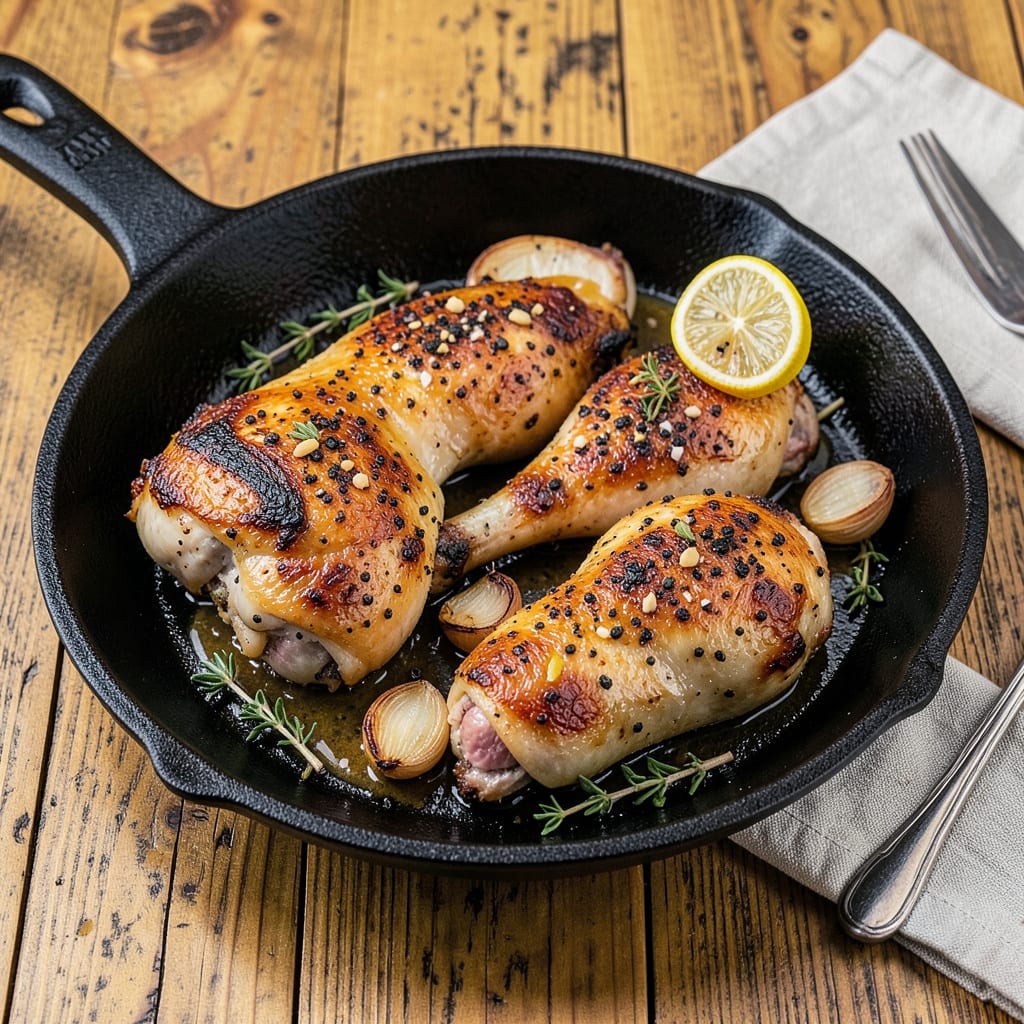
I discovered this trick by accident when I ran out of chicken seasoning—steak rub on chicken creates the most flavorful, juicy meat you’ve ever tasted. No fancy ingredients or complicated techniques, just a bold seasoning swap that transforms ordinary chicken into something extraordinary. The robust spices in steak seasoning (think garlic, pepper, and smoked paprika) give chicken that deep, savory flavor we usually associate with pricier cuts of beef.
Here’s the thing—this works because chicken’s mild flavor becomes the perfect canvas for those intense steakhouse spices. I use Montreal steak seasoning for its coarse texture and balanced heat, rubbing it generously over patted-dry chicken breasts or thighs. The key is letting the seasoned chicken rest for 10 minutes before cooking, which helps the flavors penetrate and creates that coveted crust when seared.
Whether you grill, pan-sear, or bake it, this chicken comes out with a crispy, caramelized exterior and tender, flavorful meat inside. I love serving it with simple sides like garlic mashed potatoes or a crisp green salad—the star of the plate doesn’t need much competition. The best part? It costs a fraction of steak but delivers that same satisfying, meaty flavor we all crave.
No special skills required—just good seasoning and proper technique. Let’s make chicken that tastes like it came from a high-end steakhouse, without the steakhouse price tag.
📚 In This Guide
- What You’ll Need
- Instructions
- Tips and Common Mistakes
What Youll Need
- ● Chicken: 4 boneless, skinless chicken breasts (6–8 oz each) or 6–8 thighs/drumsticks (pat dry for best sear!) 🍗
- ● Steak seasoning: 2–3 tbsp high-quality blend (look for salt, black pepper, garlic, paprika, and onion powder as base ingredients)
- ● Oil: 2 tbsp high-smoke-point oil (avocado, grapeseed, or refined coconut oil works best)
- ○ Butter: 1–2 tbsp unsalted (optional, for basting)
- ○ Fresh herbs: 2 sprigs rosemary or thyme (optional, for aroma)
- ● Cast-iron skillet or heavy-bottomed pan (10–12″ for even cooking)
- ● Tongs or meat thermometer (🌡️ 165°F is the safe internal temp!)
- ● Mixing bowl (for coating chicken evenly)
- ● Paper towels (to pat chicken dry)
- ● Aluminum foil (for resting post-cook)
- ● Chicken fully thawed (if frozen)
- ● Seasoning pre-mixed (or store-bought blend ready)
- ● Pan preheated to medium-high (rippling-hot oil = perfect sear!) 🔥
Instructions
Transform your chicken with bold, beefy flavors using this simple technique—it’s easier than you think.
Select and Prepare Your Chicken
Choose bone-in, skin-on chicken pieces for maximum flavor and moisture retention. I prefer thighs and drumsticks for this method—they hold up better to robust seasoning and stay juicier during cooking. Pat the chicken completely dry with paper towels; this ensures the seasoning adheres properly and promotes better browning.
Make shallow cuts (about ¼-inch deep) in the meaty parts of each piece. These slashes allow the seasoning to penetrate deeper, creating more flavor in every bite. Don’t cut through to the bone, as this can cause the meat to dry out during cooking.
Apply the Steak Seasoning Generously
Coat the chicken pieces thoroughly with your steak seasoning blend, working it into all the nooks and crannies. I use about 1 tablespoon of seasoning per pound of chicken, but don’t be shy—this is where the bold flavor comes from. Rub it into the slashes you made and under the skin if possible.
For even distribution, place the seasoned chicken on a wire rack set over a baking sheet. This allows air to circulate around all sides, helping the seasoning form a flavorful crust. Let it sit at room temperature for 20-30 minutes before cooking—this gives the salt in the seasoning time to begin penetrating the meat.
Sear for Maximum Flavor Development
Heat a heavy skillet (cast iron works best) over medium-high heat until it’s screaming hot. Add just enough oil to lightly coat the bottom—about 1 tablespoon. The oil should shimmer but not smoke when you add the chicken.
Place the chicken pieces skin-side down in the hot pan. Don’t move them for the first 3-4 minutes—this allows a proper sear to develop. You’ll know it’s time to flip when the chicken releases easily from the pan and you see a deep golden-brown crust forming. The aroma should be rich and savory, with the steak seasoning creating a fragrant sizzle.
Finish Cooking with Controlled Heat
After searing, reduce the heat to medium-low and cover the pan. This gentler heat allows the chicken to cook through without burning the seasoning. Cook for 15-20 minutes, turning the pieces occasionally, until the internal temperature reaches 165°F at the thickest part.
Watch for visual cues: the juices should run clear when pierced, and the meat should pull away slightly from the bones. The steak seasoning will have transformed into a flavorful crust that crackles slightly when bitten. If the pan becomes too dry, add a splash of water or broth to prevent burning while maintaining the crust.
Rest and Serve for Optimal Texture
Transfer the cooked chicken to a clean plate and let it rest uncovered for 5-10 minutes. This brief resting period allows the juices to redistribute throughout the meat, ensuring each bite is moist and flavorful. The steak seasoning crust will firm up slightly during this time.
Serve the chicken while still warm, accompanied by simple sides that won’t compete with the bold flavors. The exterior should offer a satisfying crunch from the seasoned crust, giving way to tender, juicy meat that carries the deep, savory notes of the steak seasoning throughout. The flavor profile will remind you of perfectly seasoned steak, but with chicken’s lighter texture.
Tips and Common Mistakes
Here’s what I’ve learned from perfecting this technique—small details that make a huge difference in flavor and texture.
The Seasoning Technique: When applying the steak seasoning in Step 2, don’t just sprinkle it on—really work it into every crevice and under the skin. I use my fingers to massage it into those ¼-inch slashes you made. This ensures the bold flavors penetrate deep into the meat rather than just sitting on the surface. The 20-30 minutes of resting time at room temperature is crucial here; it gives the salt time to begin breaking down proteins for maximum tenderness.
Heat Control During Searing: That initial 3-4 minutes of searing at medium-high heat in Step 3 is where the magic happens. Resist the urge to peek or move the chicken—you want that deep golden-brown crust to form undisturbed. If your pan isn’t hot enough, you’ll get steamed chicken instead of that beautiful sear. The chicken should release easily when it’s ready to flip; if it sticks, it needs more time.
Finishing with Precision: During the 15-20 minutes of covered cooking in Step 4, maintain that medium-low heat carefully. Too high and you’ll burn the seasoning crust; too low and the chicken won’t reach that perfect 165°F internal temperature. I like to turn the pieces every 5 minutes for even cooking. If you notice the pan drying out, add just a splash of water—enough to create steam but not so much that it washes away your beautiful crust.
Resting Matters More Than You Think: Those 5-10 minutes of resting in Step 5 aren’t optional. Cutting into the chicken too soon lets all the juices escape, leaving you with dry meat. The crust will also firm up slightly during this time, giving you that satisfying crunch when you bite in. I place my chicken on a wire rack during resting to prevent the bottom from getting soggy from trapped steam.
Pro Tips for Steak Seasoning On Chicken
- Here’s what I’ve learned from perfecting this technique—small details that make a huge difference in flavor and texture.
- The Seasoning Technique: When applying the steak seasoning in Step 2, don’t just sprinkle it on—really work it into e…
- Heat Control During Searing: That initial 3-4 minutes of searing at medium-high heat in Step 3 is where the magic hap…
Frequently Asked Questions
Can I use steak seasoning on chicken without overpowering it?
Steak seasoning works great on chicken, but start with half the amount you’d use on beef. Chicken has a milder flavor, so a light coat (about 1 tsp per pound) lets the spices shine without overwhelming. For bolder taste, marinate for 30+ minutes or brush with oil first to help adhesion.
How long should I let steak seasoning sit on chicken before cooking?
For best results, let it rest at least 15–30 minutes —this gives the salt and spices time to penetrate. For deeper flavor, refrigerate up to 4 hours (avoid overnight; the salt can dry out the meat). Pat the chicken dry before cooking for a crispier crust!
What’s the best cooking method for chicken with steak seasoning?
Grilling () or pan-searing () works best—high heat caramelizes the seasoning for a smoky crust. For juicier results, bake at 375°F (190°C) until internal temp hits 165°F (74°C). Avoid boiling or steaming; it’ll wash away the bold flavors you want!
Are there good substitutes if I don’t have steak seasoning?
Mix 1 tsp each of garlic powder, onion powder, smoked paprika, and black pepper + ½ tsp salt for a quick DIY version. For umami depth, add a pinch of coffee grounds or Worcestershire powder. Montreal seasoning or Cajun spice blends also work in a pinch!
Why does my chicken taste bitter after using steak seasoning?
Bitterness usually comes from burnt spices (especially paprika or pepper) or over-marinating. To fix: cook on medium heat, not high, and scrape off any charred bits. If using a rub with sugar, watch closely—it burns faster! A splash of lemon juice or honey can balance residual bitterness.
Swapping steak seasoning on chicken is a game-changer—it delivers that rich, savory punch you crave without the steakhouse price tag! 🎯 Whether you’re grilling, baking, or pan-searing, this simple trick elevates your chicken with bold, beefy flavor in minutes. Now that you’ve got the know-how, grab your favorite cut (thighs, breasts, or wings!) and start experimenting.
Ready to take it further? Try blending your own custom seasoning or pairing it with a smoky BBQ sauce for next-level deliciousness. Your taste buds will thank you! 🍗✨

- Jollof Rice Sauce Recipe: West African Tomato and Spice Infusion - September 25, 2026
- Japanese Rice Soup Recipe: Umami-Rich Comfort in a Bowl - September 25, 2026
- Homemade Cream Of Rice Recipe: Silk-Smooth Breakfast in Minutes - September 25, 2026