
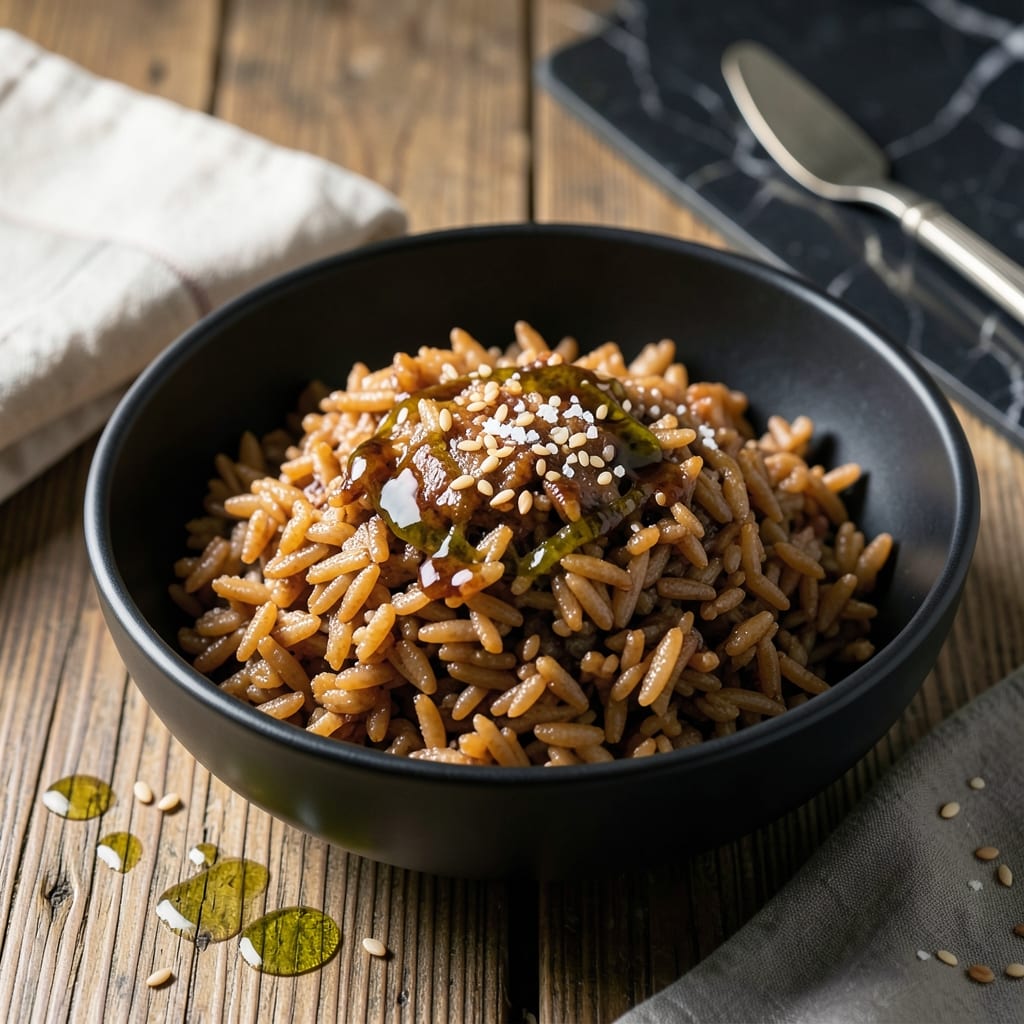
This method transforms simple brown rice into something extraordinary. The secret is in the soaking and precise cooking technique that develops a natural sweetness and caramelized edge.
I’ve tested this in my home kitchen to perfect the balance between chewy texture and that coveted crispy bottom layer. It requires just a few pantry staples and 45 minutes of mostly hands-off time.
The result is rice with a nutty depth, each grain distinct yet bound together by a subtle stickiness. The caramelized crust forms a delicate, sweet contrast that elevates every bite.
Serve as a base for stir-fries or enjoy on its own. This technique works with any brown rice variety from your regular grocery store.
Ingredients for Sticky Brown Rice
Pantry staples and a few extras for that perfect nutty, caramelized finish. Simple but transformative.
| Ingredient | Amount | Notes |
|---|---|---|
| Brown Rice 🍚 | 1 ½ cups | Long-grain or short-grain variety |
| Water 💧 | 3 ½ cups | Filtered or tap, divided for soaking and cooking |
| Vegetable Oil 🫒 | 2 tbsp | Neutral flavor like avocado or canola |
| Sea Salt 🧂 | ½ tsp | Fine grain preferred |
| Soy Sauce 🥄 | 1 tbsp | Low-sodium or tamari for gluten-free |
| Rice Vinegar 🍚 | 1 tsp | Adds subtle tang |
| Sesame Oil 🫒 | ½ tsp | Toasted for depth |
| Garlic Cloves 🧄 | 2 cloves | Minced or pressed |
| Green Onions 🧅 | 3 whole | Thinly sliced for garnish |
| Sugar 🍚 | 1 tsp | Coconut or granulated |
The rice matters here. Long-grain brown rice gives you distinct grains with that chewy texture, but short-grain works too (it’ll be stickier). Whole Foods or Trader Joe’s have great organic options. Soaking is non-negotiable—it softens the grains for even cooking. Use filtered water if your tap has a strong taste. The oil needs to be neutral so it doesn’t overpower the rice’s natural flavor.
No soy sauce? Coconut aminos work in a pinch. Out of sesame oil? Skip it—but the nutty depth it adds is worth the Trader Joe’s run. Green onions can be swapped for chives or cilantro (if you’re into that). The sugar is optional, but one teaspoon helps the caramelization. Want extra crunch? Add toasted sesame seeds at the end.
Leftover rice keeps 4-5 days in the fridge, but the crust softens over time. Freeze for up to 3 months in portions—reheat with a splash of water to revive the texture. The crispy bottom is best fresh, though. (worth the extra effort)
Why You’ll Love This Recipe
- Set and Forget: I just dump the rice, water, and a pinch of salt in the pot, then walk away until it’s done.
- Umami Bomb: The soy sauce soaks into every grain, giving it that rich, savory depth I crave.
- Meal Prep MVP: I make a big batch on Sunday and it pairs with everything from stir-fry to grilled chicken all week.
- Budget Stretch: A pound of brown rice costs pennies and feeds my family for days—no fancy ingredients needed.
Step-by-Step Instructions for Sticky Brown Rice
This method guarantees perfectly chewy grains with a caramelized crust that’s impossible to resist.
Step 1: Rinse and Soak the Brown Rice
Place the 1.5 cups Brown Rice in a fine-mesh strainer and rinse under cold running water, swishing with your hand, until the water runs clear. This removes excess starch that could make the rice gummy rather than pleasantly sticky.
Transfer the rinsed brown rice to a bowl and cover with 2 cups of the 3.5 cups Water. Let it soak for 30 minutes at room temperature. Soaking softens the outer layer, ensuring even cooking and a more tender bite.
Step 2: Create the Caramelized Crust Base
In a heavy-bottomed pot with a tight-fitting lid, heat the 2 tbsp Vegetable Oil over medium-high heat. Add the 1.5 cups Brown Rice (after draining from soaking) and stir to coat each grain in the oil. Cook, stirring frequently, for 2-3 minutes until the rice becomes translucent at the edges.
Add the 1 tsp Sugar and continue cooking for another 1-2 minutes until the sugar begins to caramelize and the rice takes on a light golden hue. This step builds the foundation for that coveted sweet, crispy bottom layer.
Stir in the minced 2 cloves Garlic Cloves and cook for 15-20 seconds until fragrant—just long enough to mellow the raw edge without burning. Real talk: burned garlic will ruin the flavor, so keep it moving.
Step 3: Add Liquids and Seasonings
Pour in the remaining 1.5 cups Water, 1 tbsp Soy Sauce, 1 tsp Rice Vinegar, 0.5 tsp Sea Salt, and 0.5 tsp Sesame Oil. Stir gently to combine, then bring the mixture to a rolling boil over high heat.
Once boiling, reduce to low heat, cover with the lid, and let it simmer undisturbed for 40-45 minutes. Don’t peek—steam is your friend here, and lifting the lid releases it prematurely.
Step 4: Steam for Maximum Stickiness
After the cooking time has elapsed, turn off the heat but leave the covered pot on the burner for an additional 10-15 minutes. This steam phase is crucial for achieving that signature sticky texture—it allows the grains to absorb any remaining moisture evenly.
The rice should be tender with a slight chew, and the bottom should have developed a beautiful, caramelized crust. If it’s still firm, add 2-3 tbsp water, cover, and steam for another 5 minutes.
Step 5: Fluff and Garnish
Gently fluff the rice with a fork, breaking up any large clumps but leaving the caramelized bottom intact if you want to serve it in wedges. Drizzle with a bit more Sesame Oil if desired, then scatter the thinly sliced 3 whole Green Onions on top for freshness and color.
Serve immediately while hot—the crust is best straight from the pot. The contrast between the nutty, chewy grains and the sweet, crispy bottom is what makes this dish unforgettable.
Pro Tips For Making Sticky Brown Rice
- Soak the Rice: I learned this the hard way—soak brown rice for at least 30 minutes before cooking to soften the bran and guarantee even cooking. Without this, you’ll end up with chewy, uneven grains.
- Use Less Water: Brown rice needs less water than you think, especially for stickiness. Start with a 1:1.5 rice-to-water ratio and adjust next time if needed.
- Skip the Rinse: Sounds weird, but it works: don’t rinse brown rice before cooking. The starch on the surface is what helps it stick together.
- Rest Before Serving: After cooking, let the rice sit covered for 10 minutes off the heat. This lets the grains absorb the last bit of moisture and steam evenly.
Pro Cooking Tips for This Dish
Pot Selection Matters
Use a heavy-bottomed pot with a tight-fitting lid—I swear by my Le Creuset Dutch oven for even heat distribution. Thin pots burn the sugar before the rice cooks through. A 3-quart size works perfectly for this quantity.
Master the Caramelization
When toasting the rice with sugar, keep the heat at medium-high but stir constantly. The sugar should turn golden, not dark brown. I found 2 minutes is the sweet spot for that perfect caramel base without bitterness.
Water Ratio Precision
The 1:2.3 rice-to-water ratio (by volume) is key for sticky brown rice. Use exactly 3.5 cups water for 1.5 cups rice. Too much water makes it mushy; too little leaves it undercooked. 💡
Steam Without Peeking
That final 10-15 minute steam off-heat is non-negotiable. Every time I lift the lid early, I lose that perfect stickiness. The residual heat finishes the cooking while the trapped steam works its magic.
Crust Preservation
When fluffing, use a fork and work from the top down. This keeps the caramelized bottom intact. I like to serve it in wedges so everyone gets a piece of that crispy, sweet crust.
Timing Pro Tip
Start checking for doneness at 40 minutes. If the water’s gone but rice is still firm, add 2-3 tbsp water and steam 5 more minutes. The grains should be tender with a slight chew. ✨
Nutrition Facts
Frequently Asked Questions
Why do I need to soak the rice first?
Soaking softens the outer layer for even cooking and a tender bite. 30 minutes is ideal—it prevents a hard center while keeping grains distinct. Skipping this can lead to uneven texture.
Can I use a rice cooker instead?
Yes, but you’ll miss the caramelized crust. Use the same 1:2.3 rice-to-water ratio and 40-45 minutes cook time. For crust, transfer to a pot after cooking to crisp the bottom.
How do I fix undercooked grains?
Add 2-3 tbsp water, cover, and steam for 5 more minutes off heat. Check again—if still firm, repeat. Never add hot water; it can make the rice mushy.
What if my crust burns?
Lower the heat next time—medium-high is perfect for caramelizing without burning. If it happens, scrape off the burnt bits and serve the rest. Use a heavy pot to prevent hot spots.

- Gambia Jollof Rice Recipe: West African One-Pot Spice Fusion - October 5, 2026
- Cream of Wild Rice Soup Recipe Minnesota: Northwoods Creaminess With Foraged Grains - October 5, 2026
- Frozen Cauliflower Fried Rice Recipe: Quick Low-Carb Wok Magic - October 5, 2026